VR800 Owner’s Manual (Digital Recording)
|
| DATA |
|
| MIDI |
|
| ||
WORD OUT SCSI | OPTICAL | OUT | IN | OUT | IN | AC IN | POWER | ||
|
|
|
|
|
|
|
|
|
|
|
|
|
|
|
|
|
|
|
|
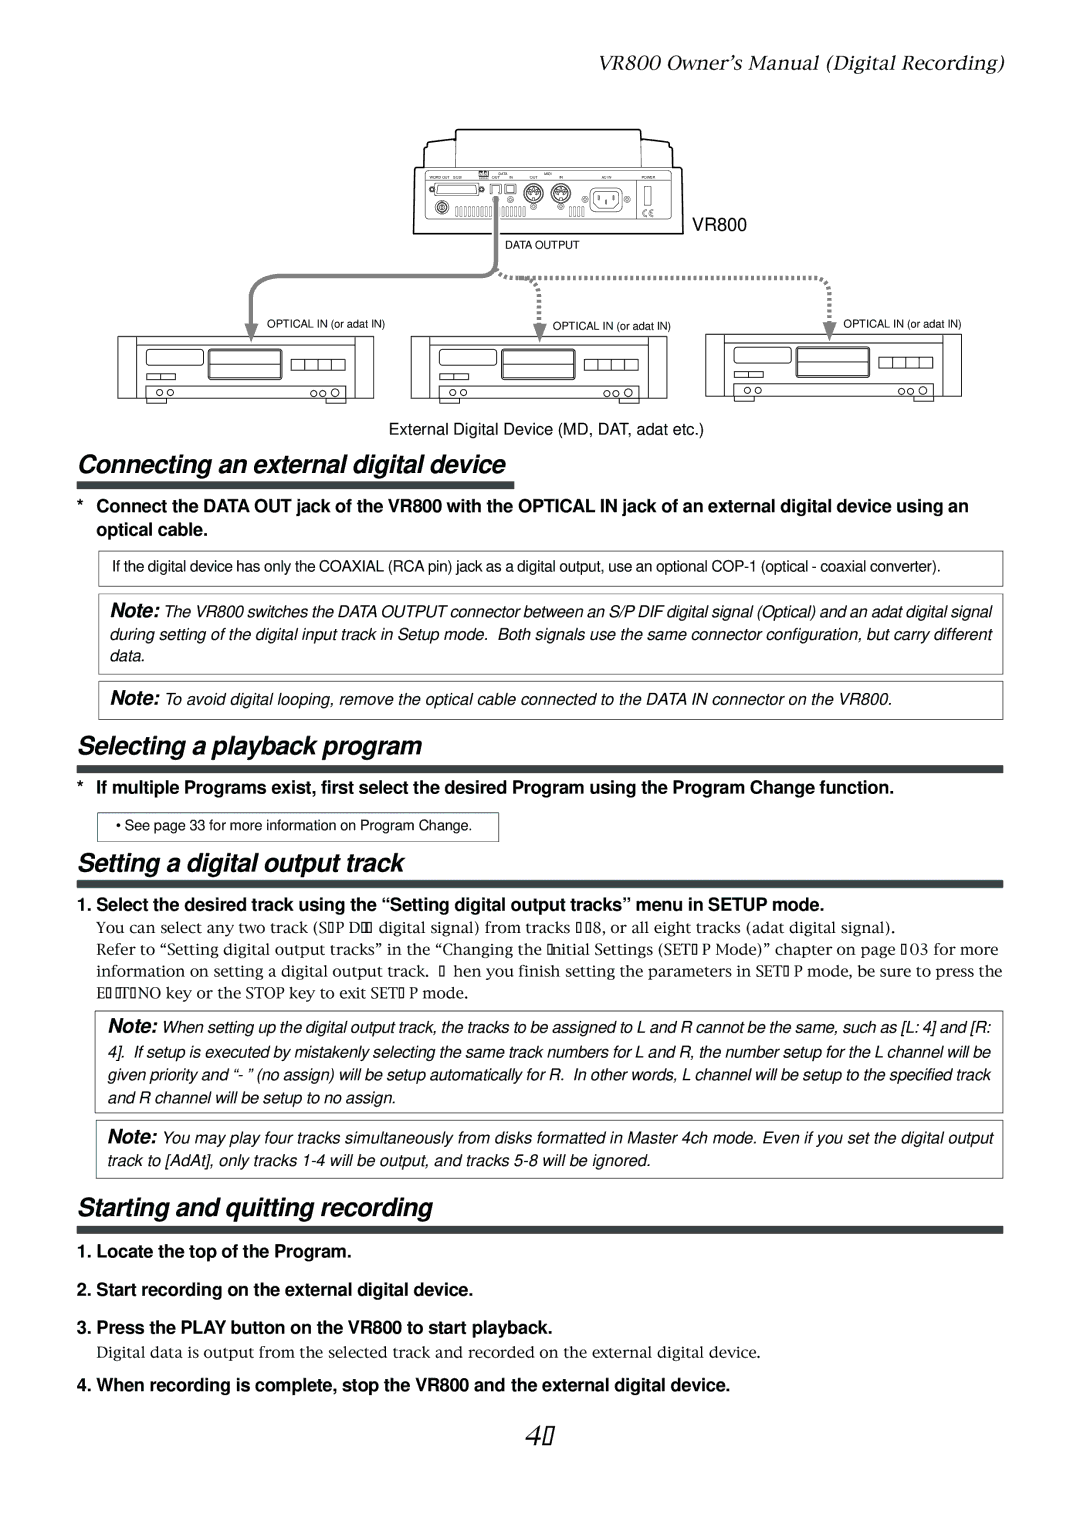
VR800
DATA OUTPUT
OPTICAL IN (or adat IN)
OPTICAL IN (or adat IN)
OPTICAL IN (or adat IN)
External Digital Device (MD, DAT, adat etc.)
Connecting an external digital device
*Connect the DATA OUT jack of the VR800 with the OPTICAL IN jack of an external digital device using an optical cable.
If the digital device has only the COAXIAL (RCA pin) jack as a digital output, use an optional
Note: The VR800 switches the DATA OUTPUT connector between an S/P DIF digital signal (Optical) and an adat digital signal during setting of the digital input track in Setup mode. Both signals use the same connector configuration, but carry different data.
Note: To avoid digital looping, remove the optical cable connected to the DATA IN connector on the VR800.
Selecting a playback program
*If multiple Programs exist, first select the desired Program using the Program Change function.
•See page 33 for more information on Program Change.
Setting a digital output track
1. Select the desired track using the “Setting digital output tracks” menu in SETUP mode.
You can select any two track (S/P DIF digital signal) from tracks
Refer to “Setting digital output tracks” in the “Changing the Initial Settings (SETUP Mode)” chapter on page 103 for more information on setting a digital output track. When you finish setting the parameters in SETUP mode, be sure to press the EXIT/NO key or the STOP key to exit SETUP mode.
Note: When setting up the digital output track, the tracks to be assigned to L and R cannot be the same, such as [L: 4] and [R: 4]. If setup is executed by mistakenly selecting the same track numbers for L and R, the number setup for the L channel will be given priority and
Note: You may play four tracks simultaneously from disks formatted in Master 4ch mode. Even if you set the digital output track to [AdAt], only tracks
Starting and quitting recording
1.Locate the top of the Program.
2.Start recording on the external digital device.
3.Press the PLAY button on the VR800 to start playback.
Digital data is output from the selected track and recorded on the external digital device.
4. When recording is complete, stop the VR800 and the external digital device.
47
