VR800 Owner’s Manual (Saving and Loading Song Data)
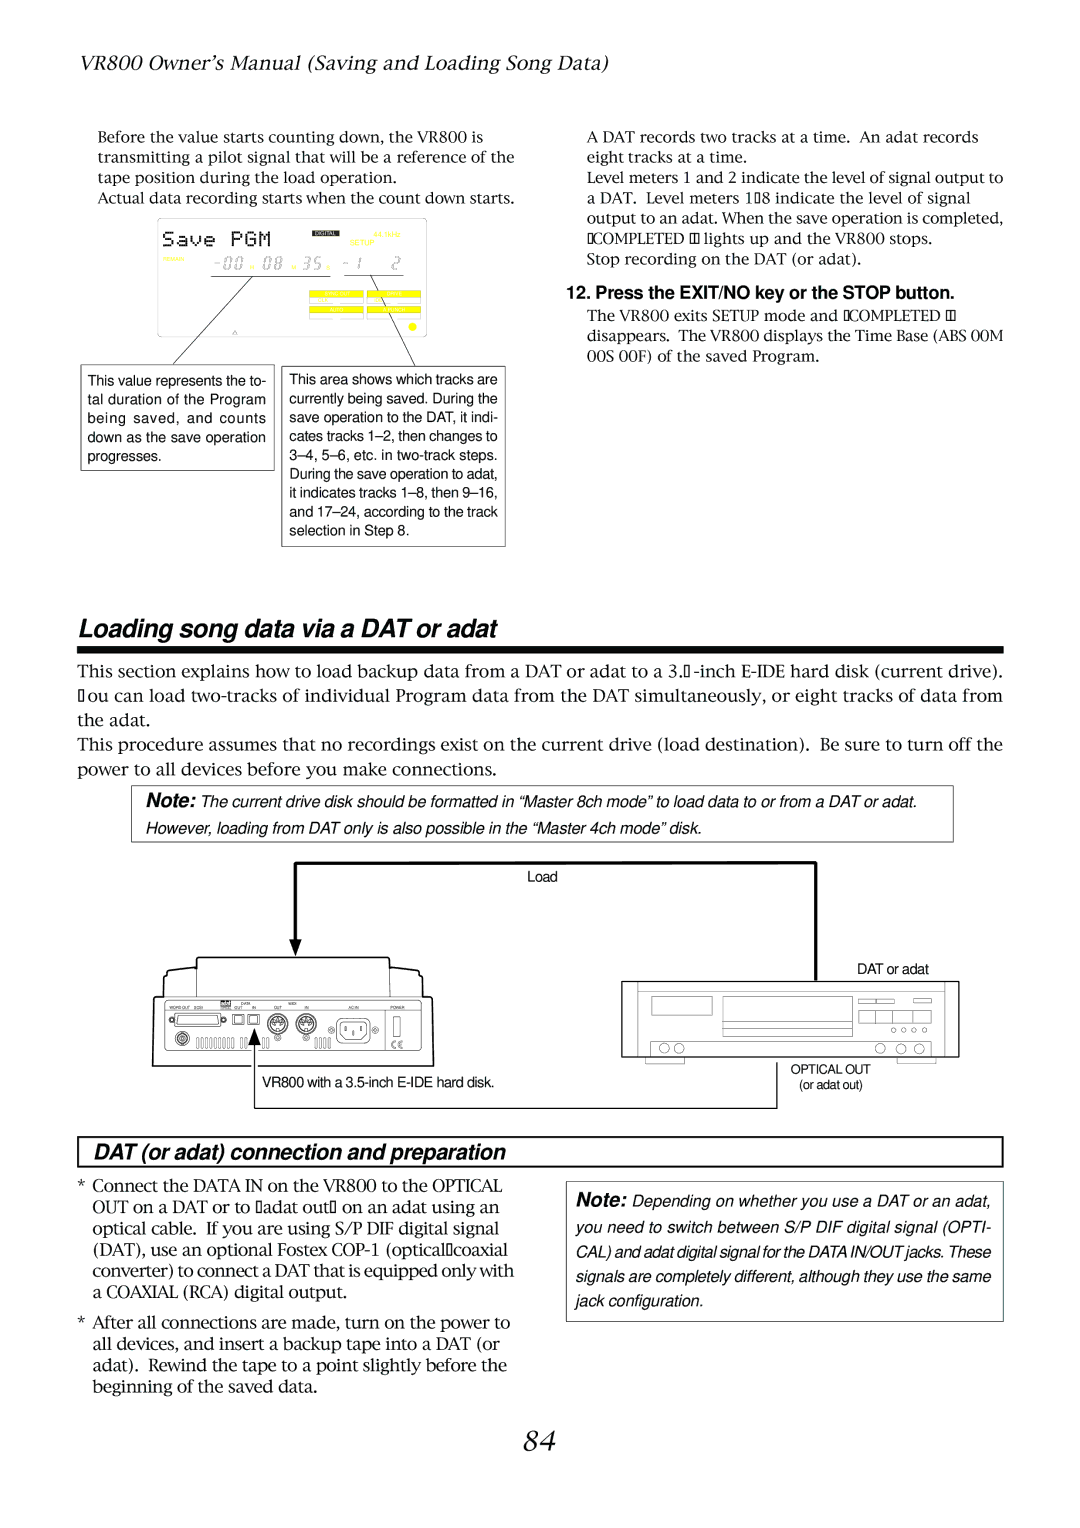
Before the value starts counting down, the VR800 is transmitting a pilot signal that will be a reference of the tape position during the load operation.
Actual data recording starts when the count down starts.
|
| DIGITAL | 44.1kHz |
|
| SETUP | |
REMAIN |
|
|
|
H | M | S |
|
|
| SYNC OUT | DRIVE |
|
| CLK | IDE |
|
| AUTO | A.PUNCH |
This value represents the to- |
| This area shows which tracks are |
tal duration of the Program |
| currently being saved. During the |
being saved, and counts |
| save operation to the DAT, it indi- |
down as the save operation |
| cates tracks |
progresses. |
| |
|
| During the save operation to adat, |
|
| |
|
| it indicates tracks |
|
| and |
|
| selection in Step 8. |
|
|
|
A DAT records two tracks at a time. An adat records eight tracks at a time.
Level meters 1 and 2 indicate the level of signal output to a DAT. Level meters
Stop recording on the DAT (or adat).
12. Press the EXIT/NO key or the STOP button.
The VR800 exits SETUP mode and [COMPLETED !] disappears. The VR800 displays the Time Base (ABS 00M 00S 00F) of the saved Program.
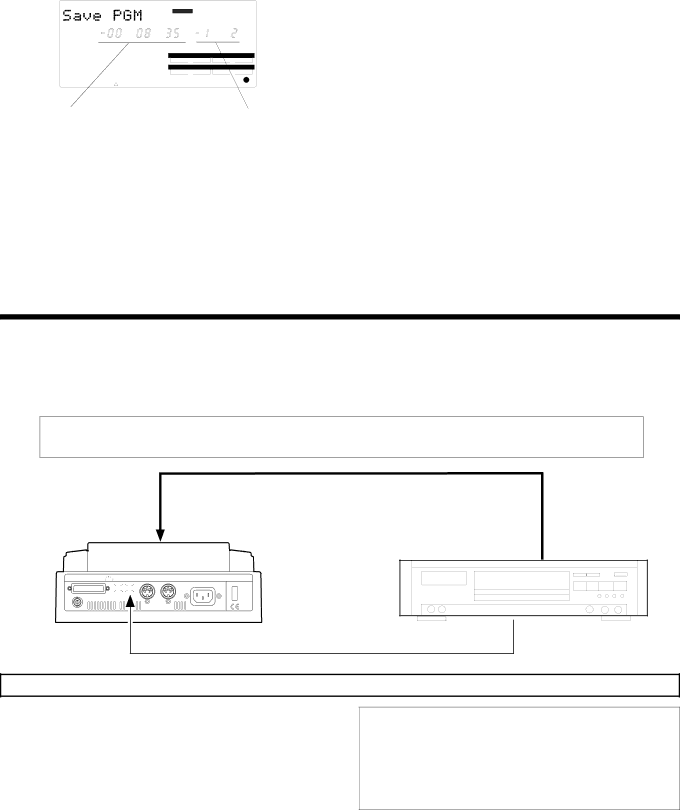
Loading song data via a DAT or adat
This section explains how to load backup data from a DAT or adat to a
This procedure assumes that no recordings exist on the current drive (load destination). Be sure to turn off the power to all devices before you make connections.
Note: The current drive disk should be formatted in “Master 8ch mode” to load data to or from a DAT or adat. However, loading from DAT only is also possible in the “Master 4ch mode” disk.
Load
DAT or adat
|
| DATA |
|
| MIDI |
|
| ||
WORD OUT SCSI | OPTICAL | OUT | IN | OUT | IN | AC IN | POWER | ||
|
|
|
|
|
|
|
|
|
|
|
|
|
|
|
|
|
|
|
|
VR800 with a
OPTICAL OUT
(or adat out)
DAT (or adat) connection and preparation
*Connect the DATA IN on the VR800 to the OPTICAL OUT on a DAT or to “adat out” on an adat using an optical cable. If you are using S/P DIF digital signal (DAT), use an optional Fostex
*After all connections are made, turn on the power to all devices, and insert a backup tape into a DAT (or adat). Rewind the tape to a point slightly before the beginning of the saved data.
Note: Depending on whether you use a DAT or an adat, you need to switch between S/P DIF digital signal (OPTI- CAL) and adat digital signal for the DATA IN/OUT jacks. These signals are completely different, although they use the same jack configuration.
84