VR800 Owner’s Manual (Saving and Loading Song Data)
Saving data
*You can back up data using the “Save PGM ?” menu in SETUP mode.
The following procedure assumes that Program 1 on the
<[Save PGM ?] menu>
*Output signal options: [AdAt], [dAT], [SCSi
*Program options: P01 - P99 (an individual Program)
* Track options: | When using an adat or DAT: tracks |
| tracks |
| When using a SCSI disk (SCSi |
| will be automatically selected. |
1.Press the SETUP key to enter SETUP mode.
2.Use the JOG dial to select [Save PGM ?] menu, then
press the EXECUTE/YES key.
[Device ?] appears and the selected output signal option flashes. ([SCSi
|
| DIGITAL | 44.1kHz | Flashing |
|
|
| ||
|
|
| SETUP |
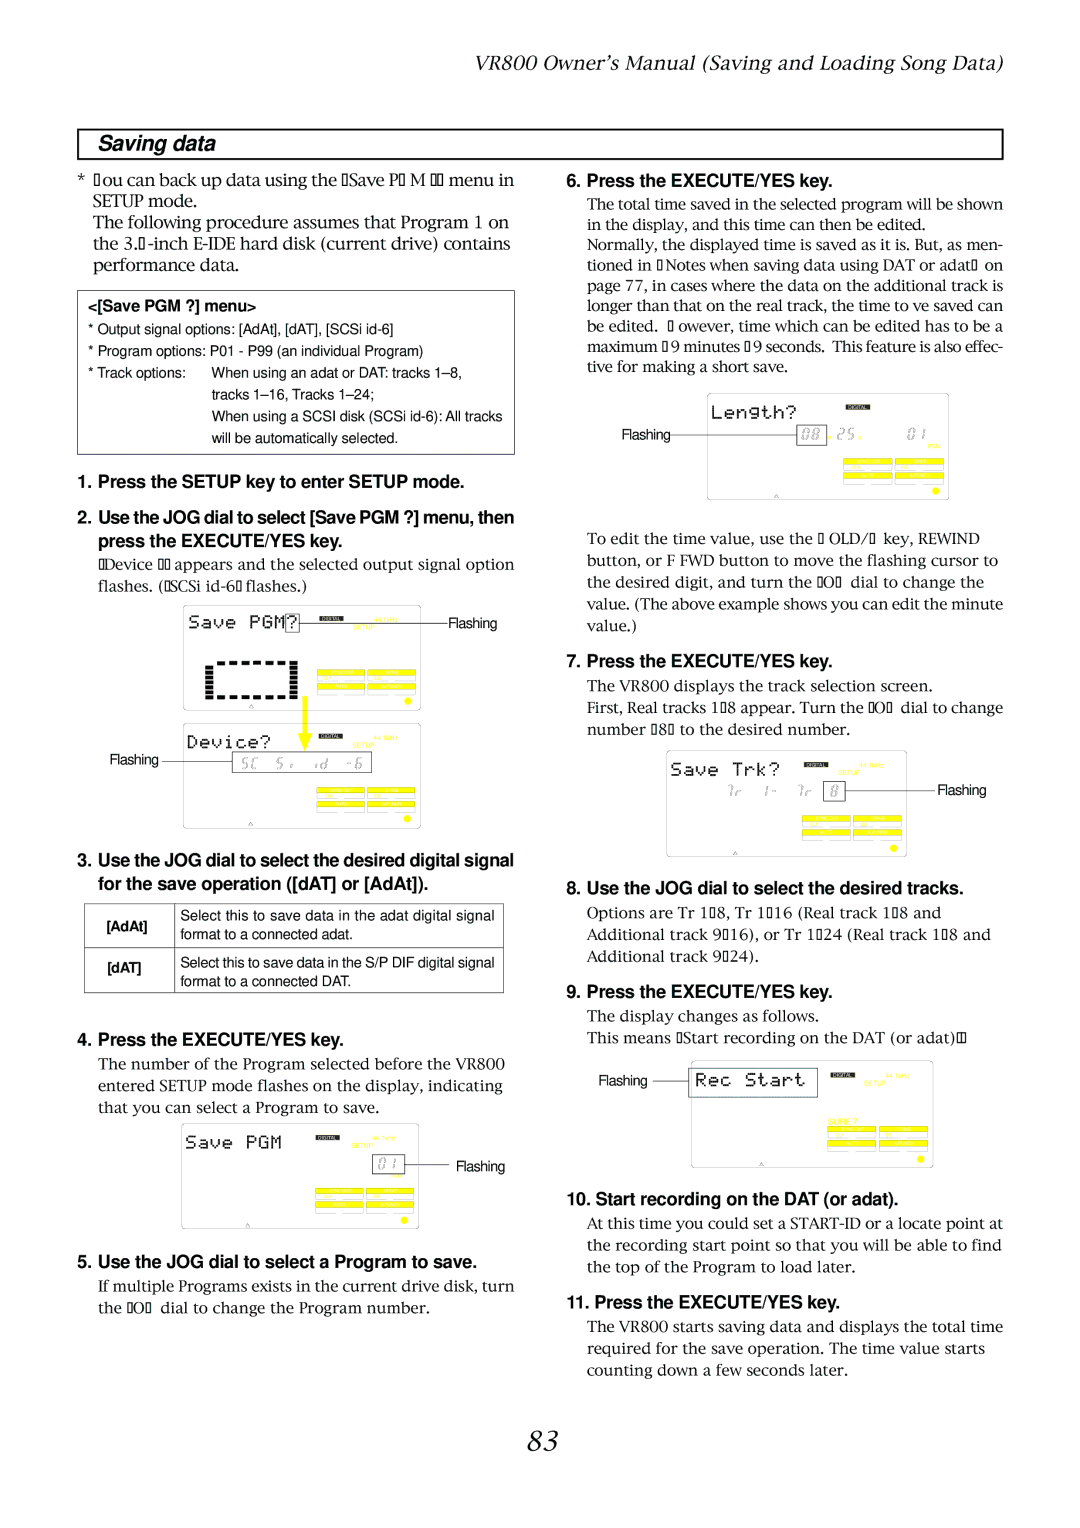
6. Press the EXECUTE/YES key.
The total time saved in the selected program will be shown in the display, and this time can then be edited. Normally, the displayed time is saved as it is. But, as men- tioned in <Notes when saving data using DAT or adat> on page 77, in cases where the data on the additional track is longer than that on the real track, the time to ve saved can be edited. However, time which can be edited has to be a maximum 59 minutes 59 seconds. This feature is also effec- tive for making a short save.
|
| DIGITAL |
Flashing | M | S |
PGM
SYNC OUT | DRIVE |
CLKIDE
AUTO | A.PUNCH |
To edit the time value, use the HOLD/> key, REWIND button, or F FWD button to move the flashing cursor to the desired digit, and turn the JOG dial to change the value. (The above example shows you can edit the minute value.)
SYNC OUT | DRIVE |
CLK | IDE |
AUTO | A.PUNCH |
DIGITAL | 44.1kHz |
SETUP | |
Flashing |
|
SYNC OUT | DRIVE |
CLK | IDE |
AUTO | A.PUNCH |
3.Use the JOG dial to select the desired digital signal for the save operation ([dAT] or [AdAt]).
[AdAt] | Select this to save data in the adat digital signal | |
format to a connected adat. | ||
| ||
|
| |
[dAT] | Select this to save data in the S/P DIF digital signal | |
format to a connected DAT. | ||
| ||
|
|
4. Press the EXECUTE/YES key.
The number of the Program selected before the VR800 entered SETUP mode flashes on the display, indicating that you can select a Program to save.
DIGITAL44.1kHz
SETUP
![]() Flashing
Flashing
|
| PGM |
|
| |
SYNC OUT |
| DRIVE |
CLK | IDE | |
|
|
|
AUTO |
| A.PUNCH |
5. Use the JOG dial to select a Program to save.
If multiple Programs exists in the current drive disk, turn the JOG dial to change the Program number.
7. Press the EXECUTE/YES key.
The VR800 displays the track selection screen.
First, Real tracks
DIGITAL44.1kHz
SETUP
Flashing
SYNC OUT |
| DRIVE |
CLK | IDE | |
|
|
|
AUTO |
| A.PUNCH |
8. Use the JOG dial to select the desired tracks.
Options are Tr
9. Press the EXECUTE/YES key.
The display changes as follows.
This means “Start recording on the DAT (or adat)!”
Flashing |
|
|
|
|
|
|
| 44.1kHz |
|
|
| DIGITAL |
|
|
| ||
|
|
|
|
|
|
| ||
|
|
| SURE ? | SETUP | ||||
|
|
|
|
|
|
| ||
|
|
|
|
|
|
| ||
|
|
|
| SYNC OUT |
| DRIVE | ||
|
|
|
| CLK |
|
| IDE | |
|
|
|
|
|
|
|
|
|
|
|
|
| AUTO |
|
| A.PUNCH | |
10. Start recording on the DAT (or adat).
At this time you could set a
11. Press the EXECUTE/YES key.
The VR800 starts saving data and displays the total time required for the save operation. The time value starts counting down a few seconds later.
83