VR800 Owner’s Manual (Punch In/Out Recording)
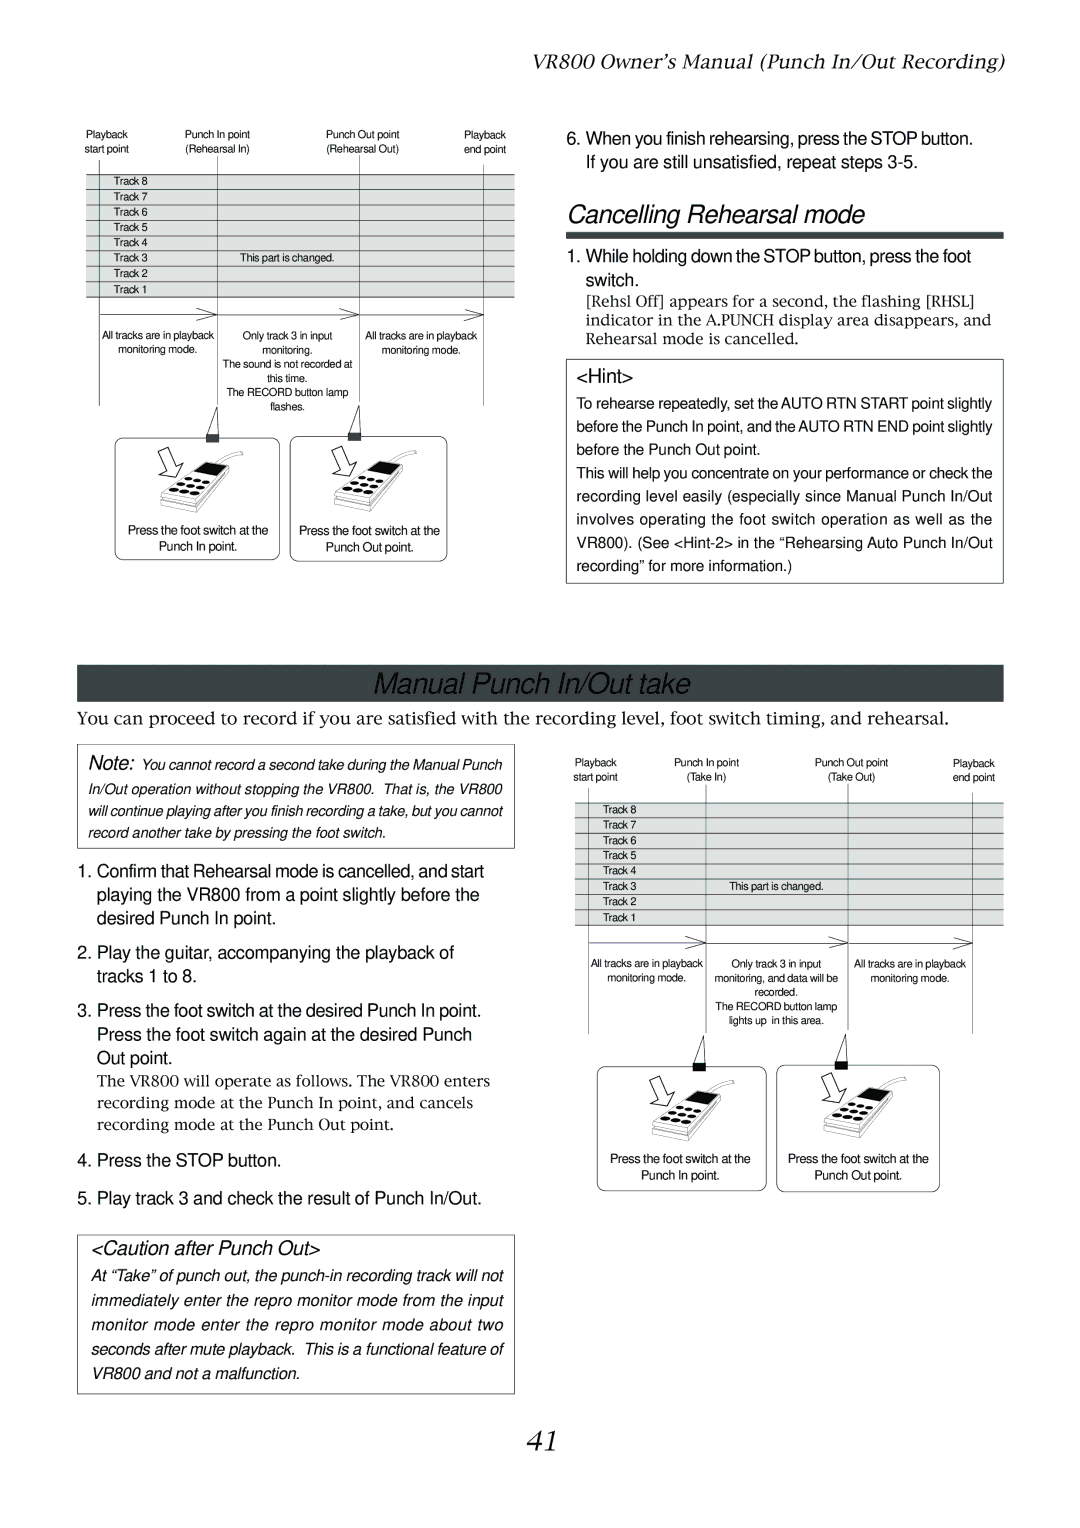
Playback | Punch In point | Punch Out point | Playback |
start point | (Rehearsal In) | (Rehearsal Out) | end point |
Track 8 |
|
|
Track 7 |
|
|
Track 6 |
|
|
Track 5 |
|
|
Track 4 |
|
|
Track 3 | This part is changed. |
|
Track 2 |
|
|
Track 1 |
|
|
All tracks are in playback | Only track 3 in input | All tracks are in playback |
monitoring mode. | monitoring. | monitoring mode. |
| The sound is not recorded at |
|
| this time. |
|
| The RECORD button lamp |
|
| flashes. |
|
Press the foot switch at the | Press the foot switch at the |
Punch In point. | Punch Out point. |
6.When you finish rehearsing, press the STOP button. If you are still unsatisfied, repeat steps
Cancelling Rehearsal mode
1. While holding down the STOP button, press the foot switch.
[Rehsl Off] appears for a second, the flashing [RHSL] indicator in the A.PUNCH display area disappears, and Rehearsal mode is cancelled.
<Hint>
To rehearse repeatedly, set the AUTO RTN START point slightly before the Punch In point, and the AUTO RTN END point slightly before the Punch Out point.
This will help you concentrate on your performance or check the recording level easily (especially since Manual Punch In/Out involves operating the foot switch operation as well as the VR800). (See
Manual Punch In/Out take
You can proceed to record if you are satisfied with the recording level, foot switch timing, and rehearsal.
Note: You cannot record a second take during the Manual Punch In/Out operation without stopping the VR800. That is, the VR800 will continue playing after you finish recording a take, but you cannot record another take by pressing the foot switch.
1.Confirm that Rehearsal mode is cancelled, and start playing the VR800 from a point slightly before the desired Punch In point.
2.Play the guitar, accompanying the playback of tracks 1 to 8.
3.Press the foot switch at the desired Punch In point. Press the foot switch again at the desired Punch
Out point.
The VR800 will operate as follows. The VR800 enters recording mode at the Punch In point, and cancels recording mode at the Punch Out point.
4. Press the STOP button.
Playback | Punch In point | Punch Out point | Playback | |||||||
start point | (Take In) | (Take Out) | end point | |||||||
|
|
|
|
|
|
|
|
|
|
|
|
|
|
|
|
|
|
|
|
|
|
|
| Track 8 |
|
|
|
|
|
|
|
|
|
| Track 7 |
|
|
|
|
|
|
|
|
|
| Track 6 |
|
|
|
|
|
|
|
|
|
| Track 5 |
|
|
|
|
|
|
|
|
|
| Track 4 |
|
|
|
|
|
|
|
|
|
| Track 3 |
|
| This part is changed. |
|
|
| ||
|
| Track 2 |
|
|
|
|
|
|
|
|
|
|
|
|
|
|
|
|
|
| |
|
| Track 1 |
|
|
|
|
|
|
|
|
|
| All tracks are in playback | Only track 3 in input | All tracks are in playback |
| |||||
|
| monitoring mode. | monitoring, and data will be | monitoring mode. |
|
| ||||
|
|
|
|
| recorded. |
|
|
| ||
|
|
|
|
| The RECORD button lamp |
|
|
| ||
|
|
|
|
| lights up | in this area. |
|
|
| |
|
|
|
|
|
|
|
|
|
|
|
|
|
|
|
|
|
|
|
|
|
|
|
|
|
|
|
|
|
|
|
|
|
Press the foot switch at the | Press the foot switch at the |
Punch In point. | Punch Out point. |
5. Play track 3 and check the result of Punch In/Out.
<Caution after Punch Out>
At “Take” of punch out, the
41