CHAPTER 4 INITIALIZATION
SETUP FOR A REMOTE CONSOLE
SETUP FOR A REMOTE CONSOLE
To enable a remote console using telnet to gain access to the
Once an IP address has been set so that telnet connections are possible, all commands that can be used from the local console can also be used from a remote console connected to the network.
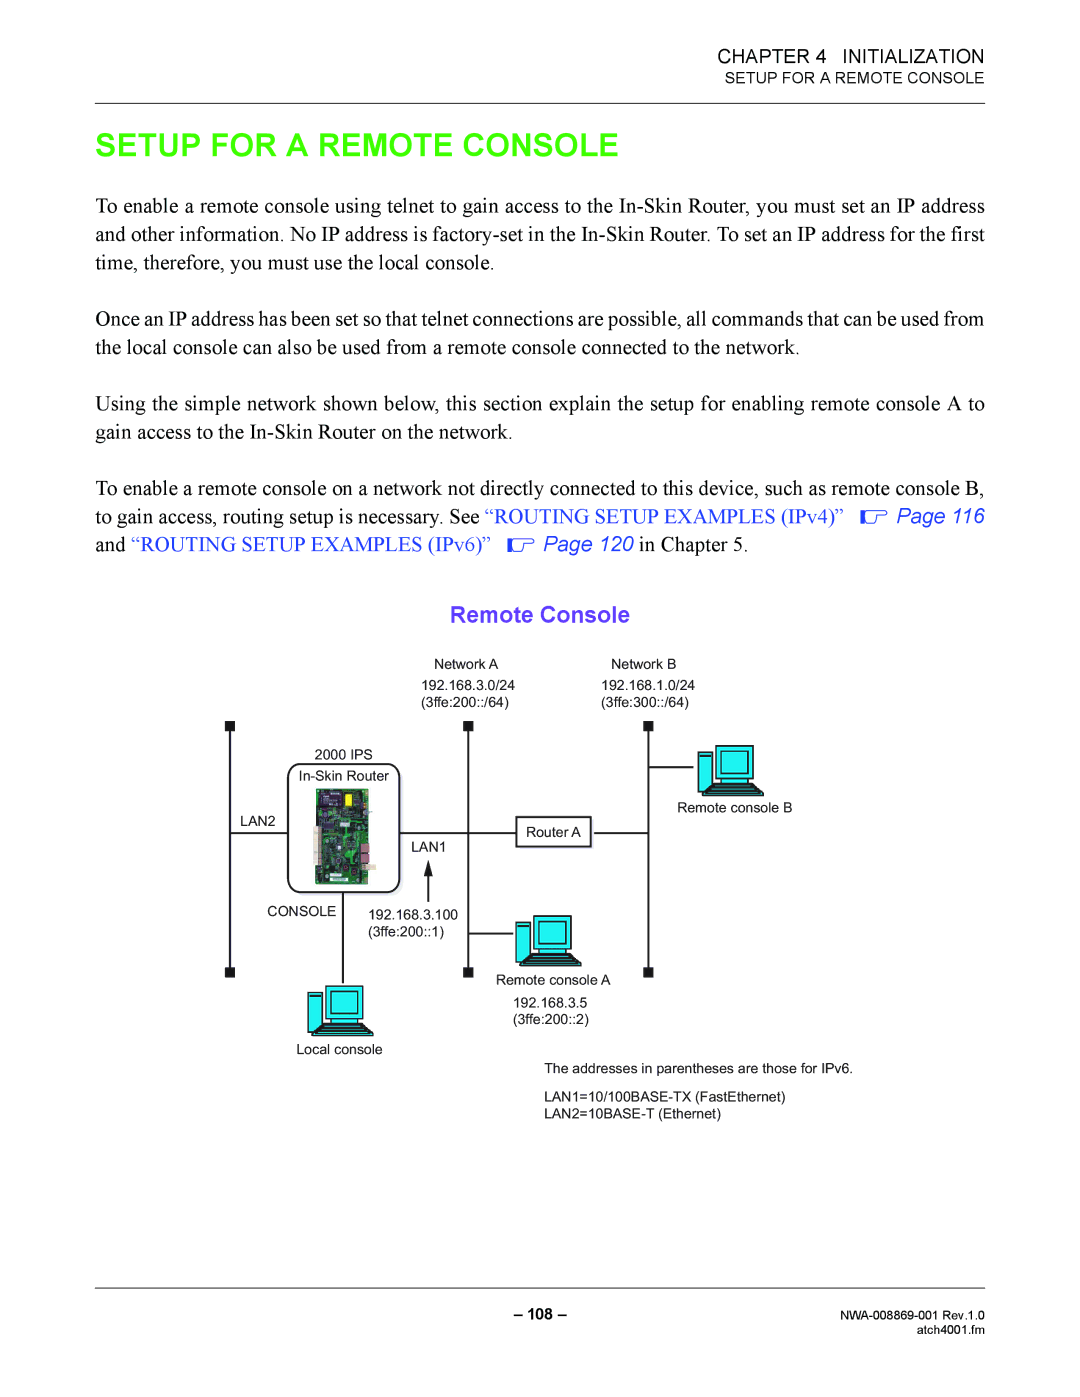
Using the simple network shown below, this section explain the setup for enabling remote console A to gain access to the
To enable a remote console on a network not directly connected to this device, such as remote console B,
to gain access, routing setup is necessary. See “ROUTING SETUP EXAMPLES (IPv4)” ![]() Page 116
Page 116
and “ROUTING SETUP EXAMPLES (IPv6)” ![]() Page 120 in Chapter 5.
Page 120 in Chapter 5.
Remote Console
Network A | Network B |
192.168.3.0/24192.168.1.0/24
(3ffe:200::/64)(3ffe:300::/64)
2000 IPS
LAN2
Router A
LAN1
CONSOLE | 192.168.3.100 |
| |
| (3ffe:200::1) |
Remote console A
192.168.3.5
(3ffe:200::2)
Remote console B
Local console
The addresses in parentheses are those for IPv6.
– 108 – | |
| atch4001.fm |