Battery Charger | Using the MDW 9031/9031DCP Pocket Phone 3 | |
|
|
|
Battery Charger
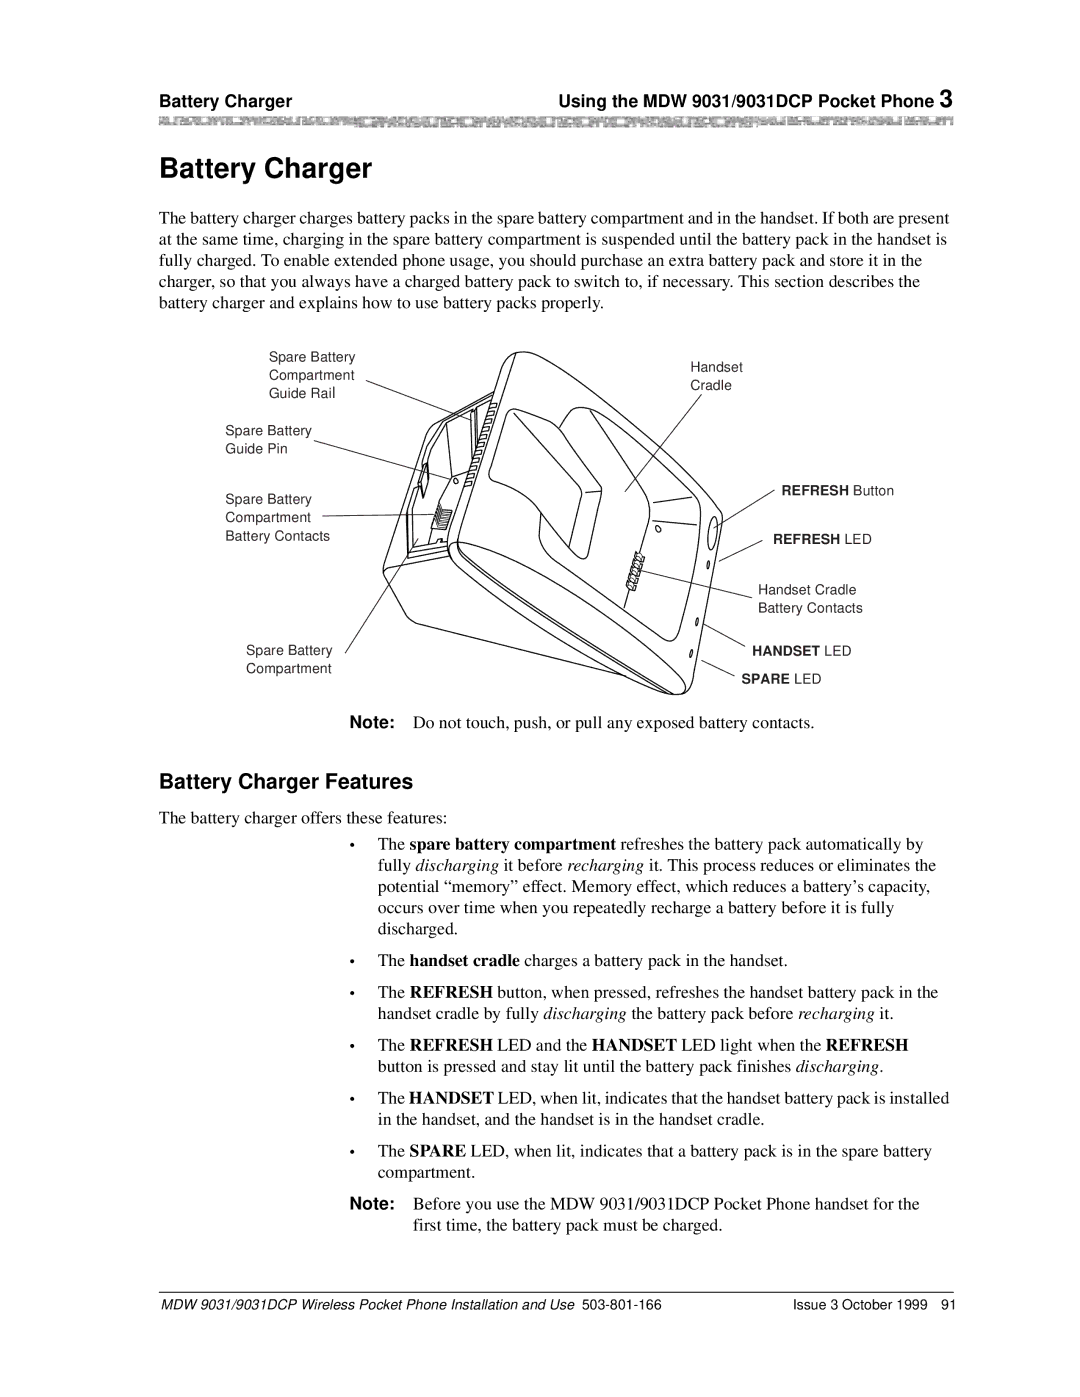
The battery charger charges battery packs in the spare battery compartment and in the handset. If both are present at the same time, charging in the spare battery compartment is suspended until the battery pack in the handset is fully charged. To enable extended phone usage, you should purchase an extra battery pack and store it in the charger, so that you always have a charged battery pack to switch to, if necessary. This section describes the battery charger and explains how to use battery packs properly.
Spare Battery
Compartment
Handset
Guide Rail
Spare Battery Guide Pin
Cradle
Spare Battery | REFRESH Button |
| |
Compartment |
|
Battery Contacts | REFRESH LED |
| Handset Cradle |
| Battery Contacts |
Spare Battery | HANDSET LED |
Compartment | SPARE LED |
|
Note: Do not touch, push, or pull any exposed battery contacts.
Battery Charger Features
The battery charger offers these features:
•The spare battery compartment refreshes the battery pack automatically by fully discharging it before recharging it. This process reduces or eliminates the potential “memory” effect. Memory effect, which reduces a battery’s capacity, occurs over time when you repeatedly recharge a battery before it is fully discharged.
•The handset cradle charges a battery pack in the handset.
•The REFRESH button, when pressed, refreshes the handset battery pack in the handset cradle by fully discharging the battery pack before recharging it.
•The REFRESH LED and the HANDSET LED light when the REFRESH button is pressed and stay lit until the battery pack finishes discharging.
•The HANDSET LED, when lit, indicates that the handset battery pack is installed in the handset, and the handset is in the handset cradle.
•The SPARE LED, when lit, indicates that a battery pack is in the spare battery compartment.
Note: Before you use the MDW 9031/9031DCP Pocket Phone handset for the first time, the battery pack must be charged.
MDW 9031/9031DCP Wireless Pocket Phone Installation and Use | Issue 3 October 1999 91 |
