2-2 User’s Reference Guide
Acrobat® Reader for Windows and Macintosh, ZTerm terminal emulator software and NCSA Telnet 2.6 for Macintosh
You will need:
■A Windows 95, 98, or
■An ISDN telephone line.
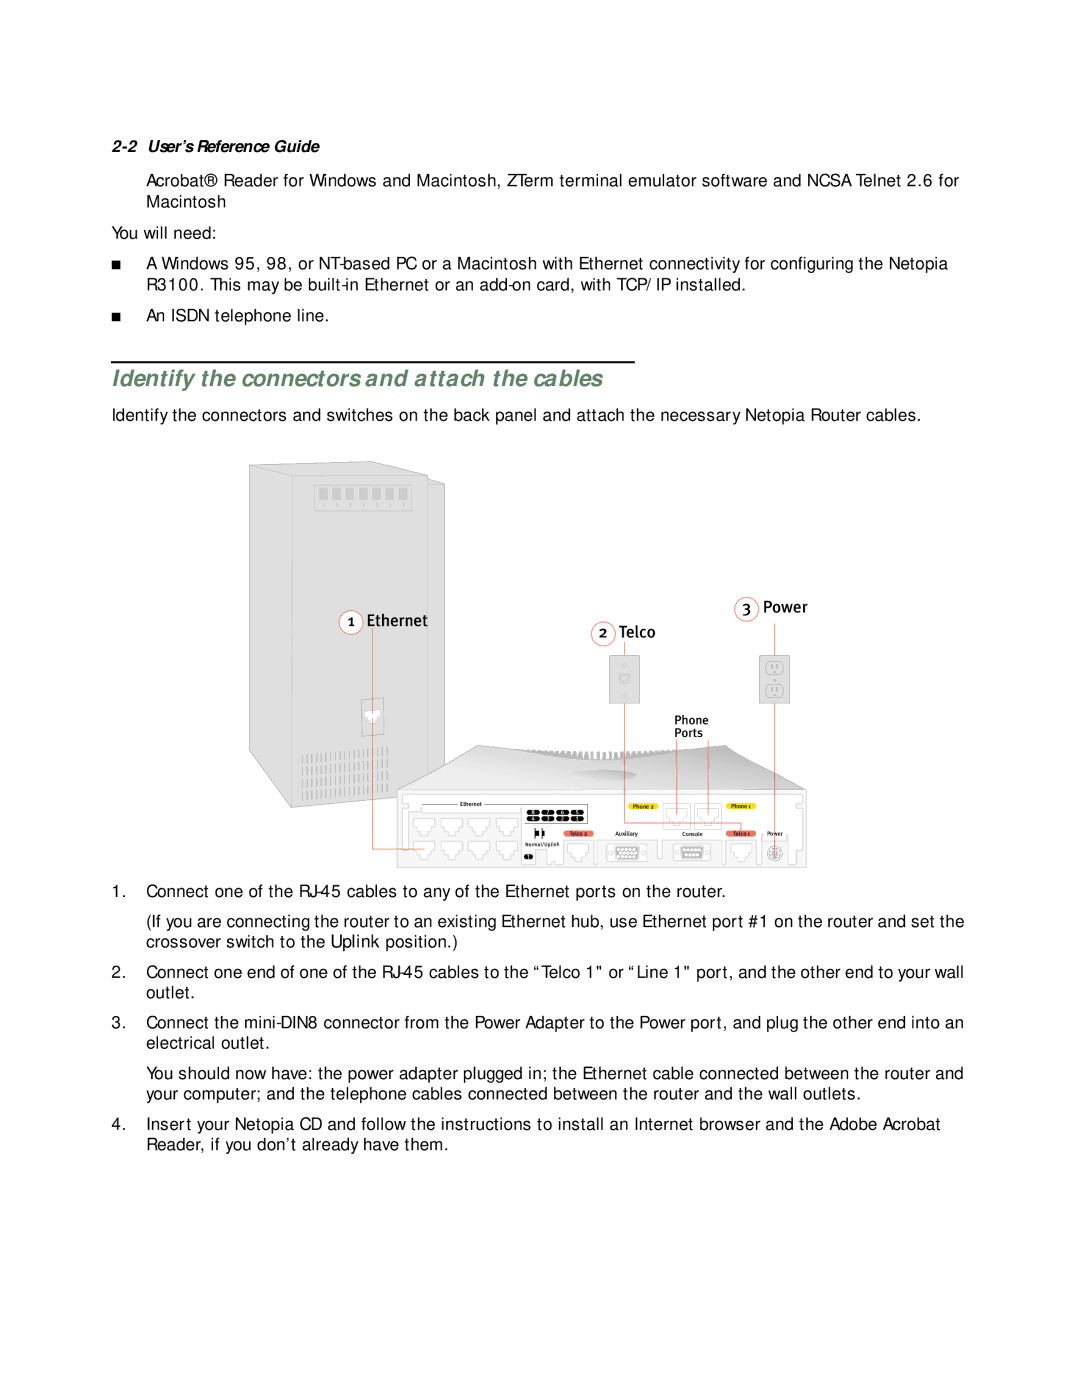
Identify the connectors and attach the cables
Identify the connectors and switches on the back panel and attach the necessary Netopia Router cables.
1 Ethernet
3 Power
2 Telco
|
|
|
|
| Phone |
|
|
|
|
|
|
| Ports |
|
|
Ethernet |
|
|
| Phone 2 |
| Phone 1 |
|
8 | 7 | 6 | 5 |
|
| ||
|
|
|
| ||||
4 | 3 | 2 | 1 |
|
|
|
|
|
|
| Telco 2 | Auxiliary | Console | Telco 1 | Power |
Normal/Uplink |
|
|
|
|
|
| |
1 |
|
|
|
|
|
|
|
1.Connect one of the
(If you are connecting the router to an existing Ethernet hub, use Ethernet port #1 on the router and set the crossover switch to the Uplink position.)
2.Connect one end of one of the
3.Connect the
You should now have: the power adapter plugged in; the Ethernet cable connected between the router and your computer; and the telephone cables connected between the router and the wall outlets.
4.Insert your Netopia CD and follow the instructions to install an Internet browser and the Adobe Acrobat Reader, if you don’t already have them.