IP Setup and Network Address Translation 11-3
Using Network Address Translation
The following procedure describes how to use Network Address Translation.
1.Pick a network number for your local network (referred to as the internal network). This can be any IP address range you want. The Netopia R3100 ISDN Router has a default IP address of 192.168.1.1. You may choose to change this address to match a
Note: The outside world (the external network) will not see this network number.
2.Using the internal network number, assign addresses to the local nodes on your LAN. For example, you may assign
■10.0.0.1 to your Netopia R3100
■10.0.0.2 to a node running as a World Wide Web server
■10.0.0.3 to an FTP server
■10.0.0.4 to a Windows NT PC
■10.0.0.5 to a Windows 95 PC
Note: See “Associating port numbers to nodes” on page
3.You created a Connection Profile for your ISP when you ran the SmartStart application. In the Connection Profile, you can toggle Address Translation Enabled to Yes or No (Yes to enable NAT) and press Return.
The Easy Setup Connection Profile is accessible either:
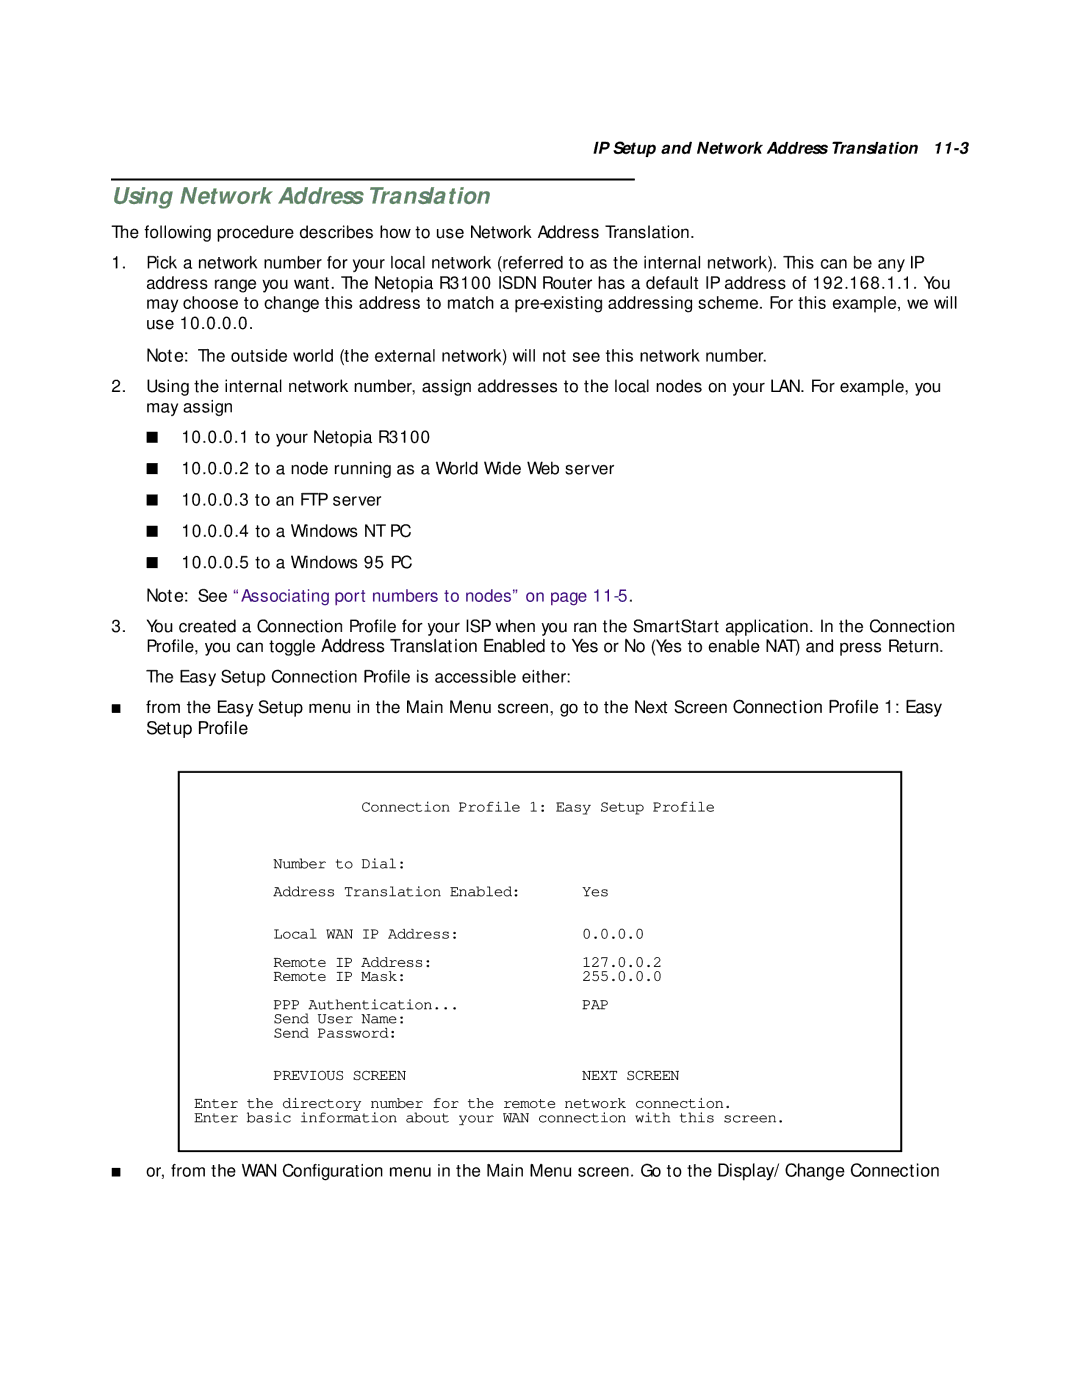
■from the Easy Setup menu in the Main Menu screen, go to the Next Screen Connection Profile 1: Easy Setup Profile
Connection Profile 1: Easy Setup Profile
Number to Dial: |
|
Address Translation Enabled: | Yes |
Local WAN IP Address: | 0.0.0.0 |
Remote IP Address: | 127.0.0.2 |
Remote IP Mask: | 255.0.0.0 |
PPP Authentication... | PAP |
Send User Name: |
|
Send Password: |
|
PREVIOUS SCREEN | NEXT SCREEN |
Enter the directory number for the remote network connection.
Enter basic information about your WAN connection with this screen.
■or, from the WAN Configuration menu in the Main Menu screen. Go to the Display/Change Connection