Easy Setup 7-7
Choose your Data Link Encapsulation method. Frame Relay is the default. The choice of Frame relay or ATM FUNI depends information supplied to you by your DSL service provider.
Easy Setup Profile
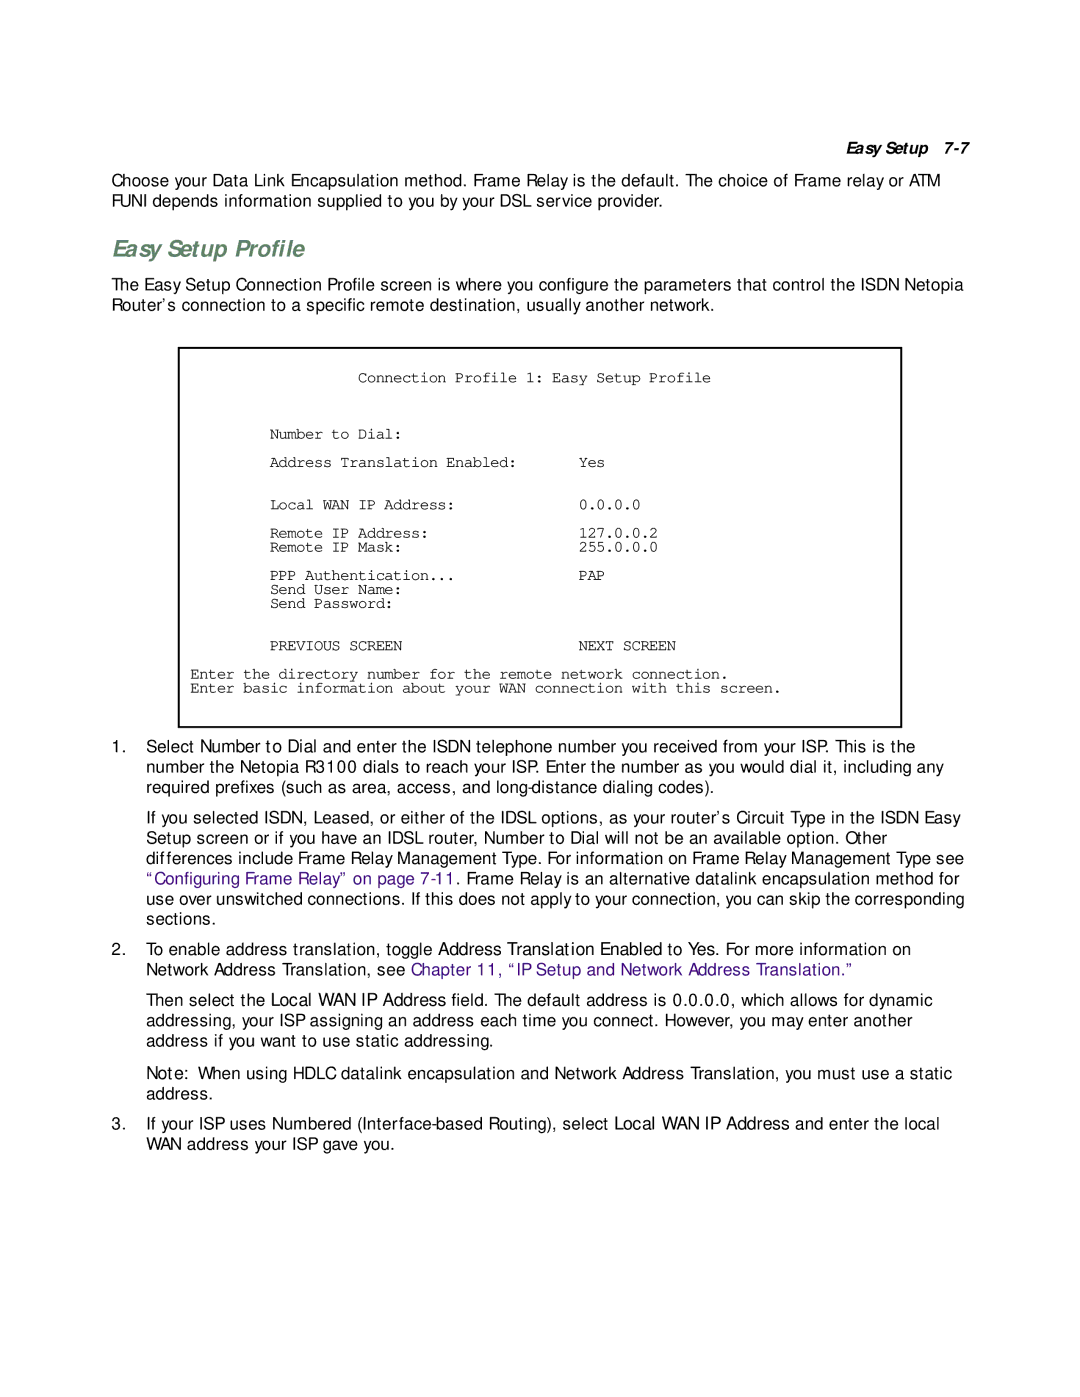
The Easy Setup Connection Profile screen is where you configure the parameters that control the ISDN Netopia Router’s connection to a specific remote destination, usually another network.
Connection Profile 1: Easy Setup Profile
Number to Dial: |
|
Address Translation Enabled: | Yes |
Local WAN IP Address: | 0.0.0.0 |
Remote IP Address: | 127.0.0.2 |
Remote IP Mask: | 255.0.0.0 |
PPP Authentication... | PAP |
Send User Name: |
|
Send Password: |
|
PREVIOUS SCREEN | NEXT SCREEN |
Enter the directory number for the remote network connection.
Enter basic information about your WAN connection with this screen.
1.Select Number to Dial and enter the ISDN telephone number you received from your ISP. This is the number the Netopia R3100 dials to reach your ISP. Enter the number as you would dial it, including any required prefixes (such as area, access, and
If you selected ISDN, Leased, or either of the IDSL options, as your router’s Circuit Type in the ISDN Easy Setup screen or if you have an IDSL router, Number to Dial will not be an available option. Other differences include Frame Relay Management Type. For information on Frame Relay Management Type see “Configuring Frame Relay” on page
2.To enable address translation, toggle Address Translation Enabled to Yes. For more information on Network Address Translation, see Chapter 11, “IP Setup and Network Address Translation.”
Then select the Local WAN IP Address field. The default address is 0.0.0.0, which allows for dynamic addressing, your ISP assigning an address each time you connect. However, you may enter another address if you want to use static addressing.
Note: When using HDLC datalink encapsulation and Network Address Translation, you must use a static address.
3.If your ISP uses Numbered
