Installation
Step 3: Mounting the PROsine
To mount the PROsine:
1.Remove the PROsine from its shipping container, verify that all components are present, and record relevant product information on “Information About Your System” on page
2.Turn off the ON/OFF/REM switch on the AC end.
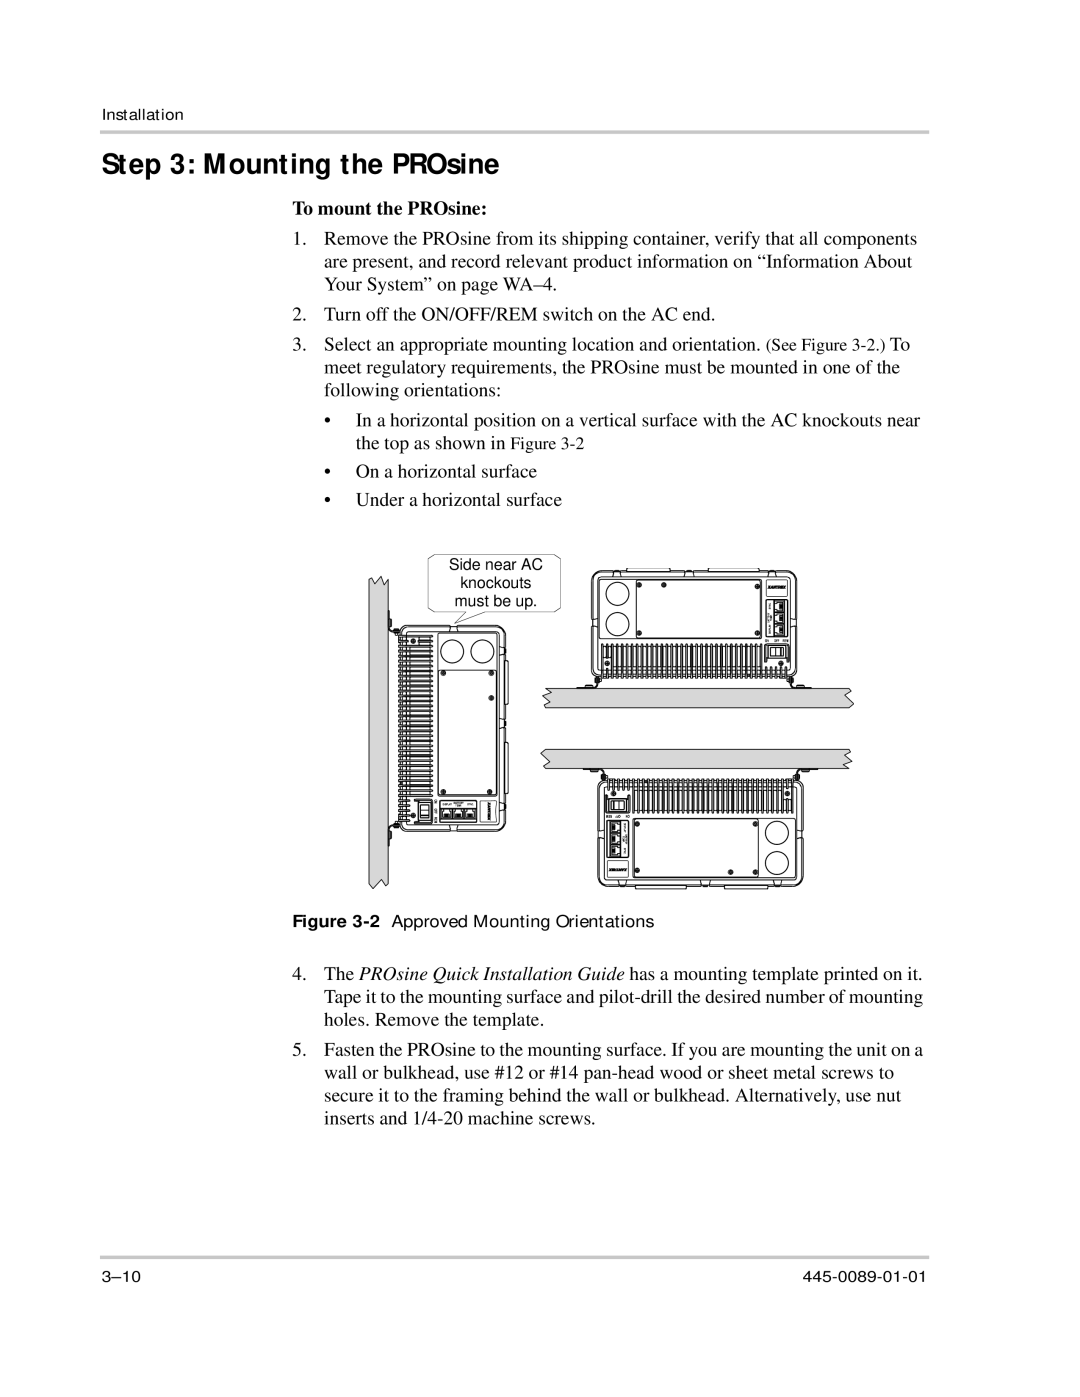
3.Select an appropriate mounting location and orientation. (See Figure
•In a horizontal position on a vertical surface with the AC knockouts near the top as shown in Figure
•On a horizontal surface
•Under a horizontal surface
Side near AC
knockouts
must be up.
Figure 3-2 Approved Mounting Orientations
4.The PROsine Quick Installation Guide has a mounting template printed on it. Tape it to the mounting surface and
5.Fasten the PROsine to the mounting surface. If you are mounting the unit on a wall or bulkhead, use #12 or #14