Operation
you have problems starting certain loads, ensure that the battery connections are solid, the DC cabling is short and of sufficient size, the AC wiring is of sufficient size, and the battery is of sufficient capacity and is fully charged.
As with all inverters, the amount of continuous power that the PROsine can deliver without overheating is limited by the ambient air temperature. It will operate and deliver its continuous power rating at higher temperatures, but the ambient temperature as well as the input voltage from the battery limits the extent to which it can do this. Operating the PROsine in conditions outside the power and temperature limits will result in thermal shutdown and/or significantly decreased performance. In addition, operation in this range is outside the ratings covered by the regulatory approvals of the product. (See page
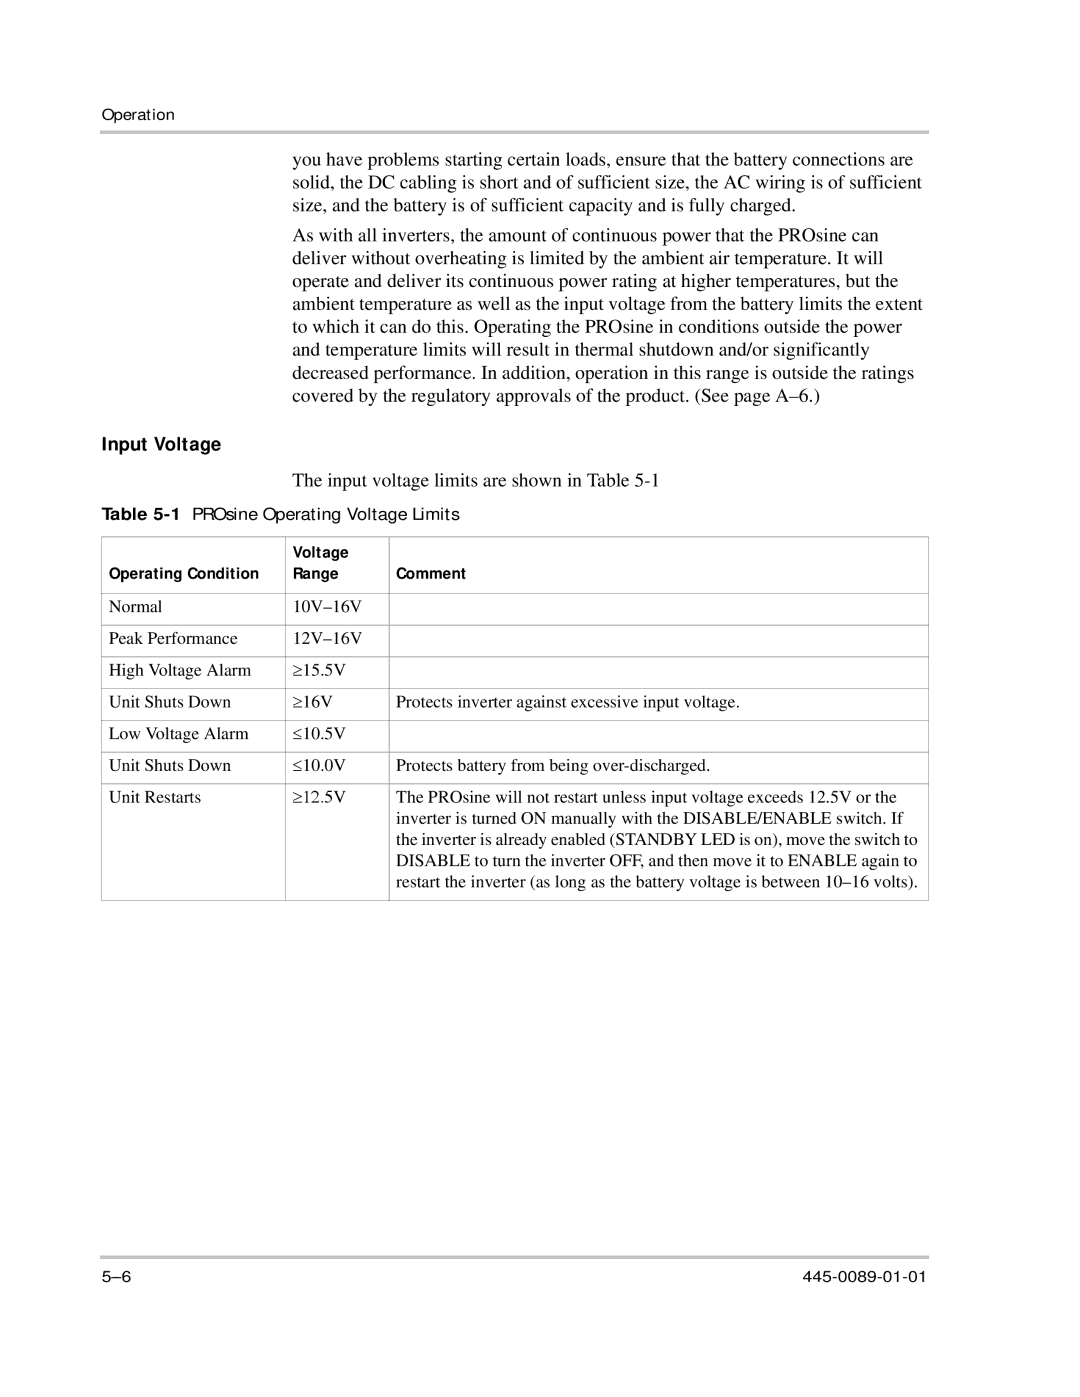
Input Voltage
The input voltage limits are shown in Table
.
Table 5-1 PROsine Operating Voltage Limits
| Voltage |
|
Operating Condition | Range | Comment |
|
|
|
Normal |
| |
|
|
|
Peak Performance |
| |
|
|
|
High Voltage Alarm | ≥15.5V |
|
|
|
|
Unit Shuts Down | ≥16V | Protects inverter against excessive input voltage. |
|
|
|
Low Voltage Alarm | ≤10.5V |
|
|
|
|
Unit Shuts Down | ≤10.0V | Protects battery from being |
|
|
|
Unit Restarts | ≥12.5V | The PROsine will not restart unless input voltage exceeds 12.5V or the |
|
| inverter is turned ON manually with the DISABLE/ENABLE switch. If |
|
| the inverter is already enabled (STANDBY LED is on), move the switch to |
|
| DISABLE to turn the inverter OFF, and then move it to ENABLE again to |
|
| restart the inverter (as long as the battery voltage is between |
|
|
|