Setting up workstations
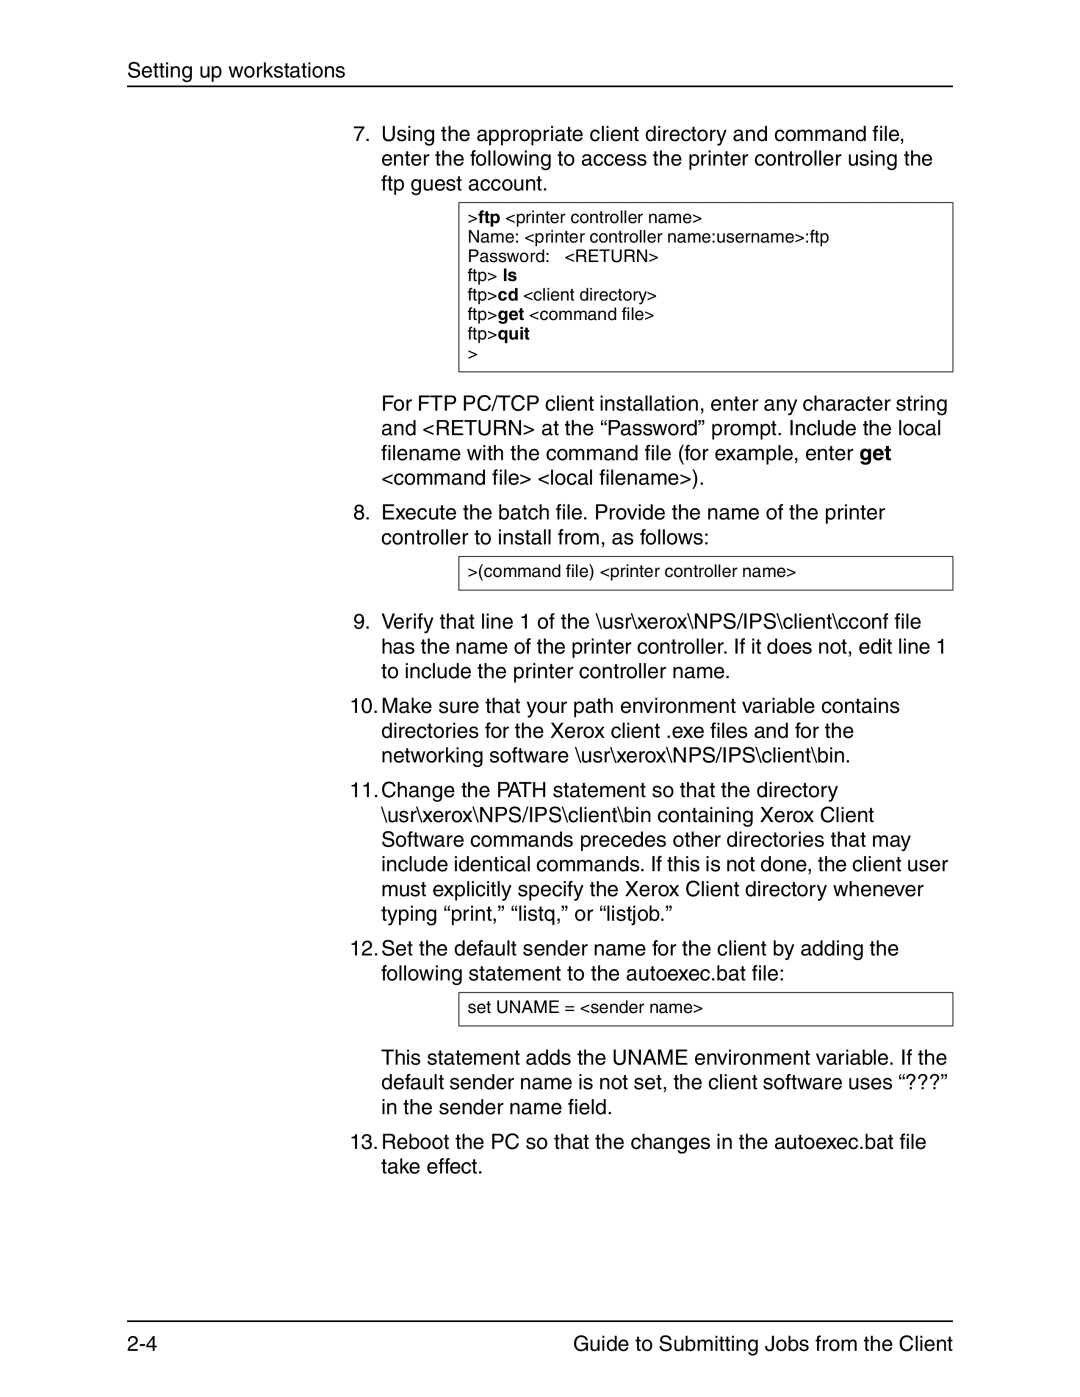
7.Using the appropriate client directory and command file, enter the following to access the printer controller using the ftp guest account.
>ftp <printer controller name>
Name: <printer controller name:username>:ftp
Password: <RETURN> ftp> ls
ftp>cd <client directory> ftp>get <command file> ftp>quit
>
For FTP PC/TCP client installation, enter any character string and <RETURN> at the “Password” prompt. Include the local filename with the command file (for example, enter get <command file> <local filename>).
8.Execute the batch file. Provide the name of the printer controller to install from, as follows:
>(command file) <printer controller name>
9.Verify that line 1 of the \usr\xerox\NPS/IPS\client\cconf file has the name of the printer controller. If it does not, edit line 1 to include the printer controller name.
10.Make sure that your path environment variable contains directories for the Xerox client .exe files and for the networking software \usr\xerox\NPS/IPS\client\bin.
11.Change the PATH statement so that the directory \usr\xerox\NPS/IPS\client\bin containing Xerox Client Software commands precedes other directories that may include identical commands. If this is not done, the client user must explicitly specify the Xerox Client directory whenever typing “print,” “listq,” or “listjob.”
12.Set the default sender name for the client by adding the following statement to the autoexec.bat file:
set UNAME = <sender name>
This statement adds the UNAME environment variable. If the default sender name is not set, the client software uses “???” in the sender name field.
13.Reboot the PC so that the changes in the autoexec.bat file take effect.
Guide to Submitting Jobs from the Client |