First Published March 04
Americas Headquarters
Page
N T E N T S
Viewing Server Properties
Viewing Server Sensors
Managing User Accounts
Creating a vNIC
Configuring Communication Services
Configuring Platform Event Filters
Bios Parameters by Server Model
Audience
Preface
Conventions
This preface includes the following sections
String
Default responses to system prompts are in square brackets
String will include the quotation marks
Indicates a comment line
New and Changed Information for this Release
Feature Description Where Documented
Feature Description
Documentation Roadmaps
Related Cisco UCS Documentation
System UCS Documentation Roadmap Bundle
Other Documentation Resources
Overview
Overview of the Server Software
This chapter includes the following sections
Cimc Firmware
Cisco Integrated Management Controller
Server OS
Management Interfaces
Cimc CLI
Command Modes
Overview Command Modes
Command to Access Mode Prompt
Mode Name
Command to Access Mode Prompt
Scope power-cap command from
Scope role-group command from
Scope sensor command from
Scope trap-destinations command
Command History
Complete a Command
Committing, Discarding, and Viewing Pending Commands
Command Output Formats
Online Help for the CLI
OL-28893-01
Installing the Server OS
OS Installation Methods
KVM Console
PXE Installation Servers
Installing an OS Using a PXE Installation Server
You can use the KVM console to install an OS on the server
Enters chassis command mode
Command or Action Purpose Step
Managing the Server
Toggling the Locator LED
Server Boot Order
Managing the Server Boot Order
Toggling the Locator LED for a Hard Drive
Server /chassis/hdd # set locateHDD
Server# scope bios
Configuring the Server Boot Order
Viewing the Actual Server Boot Order
Resetting the Server
Server /bios # show actual-boot-order
Detail
Server /chassis # power shutdown
Server# scope chassis Enters chassis mode
Shutting Down the Server
Server# scope chassis
Managing Server Power
Powering On the Server
Powering Off the Server
Power Cycling the Server
Command or Action Purpose
Server# scope chassis Enters chassis command mode
Configuring Power Policies
Viewing the Power Statistics
Name Description
Power Capping Policy
Configuring the Power Cap Policy
Non-Compliance Action
Enters the power cap command mode
Server# scope power-cap
Server /power-cap # set
Enabled yes no
Power-off power-on
Configuring the Power Restore Policy
Restore-last-state
Delay-value delay
Cisco Flexible Flash
Managing the Flexible Flash Controller
Dual Card Management in the Cisco Flexible Flash Controller
Action Description
Scenario Behavior
Configuring the Flexible Flash Controller Properties
# set write-error-count-threshold
# set read-error-count-threshold
# set virtual-drives-enabled list
# set raid-primary-member slot1
Booting from the Flexible Flash
Server /bios # set boot-override
None SCU HV HUU
Permissible index value is FlexFlash-0
Resetting the Flexible Flash Controller
Server /chassis/flexflash # commit
Default configuration
Viewing Bios Status
Configuring Bios Settings
Bios Version Version string of the running Bios
Secondary slot
Boot Order
Configuring Main Bios Settings
For each Bios setting, see one the following topics
Attempt to use
On, you are prompted to choose whether to reboot now
Configuring Advanced Bios Settings
Configure the Bios settings Server /bios/advanced #
Server /bios/main # set POSTErrorPause Enabled
Command or Action
Configuring Server Management Bios Settings
Configure the Bios settings
Server-management
Restoring Bios Defaults
Restoring Bios Manufacturing Custom Defaults
Server /bios # bios-setup-default
Server /bios # restore-mfg-defaults
Default values
Server # scope bios Server /bios # restore-mfg-defaults
OL-28893-01
Viewing Server Properties
Viewing Server Properties
Server# show chassis detail
Displays server properties
Viewing CPU Properties
Viewing Cimc Properties
Server# show cimc detail
Displays Cimc properties
This example displays Dimm summary information
Viewing Memory Properties
Viewing Storage Properties
Viewing Power Supply Properties
Viewing Storage Adapter Properties
Show psu detail
Hw-config detail
Error-counters detail
Settings detail
Server /chassis # show storageadapter
Server /chassis # show flexflash detail
Viewing the Flexible Flash Controller Properties
Optional Displays the available Cisco Flexible
Flash controllers
Viewing Physical Drive Properties
Virtual-drive drive-number detail
Viewing Virtual Drive Properties
Virtual-drive-count detail
Virtual-drive drive-number
Viewing Nvidia GPU Card Information
Slot number of the GPU card
Server # scope chassis
Viewing Network Related Properties
Viewing PCI Adapter Properties
Viewing LOM Properties
Server# scope cimc
Server# scope cimc Network
OL-28893-01
Viewing Server Sensors
Viewing Power Supply Sensors
Server# scope sensor
Show psu-redundancy
Server /sensor # show temperature detail
Viewing Temperature Sensors
Viewing Fan Sensors
Server /sensor # show psu-redundancy
This example displays temperature sensor statistics
Viewing Voltage Sensors
Purpose Step
Viewing Current Sensors
Procedure Command or Action Purpose Step
Viewing Storage Sensors
Status column
Current LED color, if any
LED Status column
OL-28893-01
Managing Remote Presence
Managing the Virtual KVM
KVM Console
Enabling the Virtual KVM
Server /kvm # set enabled yes
Disabling the Virtual KVM
Server# scope kvm
Set encrypted yes
Configuring the Virtual KVM
Set local-video yes
Server /kvm # set max-sessions
Configuring Virtual Media
Set enabled yes
Server# scope vmedia
Command or Action Server # scope vmedia
Configuring Network Mounted vMedia Mapping
Volume-name remote-share
Remote-file-path mount options
Viewing Network Mount vMedia Mapping Properties
Enters the virtual media command mode
Removing Network Mounted vMedia Mapping
Server # scope vmedia
Serial Over LAN
Managing Serial over LAN
Enters SoL command mode
Configuring Serial Over LAN
Server# scope sol
Yes no
Command mode
Server console port. You can enter this command in any
Launching Serial Over LAN
Server# connect host
OL-28893-01
Managing User Accounts
Configuring Local Users
Configuring Active Directory
Configuring the Active Directory Server
Active Directory
Role
Properties Value
Server# scope ldap
Configuring Active Directory in Cimc
Configuring Active Directory Groups in Cimc
Server# scope ldap
Server /ldap *# set dc1 Server /ldap *# set gc1
Admin user readonly
Set group-auth
Scope role-group
Terminating a User Session
Viewing User Sessions
Terminate
Server NIC Configuration
Configuring Network-Related Settings
NIC Mode
Server NICs
Server /cimc/network # set mode dedicated
Configuring Server NICs
NIC Redundancy
Sharedlom Sharedlom10g shipping ciscocard
Redundancy none
Configuring Common Properties
Active-active
Active-standby
Configuring IPv4
Optional Displays the IPv4 network settings
Configuring the Server Vlan
You must be logged in as admin to configure the server Vlan
Specifies the IP address of the secondary DNS
Connecting to a Port Profile
Set vlan-enabled
Set vlan-priority
Displays the network settings
Port profile must be defined on the switch to
Management interface, the virtual Ethernet, and the VIF on
Supported adapter cards such as the Cisco UCS VIC1225
Network Security Configuration
Configuring Network Security
Network Security
Configuring Network Time Protocol Settings
Network Time Protocol Configuration
Server # scope cimc
Yes
10.120.33.44
Server /cimc/network/ntp* # commit Commits the transaction
10.120.34.45
10.120.35.46
Overview of the Cisco UCS C-Series Network Adapters
Managing Network Adapters
Cisco UCS VIC1225 Virtual Interface Card
Cisco UCS P81E Virtual Interface Card
Configuring Network Adapter Properties
Viewing Network Adapter Properties
Index detail
Niv-mode disable enable
Fip-mode disable enable
Configure-vmfex port-count
Managing vHBAs
Viewing vHBA Properties
Host-fc-if fc0 fc1 name detail
All vHBAs
Modifying vHBA Properties
Resource-allocation-timeout msec
Error-detect-timeout msec
Error-recovery
# set fcp-error-recovery disable Enable
Set flogi-timeout msec
Enters the interrupt command mode
Interrupt
Interrupt-mode intx msi msix
Set plogi-timeout msec
Enters the Fibre Channel port login command mode
Port-p-logi
Server
Host-fc-if name
Creating a vHBA
Set channel-number number
Deleting a vHBA
Server /chassis/adapter # delete
Server /chassis/adapter # commit
Viewing the Boot Table
VHBA Boot Table
Creating a Boot Table Entry
Show boot
Deleting a Boot Table Entry
Create-boot-entry wwpn lun-id
Server /chassis # scope adapter
Take effect upon the next server reset
Delete boot entry
VHBA Persistent Binding
Locate the number of the entry to be deleted
Enabling Persistent Binding
Set persistent-lun-binding enable
Disabling Persistent Binding
Perbi
Rebuilding Persistent Binding
Set persistent-lun-binding disable
Scope perbi
# rebuild
Guidelines for Managing vNICs
Managing vNICs
Viewing vNIC Properties
Host-eth-if eth0 eth1 name detail
Modifying vNIC Properties
Host-eth-if eth0 eth1 name
Uplink 0
Vlan-mode access trunk
Trust-host-cos disable enable
Uplink-failover disable enable
Channel-number number
Scope interrupt
Uplink-failback-timeout seconds
Set interrupt-count count
Set coalescing-time usec
# set rq-count count
Set tcp-segment-offload disable
# set rq-ring-size size
Scope trans-queue
Set tcp-tx-checksum-offload disable
Set tcp-rx-checksum-offload disable
Set tcp-large-receive-offload disable
Set rss disable enable
Set rss-hash-ipv6-ex disable enable
Set rss-hash-tcp-ipv6 disable
Set rss-hash-tcp-ipv6-ex disable
Creating a vNIC
Host-eth-if name
Deleting a vNIC
Reboot
Configuring iSCSI Boot Capability
You can configure a maximum of 2 iSCSI vNICs for each host
This example deletes a vNIC on adapter
Dhcp-net-settings enabled
Iscsi-boot index
Dhcp-iscsi-settings enabled
Eth0 eth1 name
Delete iscsi-boot
Managing VM FEX
Virtual Machine Fabric Extender
Viewing VM FEX Properties
VM FEX Settings
General Properties Settings Name Description
Name
Ethernet Interrupt Settings Name Description
Completion Queue Settings Name Description
Receive Side Scaling Settings Name
TCP Offload Settings Name Description
Create Virtual Drive from Unused Physical Drives
Managing Storage Adapters
Storageadapter slot
Create virtual-drive
Carve-virtual-drive
Create Virtual Drive from an Existing Drive Group
Write policy for the new virtual drive. Enter
Appropriate information at each prompt
Clearing Foreign Configuration
Server /chassis # scope storageadapter
500 MB
Clear-foreign-config
Deleting a Virtual Drive
# delete-virtual-drive
Initializing a Virtual Drive
Cancel-initialization
Start-initialization
# get-operation-status
Set-boot-drive
Set as Boot Drive
Modifying Attributes of a Virtual Drive
Server /chassis/storageadapter # scope
Modify-attributes
Making a Dedicated Hot Spare
Policy
You are prompted to choose a virtual drive for
Preparing a Drive for Removal
Making a Global Hot Spare
Server /chassis/storageadapter/physical-drive #
Make-global-hot-spare
Removing a Drive from Hot Spare Pools
Prepare-for-removal
# remove-hot-spare
Enable-auto-learn
Enabling Auto Learn Cycles for the Battery Backup Unit
Undo Preparing a Drive for Removal
Undo-prepare-for-removal
Starting a Learn Cycle for a Battery Backup Unit
Disabling Auto Learn Cycles for the Battery Backup Unit
Disable-auto-learn
You must be logged in as an admin to use this command
Start-learn-cycle
Toggling the Locator LED for a Physical Drive
Physical-drive
# locator-led on off
Backing Up and Restoring the Adapter Configuration
Exporting the Adapter Configuration
Viewing Storage Controller Logs
This example exports the configuration of adapter
Importing the Adapter Configuration
Reboot the server to apply the imported configuration
Restoring Adapter Defaults
Adapter-reset-defaults index
PCI slot number specified by the index
Managing Adapter Firmware
Installing Adapter Firmware
Adapter Firmware
Or two specified adapters or, if no adapter is specified
Resetting the Adapter
Activating Adapter Firmware
Server /chassis # activate-adapter-fw
Resetting the adapter also resets
Server/chassis # adapter-reset index
This example resets the adapter in PCI slot
Host
Configuring Http
Configuring Communication Services
Server# scope http
Server /http # set http-redirect yes
Set timeout seconds
Configuring SSH
Server# scope ssh
Set ssh-port number
XML API for Cimc
Configuring XML API
Enabling XML API
Server# scope xmlapi
Configuring Ipmi over LAN
Configuring Ipmi
Set enabled
Ipmi Over LAN
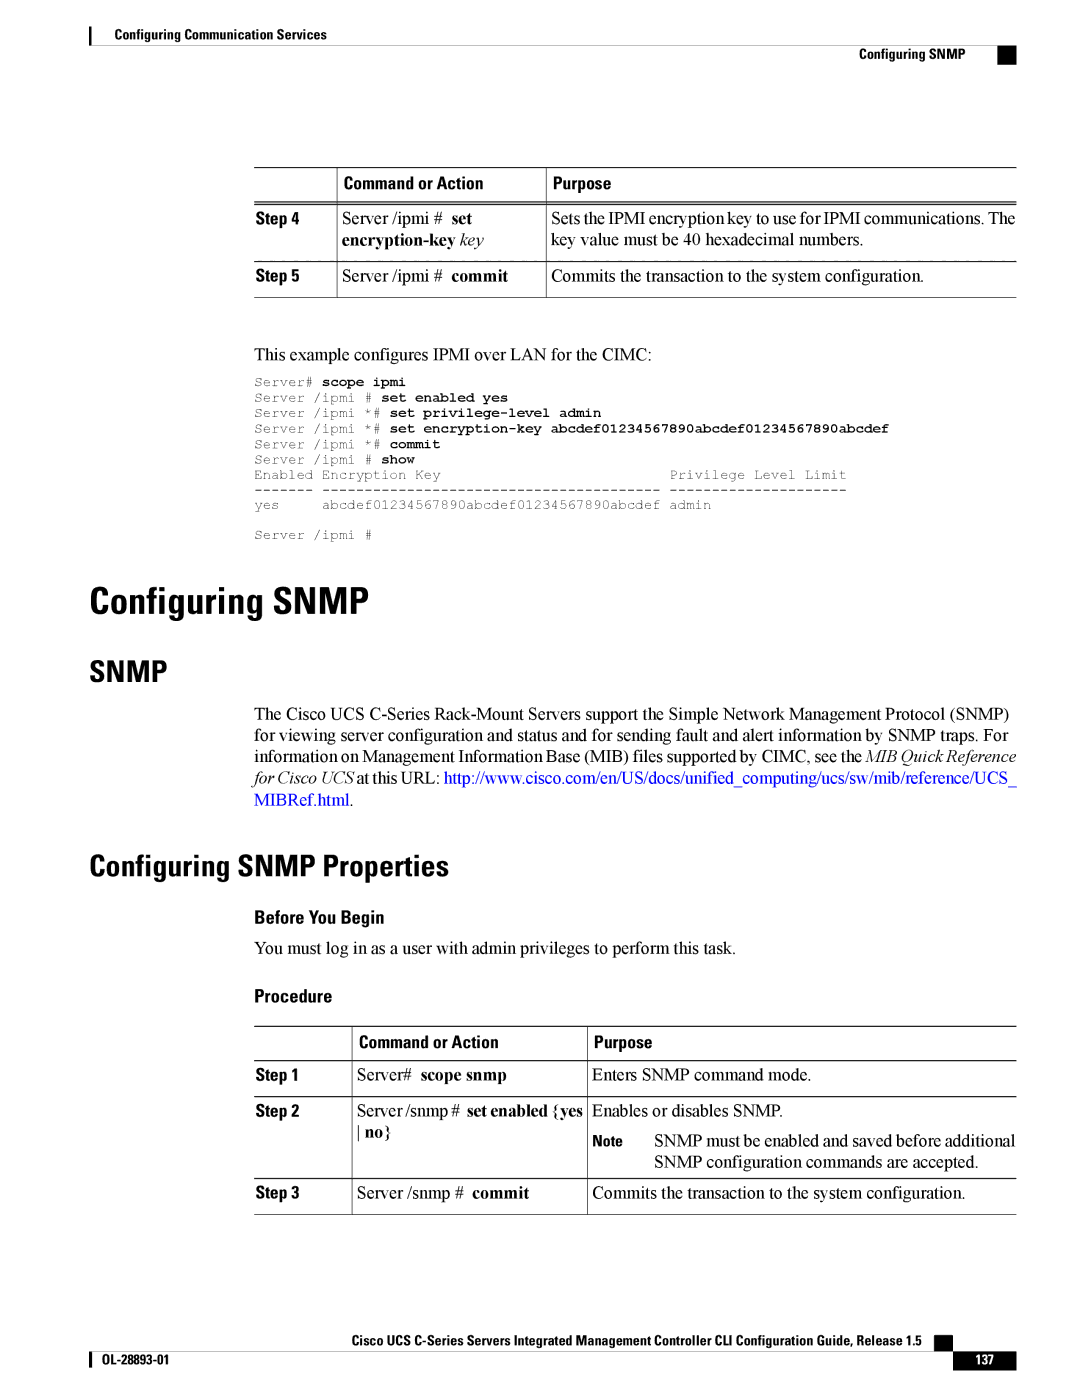
Configuring Snmp Properties
Configuring Snmp
Encryption-key key
Server# scope snmp
Community-str community
Setcommunity-access
Settrap-community-str
Server /snmp # set sys-location
Trap-destinations number
Configuring Snmp Trap Settings
Version 1 2
Type trap inform
Sending a Test Snmp Trap Message
Configuring SNMPv3 Users
To send a test message
Specified user number
V3security-level noauthnopriv
V3security-name security-name
Authnopriv authpriv
MD5 SHA
142
Managing Certificates
Managing the Server Certificate
Generating a Certificate Signing Request
Server# scope certificate
Enters the certificate command mode
Server /certificate # generate-csr
Signing request CSR
Managing Certificates Creating a Self-Signed Certificate
Creating a Self-Signed Certificate
Example
Openssl genrsa -out CAkeyfilename
Openssl req -new -x509 -days numdays
Echo nsCertType = server openssl.conf
Uploading a Server Certificate
Server /certificate # upload
New server certificate
Begin Certificate
This example uploads a new certificate to the server
Server# scope fault
Configuring Platform Event Filters
Platform-event-enabled yes
Platform Event Filters
Configuring Platform Event Filters
Platform-event-enabled no
Disabling Platform Event Alerts
None reboot power-cycle
Power-off
Platform Event Filter
Configuring Platform Event Trap Settings
Server /fault # scope pef-destinations
Enabled yes
Platform Event Trap Descriptions
Interpreting Platform Event Traps
Event Number Note Platform Event Description
Test Trap
154
155
Event Number Note
156
Overview of Firmware
Cimc Firmware Management
Center box, click Unified Computing and Servers
Obtaining Firmware from Cisco
Click the Unified Computing System UCS Server Firmware link
Click Accept License Agreement
Log in to the as a user with admin privileges
Installing Cimc Firmware from a Remote Server
Activating Installed Cimc Firmware
Server /cimc/firmware # activate 1
Is specified, the server activates the currently
Inactive image
Current FW Version field
Installing Bios Firmware from a Remote Server
163
Server # scope bios
164
Scope fault
Viewing the Faults and Logs Summary
Show fault-entries
Viewing Logs
Viewing the Cimc Log
Cimc Log
Clearing the Cimc Log
Configuring the Cimc Log Threshold
Server /cimc # scope log
Server /cimc/log # clear
Sending the Cimc Log to a Remote Server
Local-syslog-severity
Remote-syslog-severity level
Error Informational Debug
Critical
Server-ip ip-address
System Event Log
Viewing the System Event Log
Server# scope sel
Enters the system event log command mode
Clearing the System Event Log
Server# scope sel
172
Exporting Technical Support Data
Server Utilities
Server /cimc # scope tech-support
Remote-ip ip-address
Remote-password password
Remote-protocol protocol
Remote-username name
Clearing the Bios Cmos
Rebooting the Cimc
Server# scope bios Enters the bios command mode
Provide the generated report file to Cisco TAC
Recovering from a Corrupted Bios
Scope bios
Recover
Resetting the Cimc to Factory Defaults
This example shows how to recover from a corrupted Bios
Power cycle or reset the server
Exporting and Importing the Cimc Configuration
Exporting and Importing the Cimc Configuration
Exporting the Cimc Configuration
Server /cimc # scope import-export
Importing a Cimc Configuration
Server# scope cimc Enters the Cimc command mode
Server /cimc/import-export #
Generating Non maskable Interrupts to the Host
181
182
Main Bios Parameters for C22 and C24 Servers
Bios Parameters by Server Model
C22 and C24 Servers
TPM Support
Processor Configuration Parameters Name
Advanced Bios Parameters for C22 and C24 Servers
Number of Enabled Cores
Execute Disable
Intel VT-d
Intel VT
Intel VT-d Coherency Support
Intel VT-d ATS Support
CPU Performance
Hardware Prefetcher
Adjacent Cache Line Prefetcher
Direct Cache Access Support
DCU Streamer Prefetch
DCU IP Prefetcher
Power Technology
Processor Power State C1 Enhanced
Processor Power State C6
Intel Turbo Boost Technology
Frequency Floor Override
Energy Performance
State Coordination
Memory Configuration Parameters Name Description
Select Memory RAS
Dram Clock Throttling
Dram Refresh rate
Low Voltage DDR Mode
Channel Interleaving
Rank Interleaving
Patrol Scrub
Demand Scrub
Altitude
QPI Configuration Parameters Name Description
USB Configuration Parameters Name Description
Onboard Storage Parameters Name
USB Port Rear
All USB Devices
USB Port Front
USB Port Internal
Mmio Above 4GB
PCI Configuration Parameters Name Description
Aspm Support
VGA Priority
Console Redirection
Terminal Type
Bits per second
Putty KeyPad
Flow Control
LOM Port n OptionROM
All Onboard LOM Ports
All PCIe Slots OptionROM
PCIe Slot n OptionROM
FRB-2 Timer
Server Management Bios Parameters for C22 and C24 Servers
OS Watchdog Timer
PCIe Slot n Link Speed
OS Watchdog Timer Policy
OS Watchdog Timer Timeout
Boot Order Rules
Main Bios Parameters for C220 and C240 Servers
Advanced Bios Parameters for C220 and C240 Servers
C220 and C240 Servers
204
Enabled -The processor uses VT-d ATS as required
Disabled -The processor does not support ATS
206
207
Power consumption but may reduce system performance
209
210
211
212
213
214
USB Port SD Card
Memory Mapped I/O Above 4GB
4GB or greater address space
Enables console redirection on COM port 0 during Post
Enables console redirection on COM port 1 during Post
Offboard -Priority is given to the Pcie Graphics adapter
Introduced by a hidden terminal problem. This can be one
None -No flow control is used
Allows you to change the action of the PuTTY function keys
218
Server Management Bios Parameters for C220 and C240 Servers
PCIe Mezzanine OptionROM
If it hangs during POST. This can be one of the following
Watchdog timer expires 5 minutes after the OS
System removes that device type from the boot order
Advanced Bios Parameters for C260 Servers
Main Bios Parameters for C260 Servers
Processor Configuration Parameters Name Description
C260 Servers
Whether the processor uses Enhanced Intel SpeedStep
Enhanced Intel Speedstep Technology
Intel Hyper-Threading Technology
Which allows multithreaded software applications to execute
Intel Virtualization Technology
Intel VT for Directed IO
Intel VT-d Interrupt Remapping
Processor C3 Report
Direct Cache Access
Processor C6 Report
Package C State Limit
CPU C State
Numa Optimized
Mirroring Mode
Sparing Mode
Sparing
Mirroring
Serial a Enable
Serial Port Configuration Parameters Name Description
USB Configuration Parameters Name
Patrol Scrub Interval
PCIe OptionROMs
Onboard NIC n ROM
PCIe Slot n ROM
Onboard Gbit LOM
Onboard 10Gbit LOM
Sriov
IOH Resource Allocation
Server Management Bios Parameters for C260 Servers
Assert NMI on Serr
Assert NMI on Perr
Baud Rate
OS Boot Watchdog Timer Timeout
OS Boot Watchdog Policy
OS Boot Watchdog Timer
Legacy OS Redirection
Main Bios Parameters for C420 Servers
Advanced Bios Parameters for C420 Servers
C420 Servers
236
237
238
239
240
241
242
243
244
245
Enabled -Enables the SD card drives
Not detected by the Bios and operating system
247
Can be one of the following
Allows you to change the action of the PuTTY function keys
250
Server Management Bios Parameters for C420 Servers
252
Main Bios Parameters for C460 Servers
Advanced Bios Parameters for C460 Servers
C460 Servers
254
255
Intel VT-d PassThrough DMA
257
258
259
260
261
262
Server Management Bios Parameters for C460 Servers
264
265
266
D E
Installing from remote server 159 obtaining from Cisco
LDAP, See Active Directory local users
Dedicated
IN-4
Yaml
IN-6