L3 Roaming Example
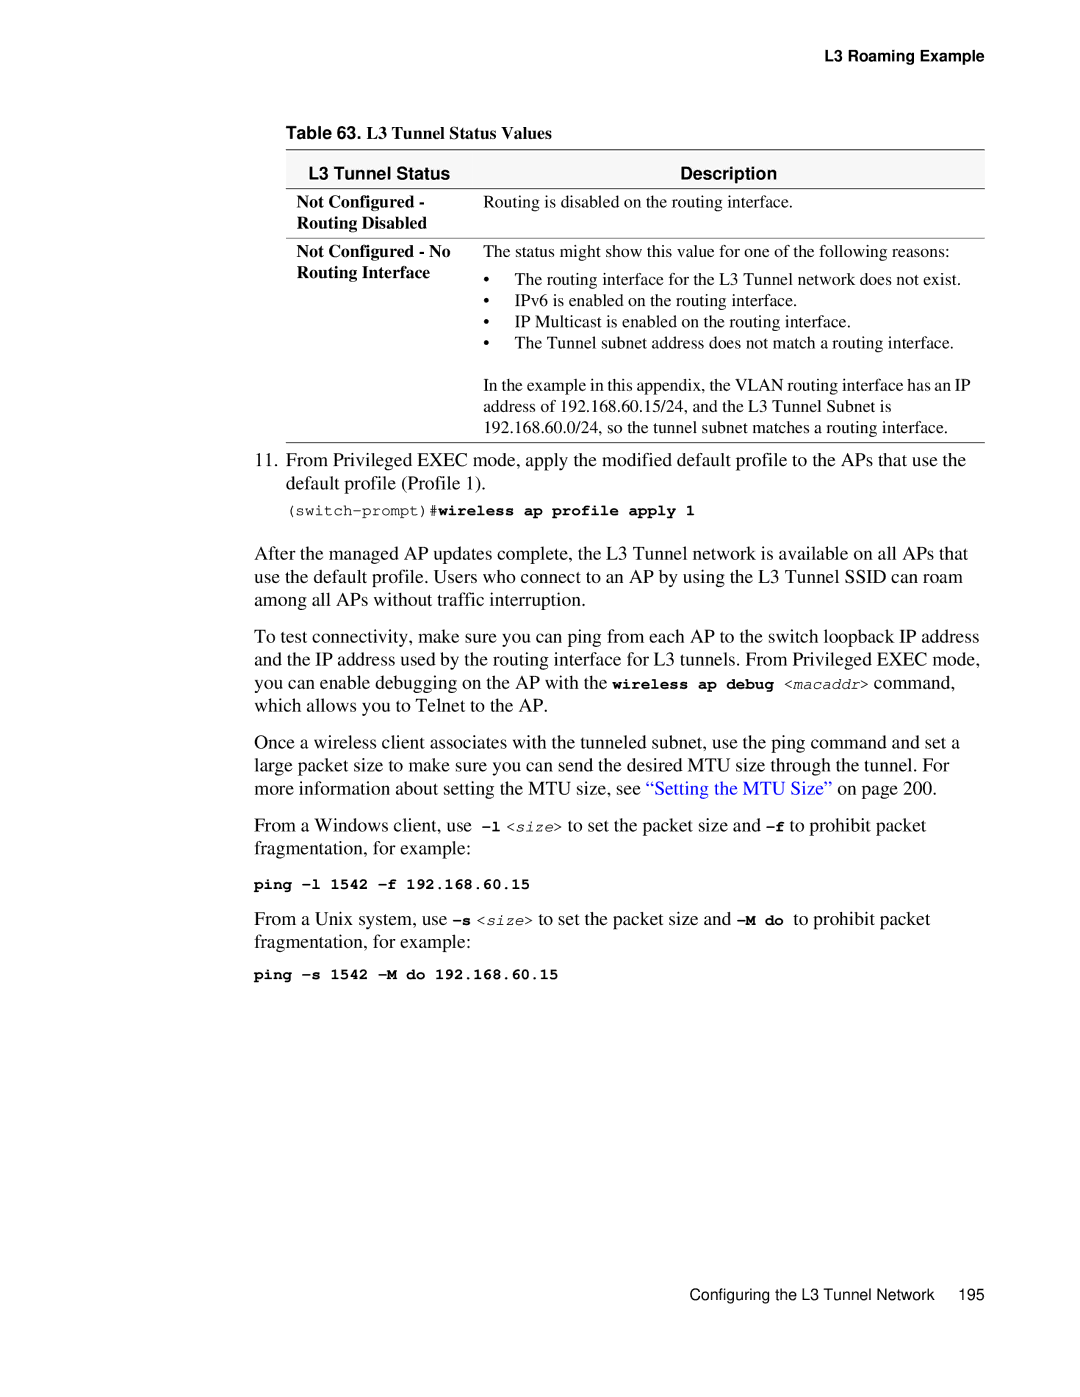
Table 63. L3 Tunnel Status Values
L3 Tunnel Status | Description |
Not Configured - | Routing is disabled on the routing interface. |
Routing Disabled |
|
Not Configured - No Routing Interface
The status might show this value for one of the following reasons:
•The routing interface for the L3 Tunnel network does not exist.
•IPv6 is enabled on the routing interface.
•IP Multicast is enabled on the routing interface.
•The Tunnel subnet address does not match a routing interface.
In the example in this appendix, the VLAN routing interface has an IP address of 192.168.60.15/24, and the L3 Tunnel Subnet is 192.168.60.0/24, so the tunnel subnet matches a routing interface.
11.From Privileged EXEC mode, apply the modified default profile to the APs that use the default profile (Profile 1).
(switch-prompt)#wireless ap profile apply 1
After the managed AP updates complete, the L3 Tunnel network is available on all APs that use the default profile. Users who connect to an AP by using the L3 Tunnel SSID can roam among all APs without traffic interruption.
To test connectivity, make sure you can ping from each AP to the switch loopback IP address and the IP address used by the routing interface for L3 tunnels. From Privileged EXEC mode, you can enable debugging on the AP with the wireless ap debug <macaddr> command, which allows you to Telnet to the AP.
Once a wireless client associates with the tunneled subnet, use the ping command and set a large packet size to make sure you can send the desired MTU size through the tunnel. For more information about setting the MTU size, see “Setting the MTU Size” on page 200.
From a Windows client, use
ping
From a Unix system, use
ping
Configuring the L3 Tunnel Network 195