44
| CHAPTER 4 |
You can also use borders to frame images in a
To specify border color:
•Repeatedly press BORDER COLOR to cycle through the available colors. The Color Selector shows the current color.
Press BORDER STYLE+0 (zero) to immediately turn off the border.
To specify border style:
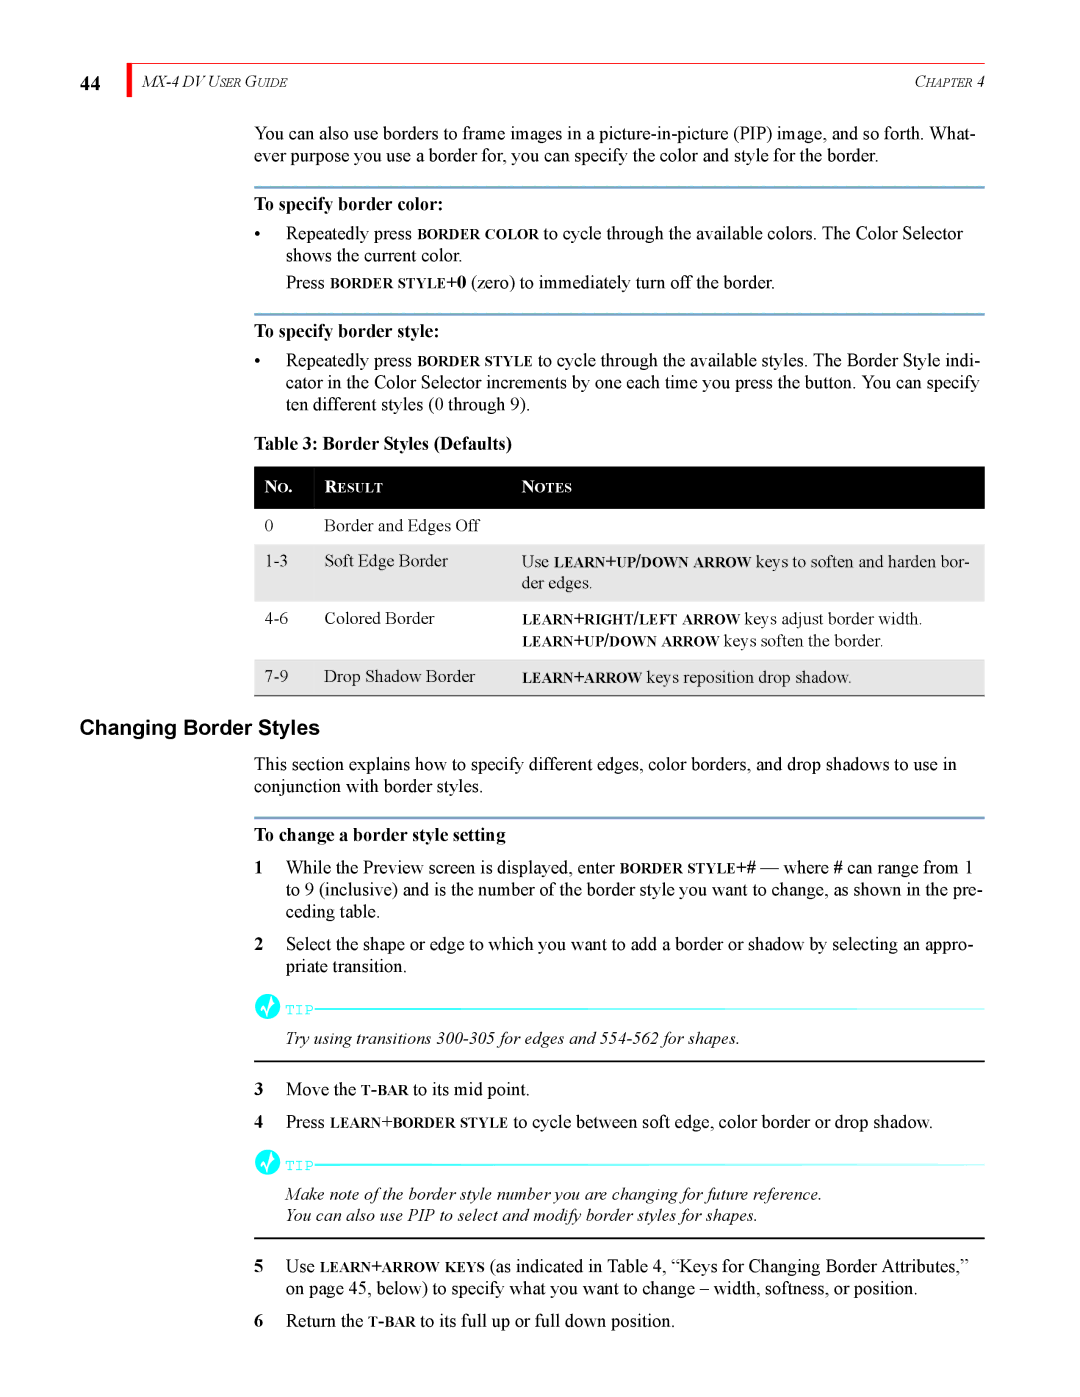
•Repeatedly press BORDER STYLE to cycle through the available styles. The Border Style indi- cator in the Color Selector increments by one each time you press the button. You can specify ten different styles (0 through 9).
Table 3: Border Styles (Defaults)
NO. | RESULT | NOTES |
0 | Border and Edges Off |
|
Soft Edge Border | Use LEARN+UP/DOWN ARROW keys to soften and harden bor- | |
|
| der edges. |
Colored Border | LEARN+RIGHT/LEFT ARROW keys adjust border width. | |
|
| LEARN+UP/DOWN ARROW keys soften the border. |
Drop Shadow Border | LEARN+ARROW keys reposition drop shadow. | |
|
|
|
Changing Border Styles
This section explains how to specify different edges, color borders, and drop shadows to use in conjunction with border styles.
To change a border style setting
1While the Preview screen is displayed, enter BORDER STYLE+# — where # can range from 1 to 9 (inclusive) and is the number of the border style you want to change, as shown in the pre- ceding table.
2Select the shape or edge to which you want to add a border or shadow by selecting an appro- priate transition.
![]() TIP
TIP![]()
Try using transitions
3Move the
4Press LEARN+BORDER STYLE to cycle between soft edge, color border or drop shadow.
![]() TIP
TIP![]()
Make note of the border style number you are changing for future reference.
You can also use PIP to select and modify border styles for shapes.
5Use LEARN+ARROW KEYS (as indicated in Table 4, “Keys for Changing Border Attributes,” on page 45, below) to specify what you want to change – width, softness, or position.
6Return the
