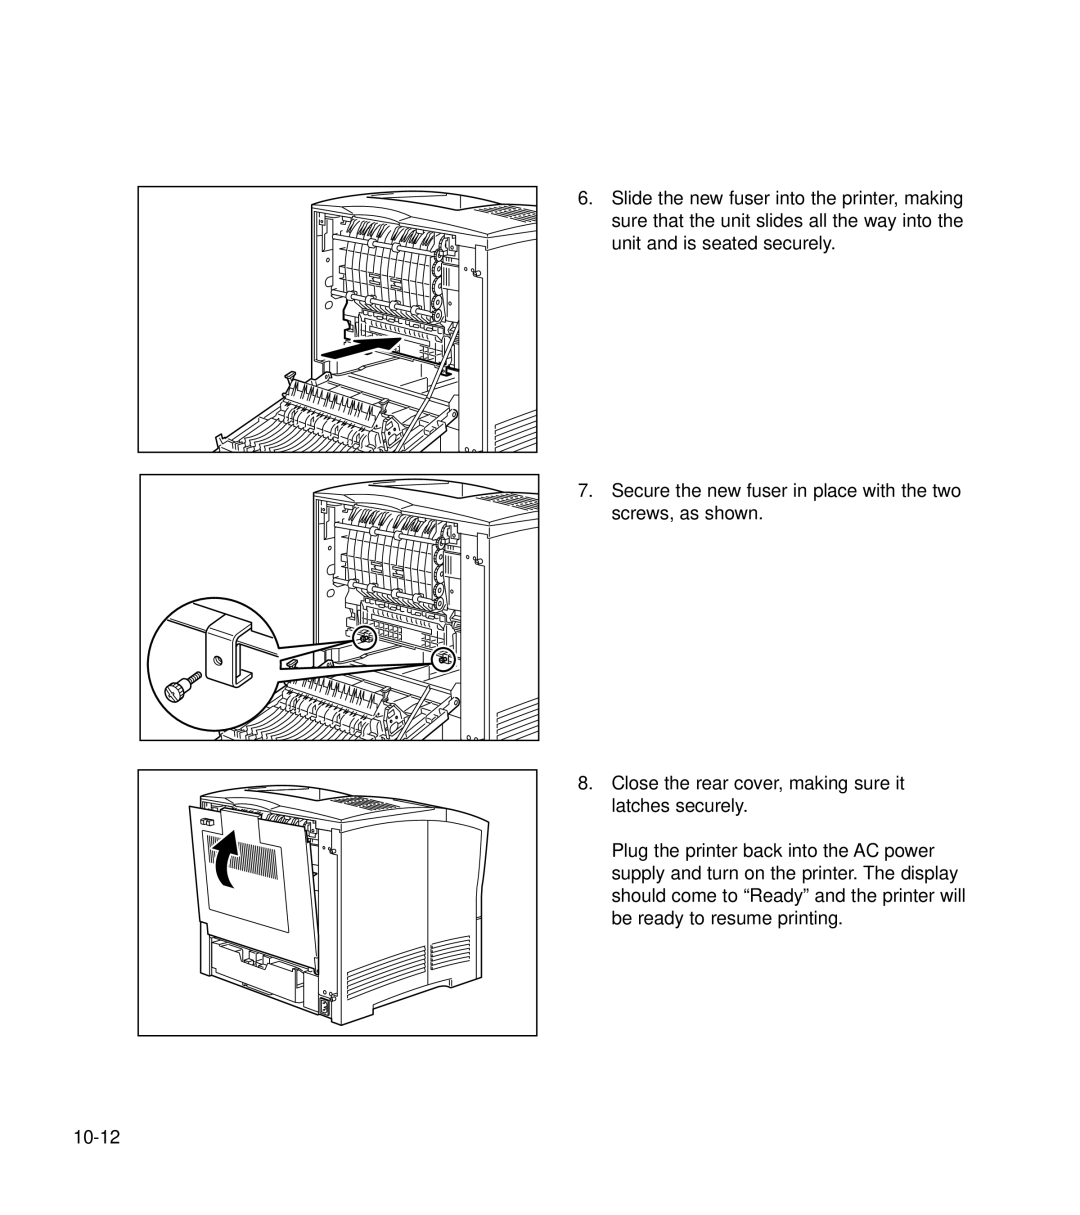
6.Slide the new fuser into the printer, making sure that the unit slides all the way into the unit and is seated securely.
7.Secure the new fuser in place with the two screws, as shown.
8.Close the rear cover, making sure it latches securely.
Plug the printer back into the AC power supply and turn on the printer. The display should come to “Ready” and the printer will be ready to resume printing.