Windows 95/98 Software Installation - Using the Add Printer Wizard
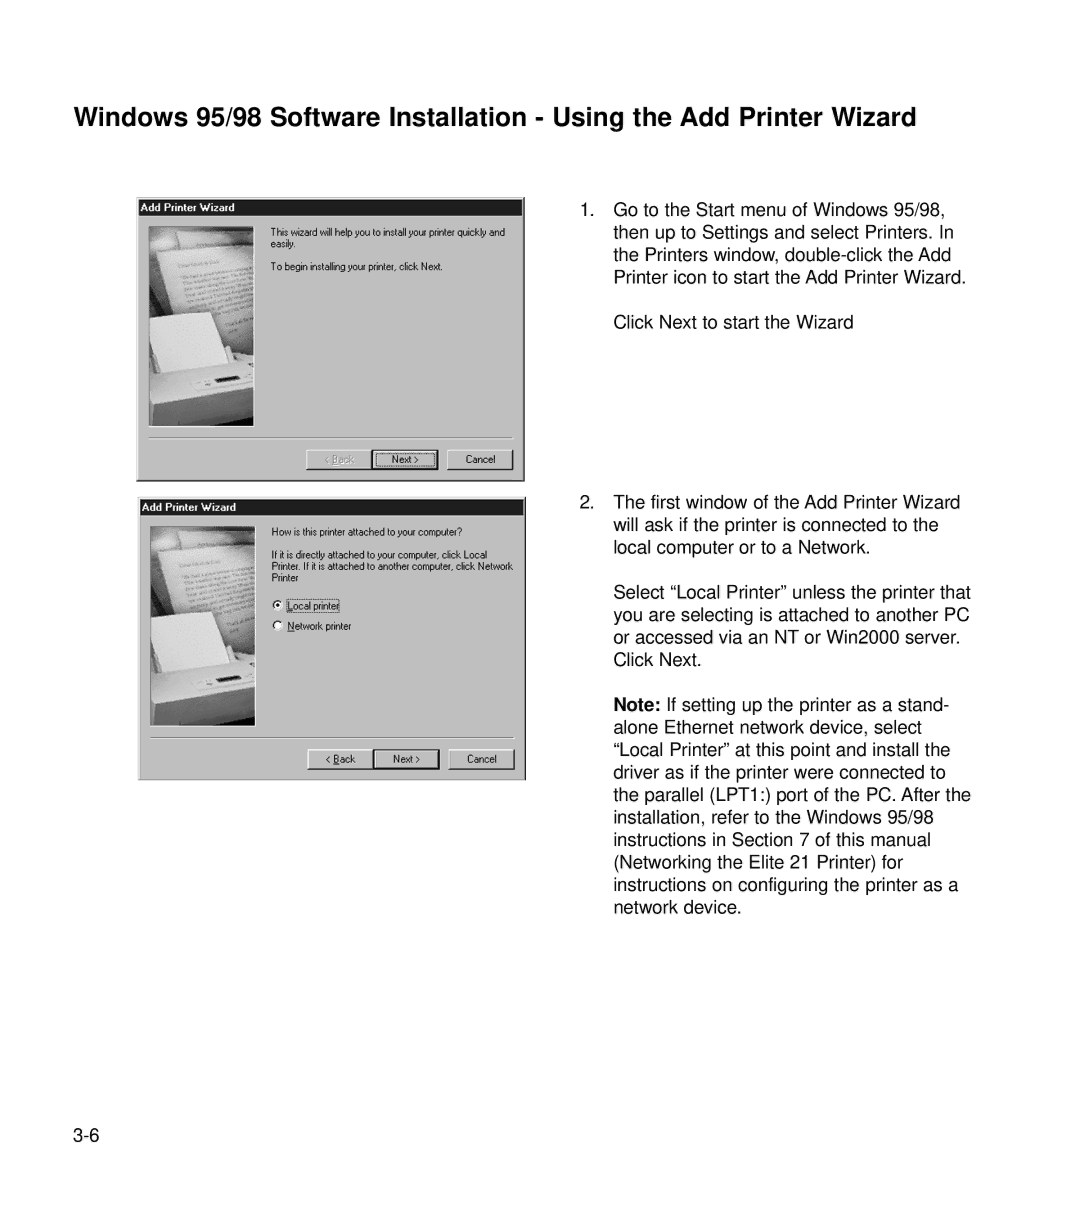
1. Go to the Start menu of Windows 95/98, then up to Settings and select Printers. In the Printers window,
Click Next to start the Wizard
2. The first window of the Add Printer Wizard will ask if the printer is connected to the local computer or to a Network.
Select “Local Printer” unless the printer that you are selecting is attached to another PC or accessed via an NT or Win2000 server.
Click Next.
Note: If setting up the printer as a stand- alone Ethernet network device, select “Local Printer” at this point and install the driver as if the printer were connected to the parallel (LPT1:) port of the PC. After the installation, refer to the Windows 95/98 instructions in Section 7 of this manual (Networking the Elite 21 Printer) for instructions on configuring the printer as a network device.