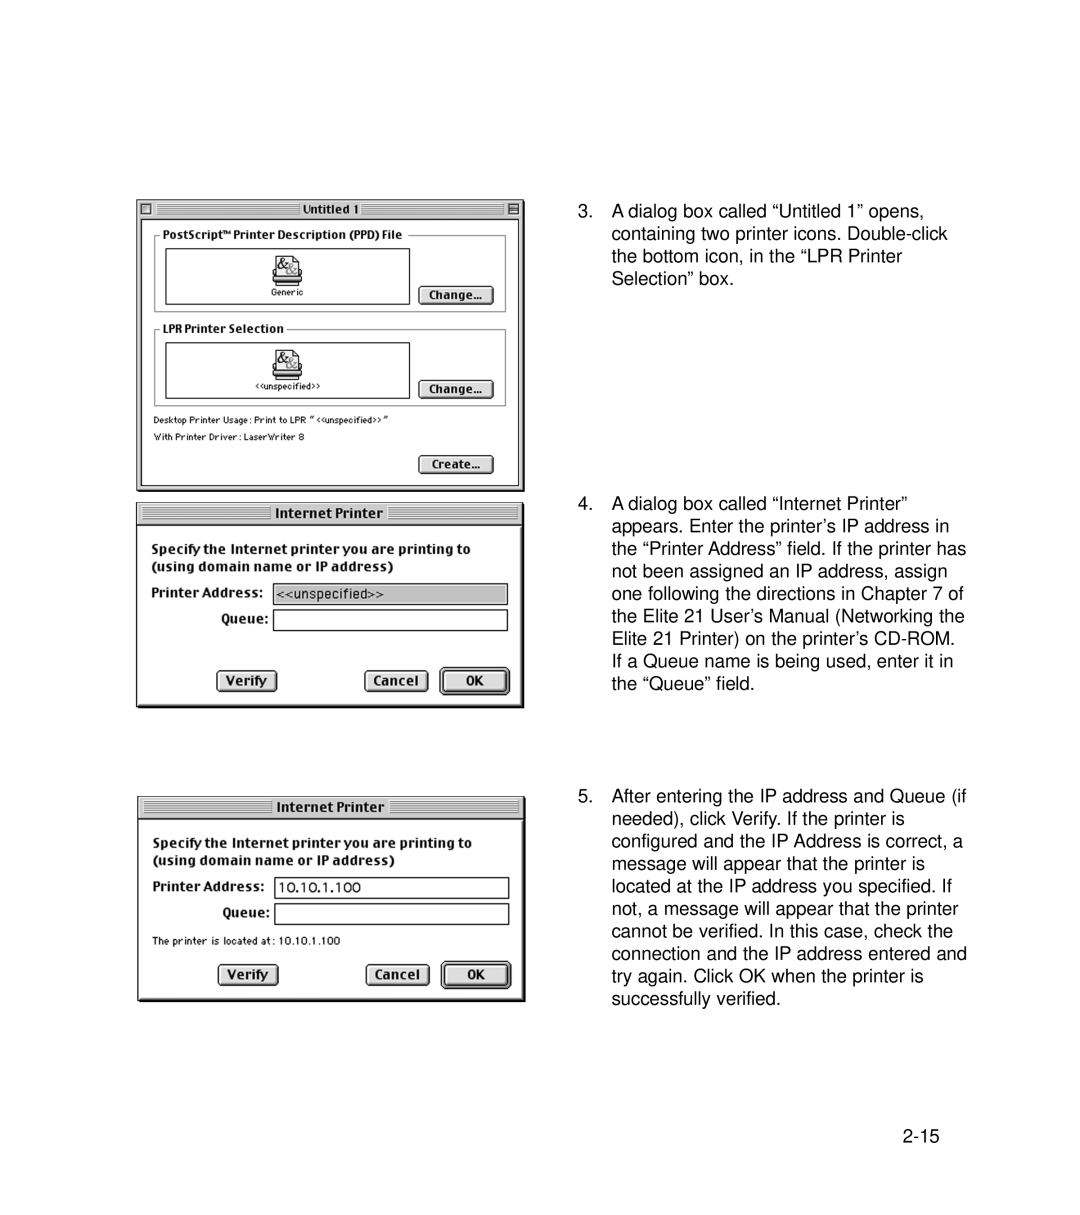
3.A dialog box called “Untitled 1” opens, containing two printer icons.
4.A dialog box called “Internet Printer” appears. Enter the printer’s IP address in the “Printer Address” field. If the printer has not been assigned an IP address, assign one following the directions in Chapter 7 of the Elite 21 User’s Manual (Networking the Elite 21 Printer) on the printer’s
5.After entering the IP address and Queue (if needed), click Verify. If the printer is configured and the IP Address is correct, a message will appear that the printer is located at the IP address you specified. If not, a message will appear that the printer cannot be verified. In this case, check the connection and the IP address entered and try again. Click OK when the printer is successfully verified.
