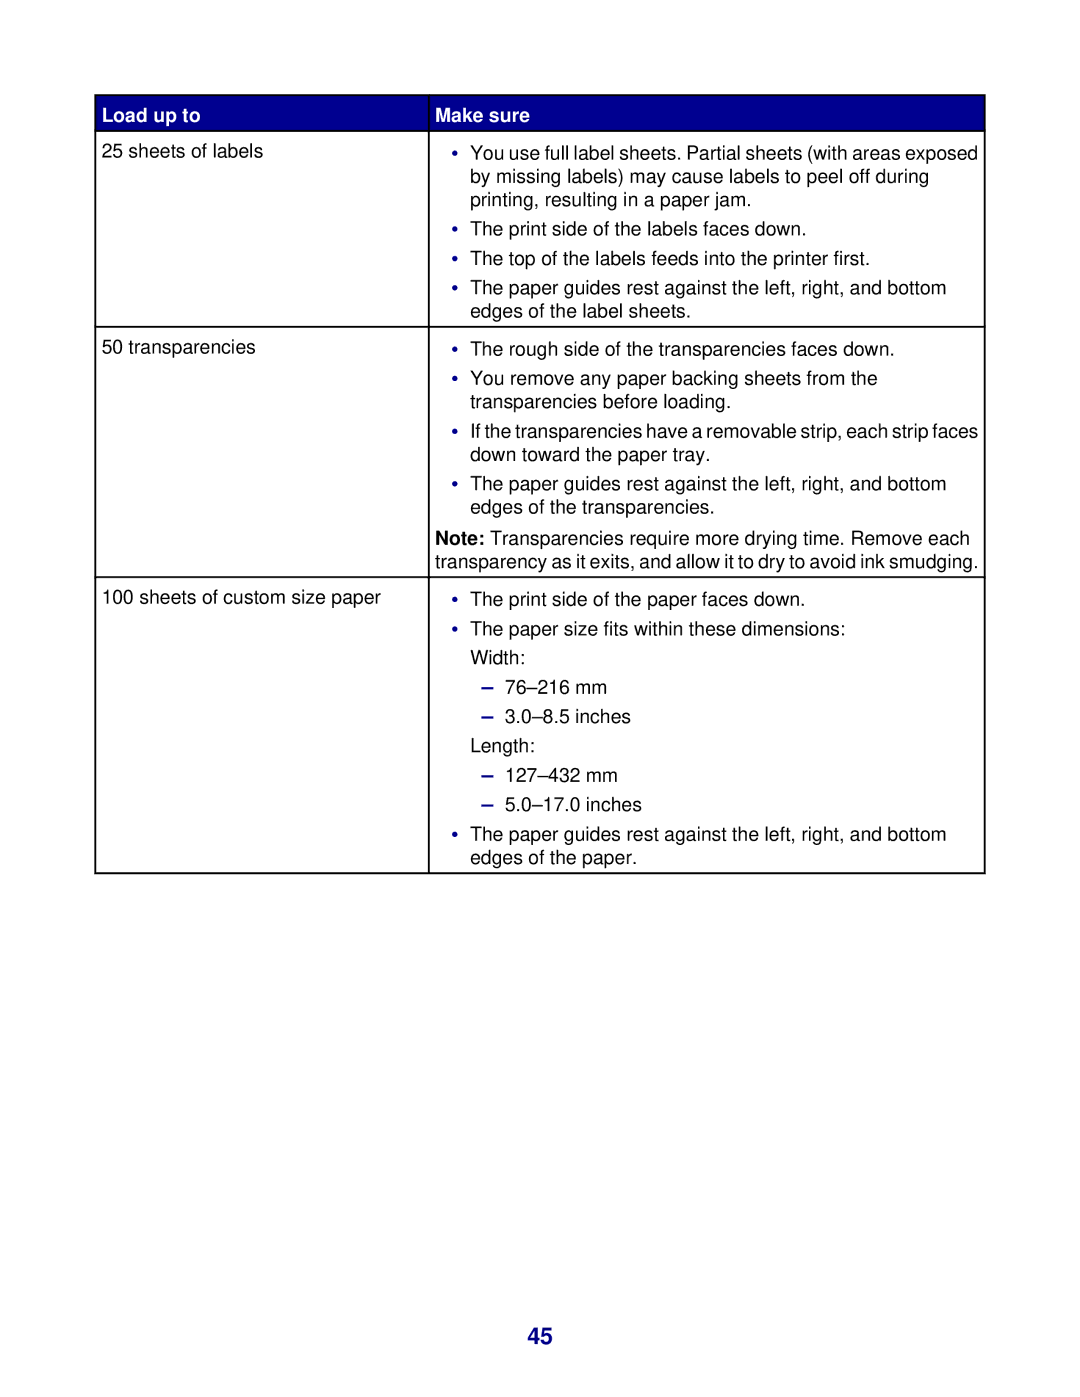
Load up to | Make sure | ||
25 sheets of labels | • | You use full label sheets. Partial sheets (with areas exposed |
|
|
| by missing labels) may cause labels to peel off during | |
|
| printing, resulting in a paper jam. | |
| • | The print side of the labels faces down. | |
| • | The top of the labels feeds into the printer first. | |
| • | The paper guides rest against the left, right, and bottom | |
|
| edges of the label sheets. | |
|
|
|
|
50 transparencies | • | The rough side of the transparencies faces down. | |
| • | You remove any paper backing sheets from the | |
|
| transparencies before loading. | |
| • If the transparencies have a removable strip, each strip faces | ||
|
| down toward the paper tray. | |
| • | The paper guides rest against the left, right, and bottom | |
|
| edges of the transparencies. | |
| Note: Transparencies require more drying time. Remove each | ||
| transparency as it exits, and allow it to dry to avoid ink smudging. | ||
|
|
|
|
100 sheets of custom size paper | • | The print side of the paper faces down. | |
| • | The paper size fits within these dimensions: | |
|
| Width: | |
|
| – | |
|
| – | |
|
| Length: | |
|
| – | |
|
| – | |
| • | The paper guides rest against the left, right, and bottom | |
|
| edges of the paper. | |
|
|
|
|
45