Return to Section TOC
Return to Section TOC
Return to Master TOC
Return to Master TOC
TROUBLESHOOTING AND REPAIR | ||
| INPUT RECTIFIER REMOVAL AND REPLACEMENT (continued) |
|
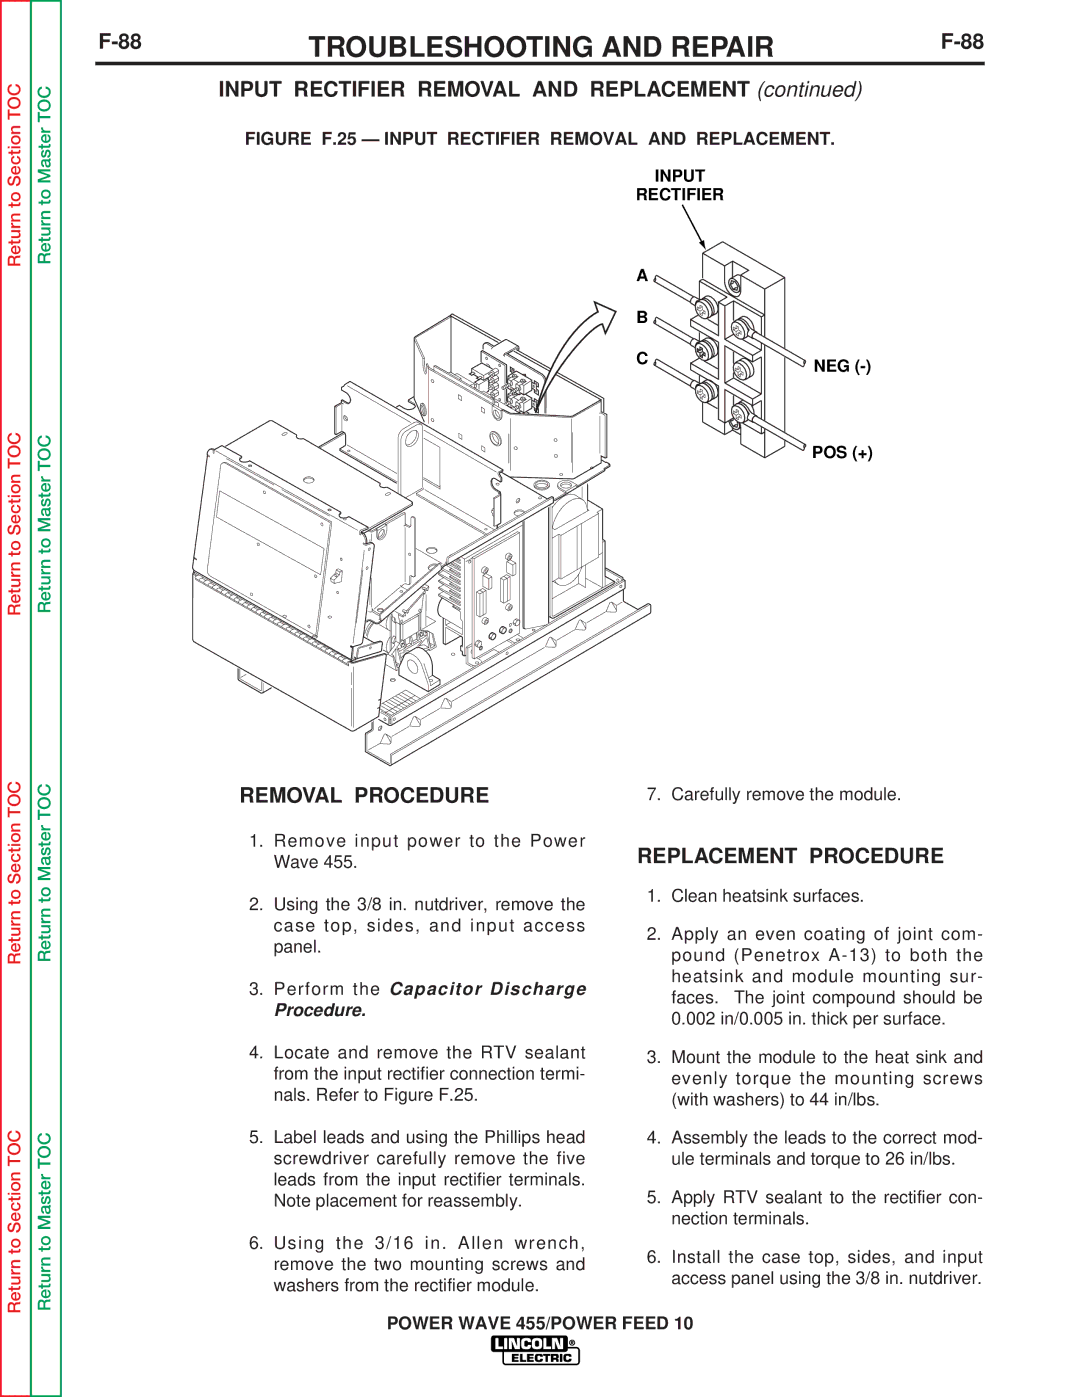
FIGURE F.25 — INPUT RECTIFIER REMOVAL AND REPLACEMENT.
INPUT
RECTIFIER
A |
|
B |
|
C | NEG |
| |
| POS (+) |
Return to Section TOC
Return to Section TOC
Return to Master TOC
Return to Master TOC
REMOVAL PROCEDURE
1.Remove input power to the Power Wave 455.
2.Using the 3/8 in. nutdriver, remove the case top, sides, and input access panel.
3.Perform the Capacitor Discharge
Procedure.
4.Locate and remove the RTV sealant from the input rectifier connection termi- nals. Refer to Figure F.25.
5.Label leads and using the Phillips head screwdriver carefully remove the five leads from the input rectifier terminals. Note placement for reassembly.
6.Using the 3/16 in. Allen wrench, remove the two mounting screws and washers from the rectifier module.
7. Carefully remove the module.
REPLACEMENT PROCEDURE
1.Clean heatsink surfaces.
2.Apply an even coating of joint com- pound (Penetrox
3.Mount the module to the heat sink and evenly torque the mounting screws (with washers) to 44 in/lbs.
4.Assembly the leads to the correct mod- ule terminals and torque to 26 in/lbs.
5.Apply RTV sealant to the rectifier con- nection terminals.
6.Install the case top, sides, and input access panel using the 3/8 in. nutdriver.
