Return to Section TOC
Return to Section TOC
Return to Master TOC
Return to Master TOC
F-62 TROUBLESHOOTING AND REPAIRF-62
GAS SOLENOID REMOVAL AND REPLACEMENT (continued)
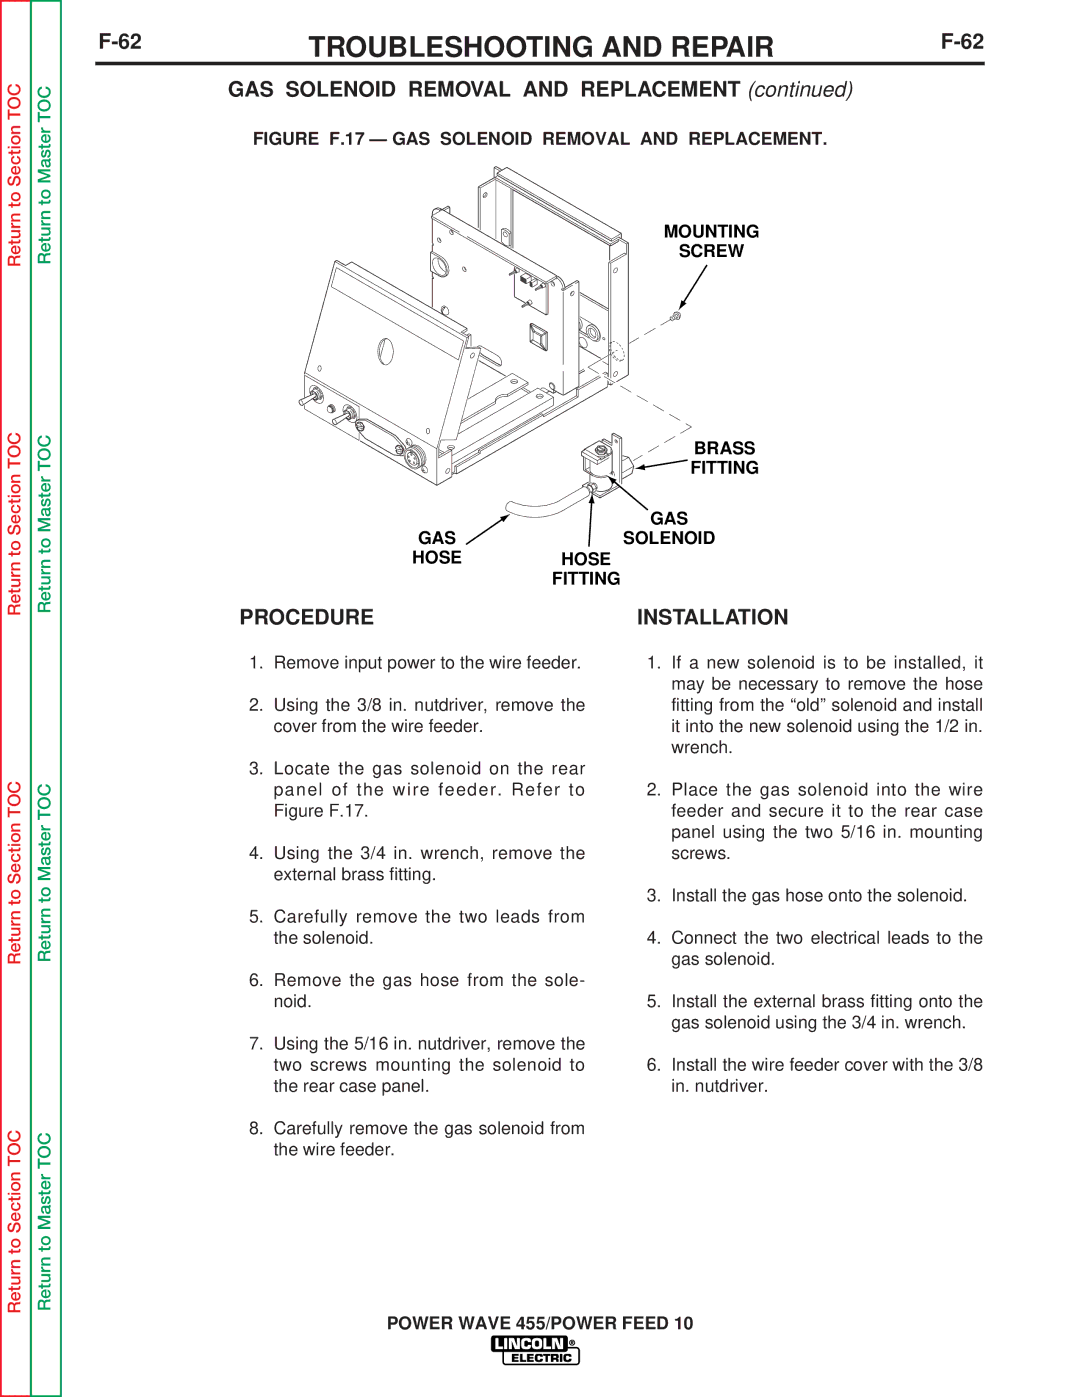
FIGURE F.17 — GAS SOLENOID REMOVAL AND REPLACEMENT.
MOUNTING
SCREW
| BRASS |
| FITTING |
| GAS |
GAS | SOLENOID |
HOSE | HOSE |
| FITTING |
Return to Section TOC
Return to Section TOC
Return to Master TOC
Return to Master TOC
PROCEDURE
1.Remove input power to the wire feeder.
2.Using the 3/8 in. nutdriver, remove the cover from the wire feeder.
3.Locate the gas solenoid on the rear panel of the wire feeder. Refer to Figure F.17.
4.Using the 3/4 in. wrench, remove the external brass fitting.
5.Carefully remove the two leads from the solenoid.
6.Remove the gas hose from the sole- noid.
7.Using the 5/16 in. nutdriver, remove the two screws mounting the solenoid to the rear case panel.
8.Carefully remove the gas solenoid from the wire feeder.
INSTALLATION
1.If a new solenoid is to be installed, it may be necessary to remove the hose fitting from the “old” solenoid and install it into the new solenoid using the 1/2 in. wrench.
2.Place the gas solenoid into the wire feeder and secure it to the rear case panel using the two 5/16 in. mounting screws.
3.Install the gas hose onto the solenoid.
4.Connect the two electrical leads to the gas solenoid.
5.Install the external brass fitting onto the gas solenoid using the 3/4 in. wrench.
6.Install the wire feeder cover with the 3/8 in. nutdriver.
