4 SYSTEM FUNCTIONS
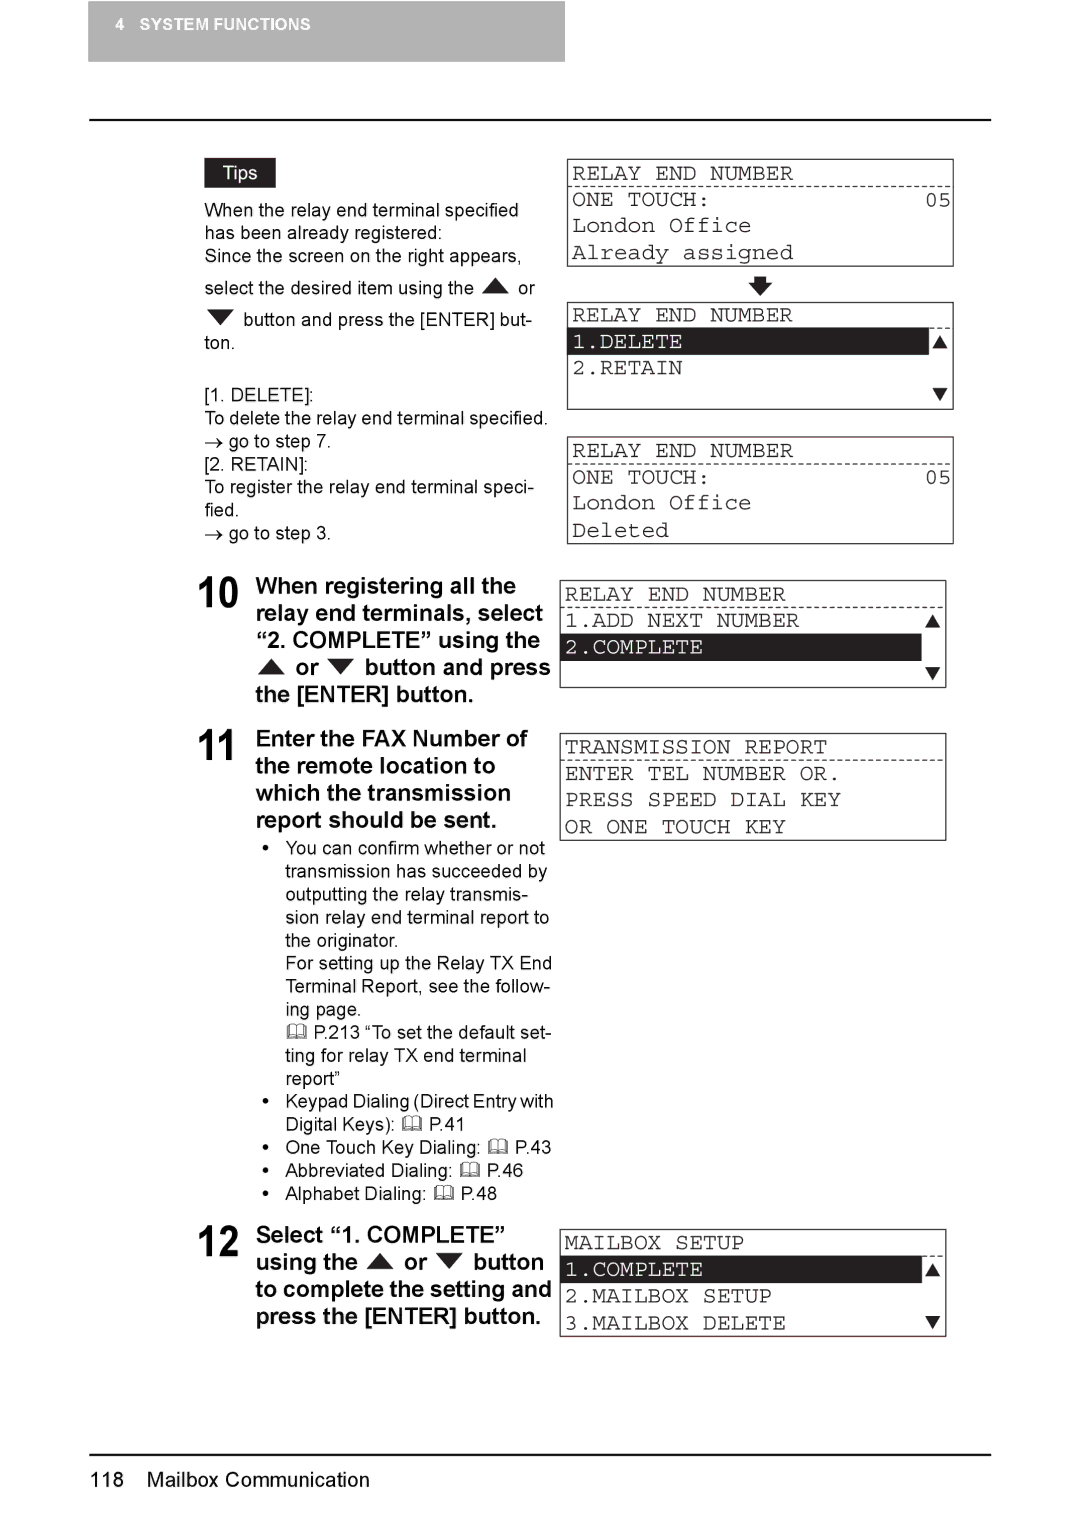
When the relay end terminal specified has been already registered:
Since the screen on the right appears,
select the desired item using the ![]() or
or
![]() button and press the [ENTER] but- ton.
button and press the [ENTER] but- ton.
[1. DELETE]:
To delete the relay end terminal specified.
→go to step 7.
[2. RETAIN]:
To register the relay end terminal speci- fied.
→go to step 3.
10 When registering all the relay end terminals, select “2. COMPLETE” using the ![]() or
or ![]() button and press the [ENTER] button.
button and press the [ENTER] button.
11 Enter the FAX Number of the remote location to which the transmission report should be sent.
yYou can confirm whether or not transmission has succeeded by outputting the relay transmis- sion relay end terminal report to the originator.
For setting up the Relay TX End Terminal Report, see the follow- ing page.
P.213 “To set the default set- ting for relay TX end terminal report”
yKeypad Dialing (Direct Entry with
Digital Keys): P.41
y One Touch Key Dialing: P.43
yAbbreviated Dialing: P.46
yAlphabet Dialing: P.48
| RELAY END NUMBER |
|
|
|
| ONE TOUCH: | 05 | ||
| London Office |
|
|
|
| Already assigned |
|
|
|
|
|
|
|
|
| RELAY END NUMBER |
|
|
|
| 1.DELETE |
|
|
|
| 2.RETAIN |
|
|
|
|
|
|
|
|
|
|
|
|
|
| RELAY END NUMBER |
|
|
|
| ONE TOUCH: | 05 | ||
| London Office |
|
|
|
| Deleted |
|
|
|
|
|
|
| |
RELAY END NUMBER |
|
|
| |
1.ADD NEXT NUMBER |
|
|
| |
2.COMPLETE |
|
|
| |
|
|
|
|
|
|
|
|
| |
TRANSMISSION REPORT |
|
|
| |
ENTER TEL NUMBER OR. |
|
|
| |
PRESS SPEED DIAL KEY |
|
|
| |
OR ONE TOUCH KEY |
|
|
| |
12 Select “1. COMPLETE” using the ![]() or
or ![]() button to complete the setting and press the [ENTER] button.
button to complete the setting and press the [ENTER] button.
MAILBOX SETUP
1.COMPLETE
2.MAILBOX SETUP 3.MAILBOX DELETE
118 Mailbox Communication
