2 Select “03. FAX SETUP”
using the ![]() or
or ![]() button and press the [ENTER] but- ton.
button and press the [ENTER] but- ton.
DEFAULT SETTINGS 01.GENERAL SETTING 02.COPY SETUP
03.FAX SETUP
3 Select “14. ACCOUNT CODE” using the ![]() or
or ![]() button and press the [ENTER] button.
button and press the [ENTER] button.
4 Select the desired function
using the ![]() or
or ![]() button and press the [ENTER] but- ton.
button and press the [ENTER] but- ton.
[1.OFF]: Disables account code prompting and printing on the transmission journal.
[2.ON]: Enables account code prompting and printing on the transmission journal.
*Default: [1.OFF]
FAX SETUP 12.TTI
13.SEND AFTER SCAN
14.ACCOUNT CODE
ACCOUNT CODE 1.OFF
2.ON
5 Press the [FAX] button to return to the Fax basic screen.
y You can press the [USER FUNCTIONS] button instead of [FAX] to exit the user func- tions menu and return to the default mode basic screen.
P.24 “Message LCD Screen”
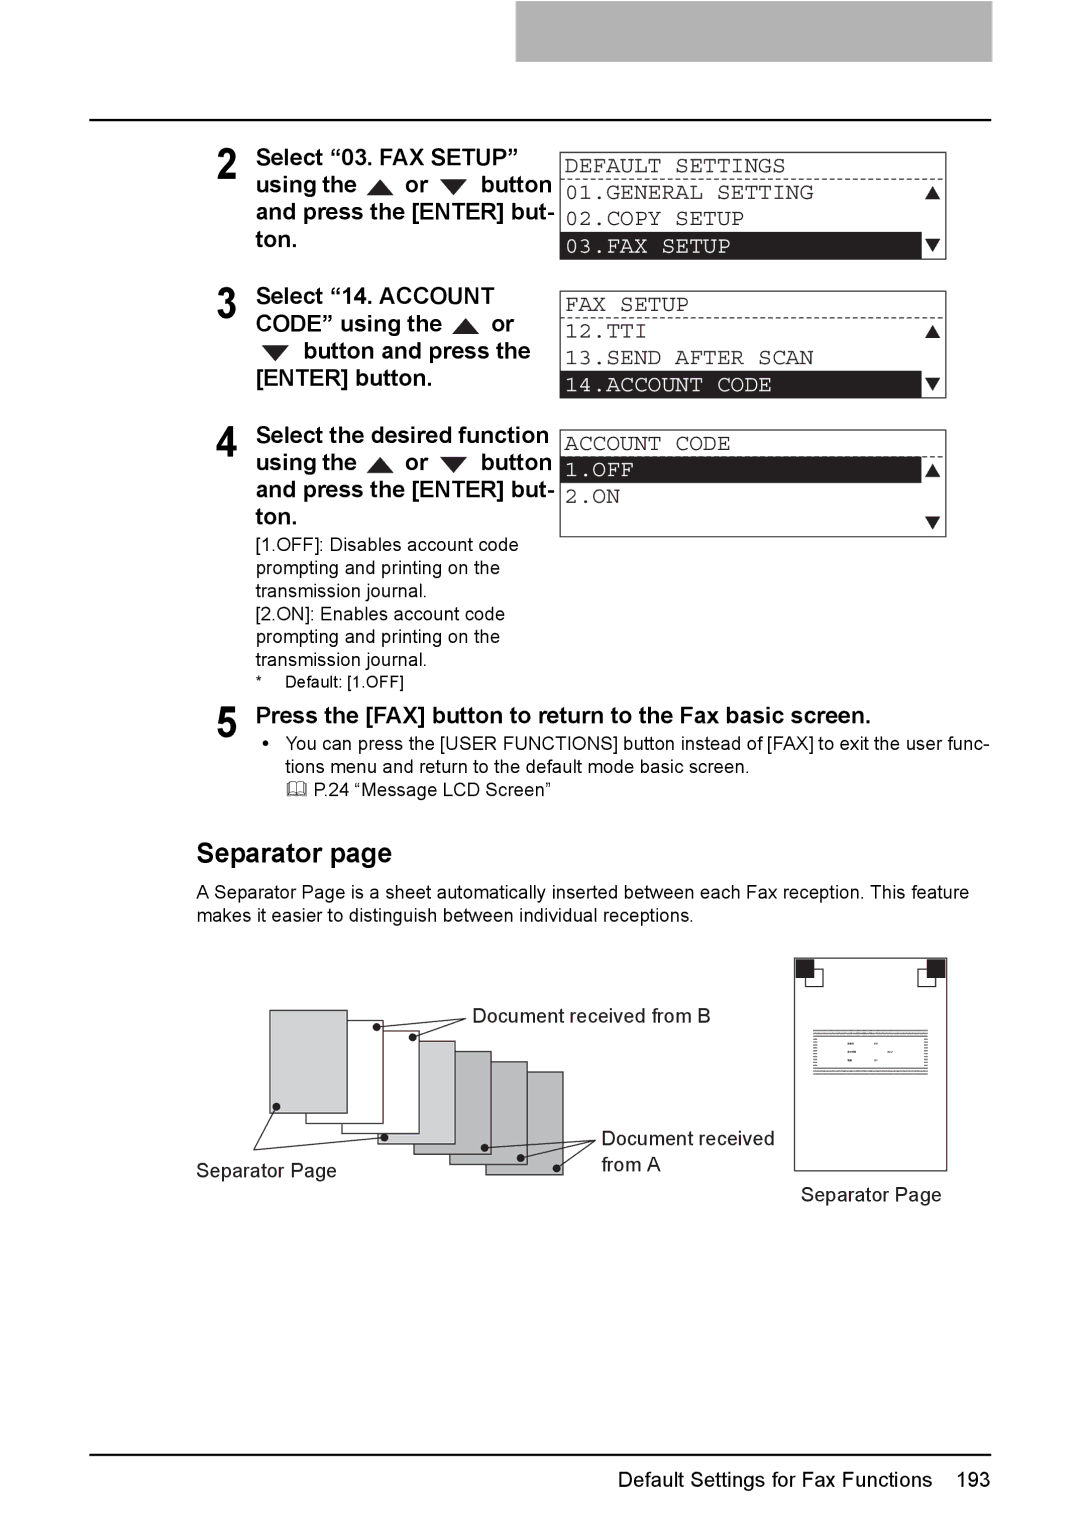
Separator page
A Separator Page is a sheet automatically inserted between each Fax reception. This feature makes it easier to distinguish between individual receptions.
Document received from B
Separator Page
Document received from A
Separator Page
Default Settings for Fax Functions 193