5 Select the mailbox type using the ![]() or
or ![]() button and press the [ENTER] but- ton.
button and press the [ENTER] but- ton.
[1. CONFIDENTIAL]: Allows a one time document retrieval from the mailbox.
[2. BULLETIN BOARD]:
Allows multiple document retrievals from the mailbox.
[3. RELAY]:
Not used in this operation. ( P.115 “Setting up relay mailbox”)
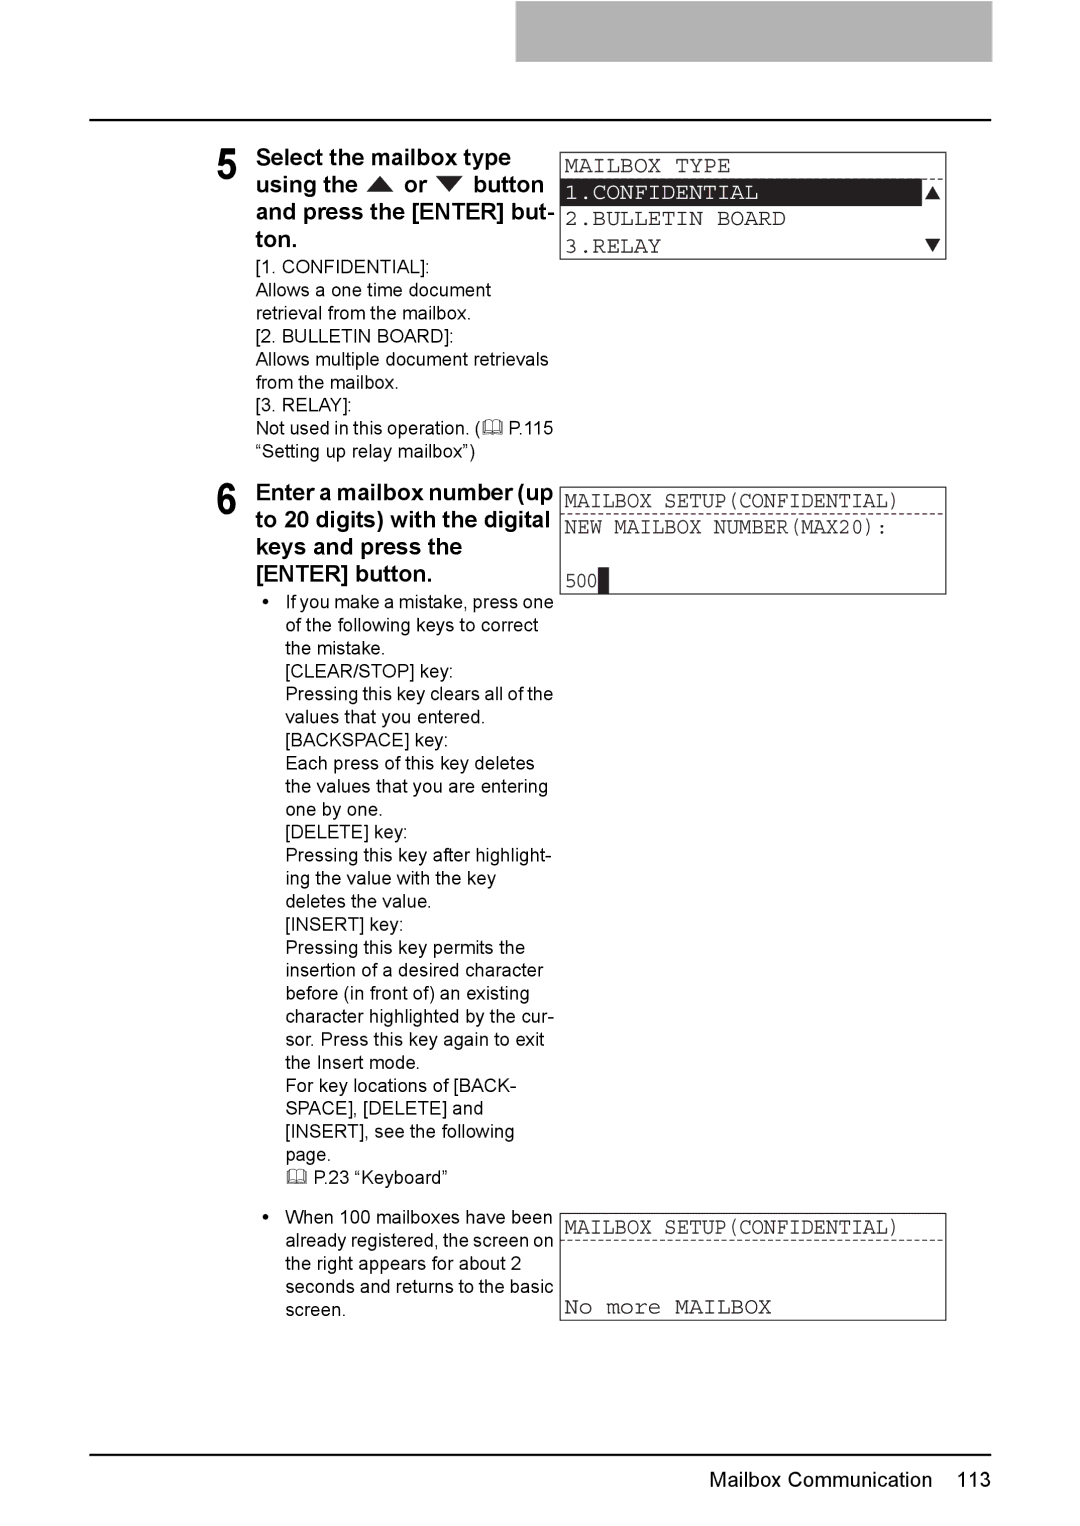
MAILBOX TYPE
1.CONFIDENTIAL
2.BULLETIN BOARD 3.RELAY
6 | Enter a mailbox number (up |
to 20 digits) with the digital |
keys and press the [ENTER] button.
yIf you make a mistake, press one of the following keys to correct the mistake.
[CLEAR/STOP] key:
Pressing this key clears all of the values that you entered. [BACKSPACE] key:
Each press of this key deletes the values that you are entering one by one.
[DELETE] key:
Pressing this key after highlight- ing the value with the key deletes the value.
[INSERT] key:
Pressing this key permits the insertion of a desired character before (in front of) an existing character highlighted by the cur- sor. Press this key again to exit the Insert mode.
For key locations of [BACK- SPACE], [DELETE] and [INSERT], see the following page.
P.23 “Keyboard”
yWhen 100 mailboxes have been already registered, the screen on the right appears for about 2 seconds and returns to the basic screen.
MAILBOX SETUP(CONFIDENTIAL) NEW MAILBOX NUMBER(MAX20):
500![]()
MAILBOX SETUP(CONFIDENTIAL)
No more MAILBOX
Mailbox Communication 113
