5 ENTERING & SETTING ITEMS
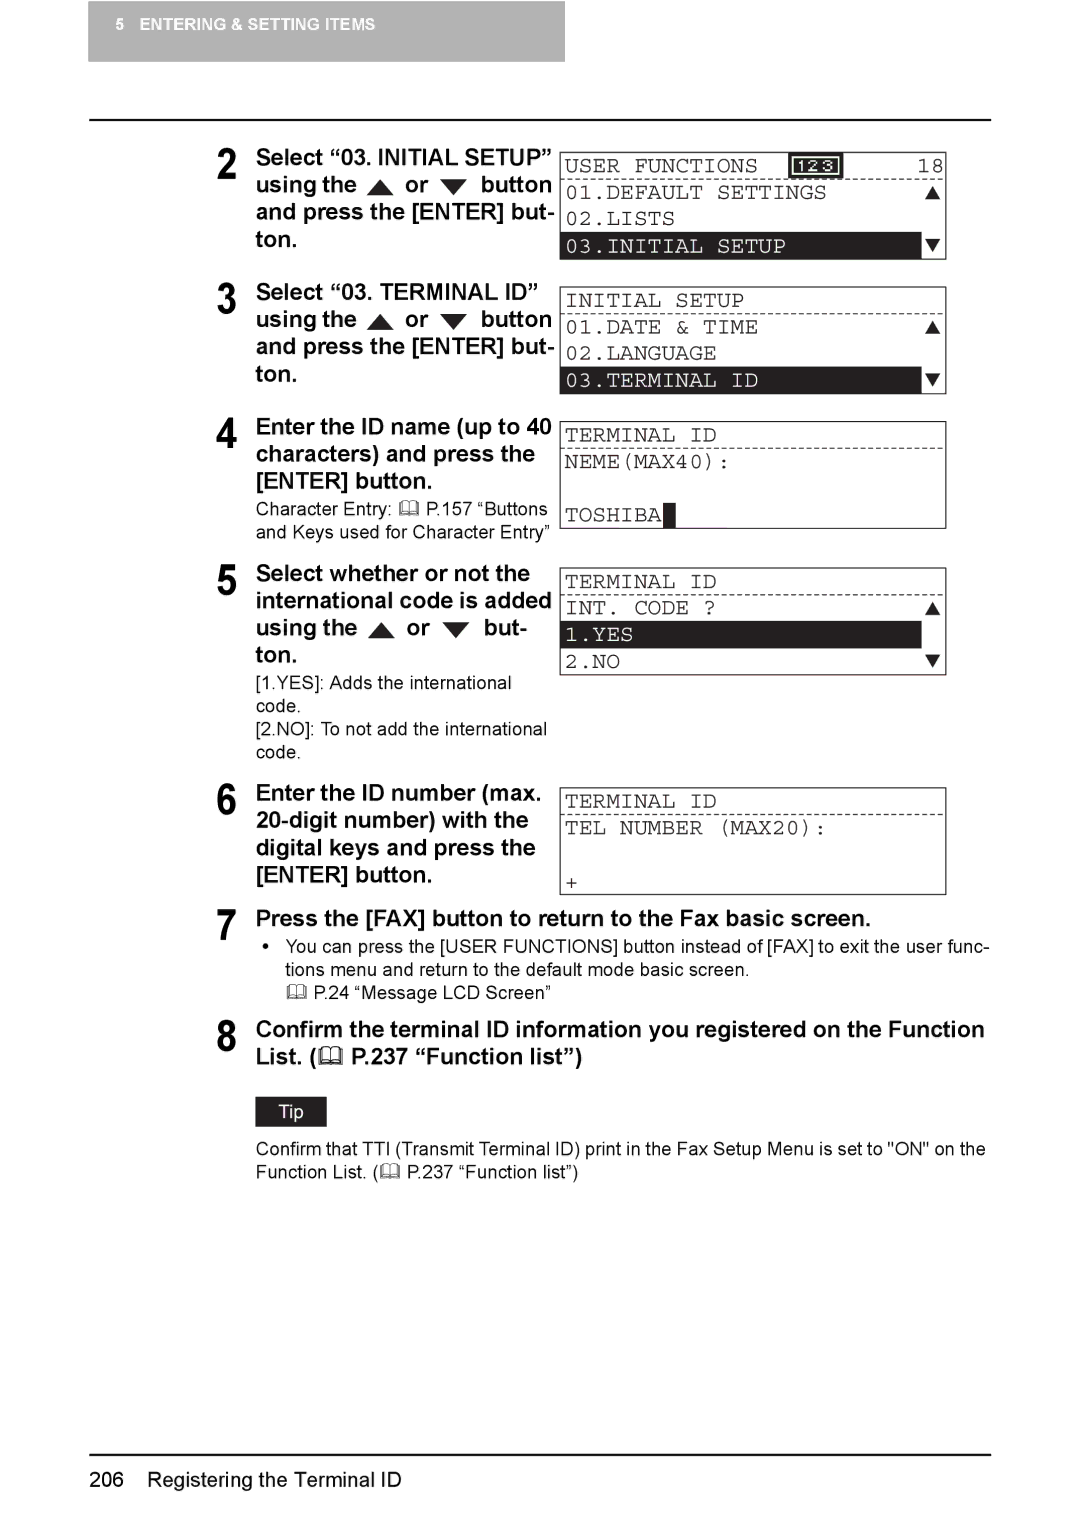
2 Select “03. INITIAL SETUP”
using the ![]() or
or ![]() button and press the [ENTER] but- ton.
button and press the [ENTER] but- ton.
3 Select “03. TERMINAL ID”
using the ![]() or
or ![]() button and press the [ENTER] but- ton.
button and press the [ENTER] but- ton.
4 Enter the ID name (up to 40 characters) and press the [ENTER] button.
Character Entry: P.157 “Buttons and Keys used for Character Entry”
5 Select whether or not the international code is added
using the  or
or  but- ton.
[1.YES]: Adds the international code.
[2.NO]: To not add the international code.
USER FUNCTIONS | 18 |
01.DEFAULT SETTINGS 02.LISTS
03.INITIAL SETUP
INITIAL SETUP 01.DATE & TIME 02.LANGUAGE
03.TERMINAL ID
TERMINAL ID
NEME(MAX40):
TOSHIBA![]()
TERMINAL ID
INT. CODE ?
1.YES
2.NO
6 Enter the ID number (max.
TERMINAL ID
TEL NUMBER (MAX20):
+
7 Press the [FAX] button to return to the Fax basic screen.
yYou can press the [USER FUNCTIONS] button instead of [FAX] to exit the user func- tions menu and return to the default mode basic screen.
P.24 “Message LCD Screen”
8 | Confirm the terminal ID information you registered on the Function |
List. ( P.237 “Function list”) |
Confirm that TTI (Transmit Terminal ID) print in the Fax Setup Menu is set to "ON" on the Function List. ( P.237 “Function list”)
206 Registering the Terminal ID
