9Disconnect the fan power cables from the system board.
10Disconnect any additional cables from the system board.
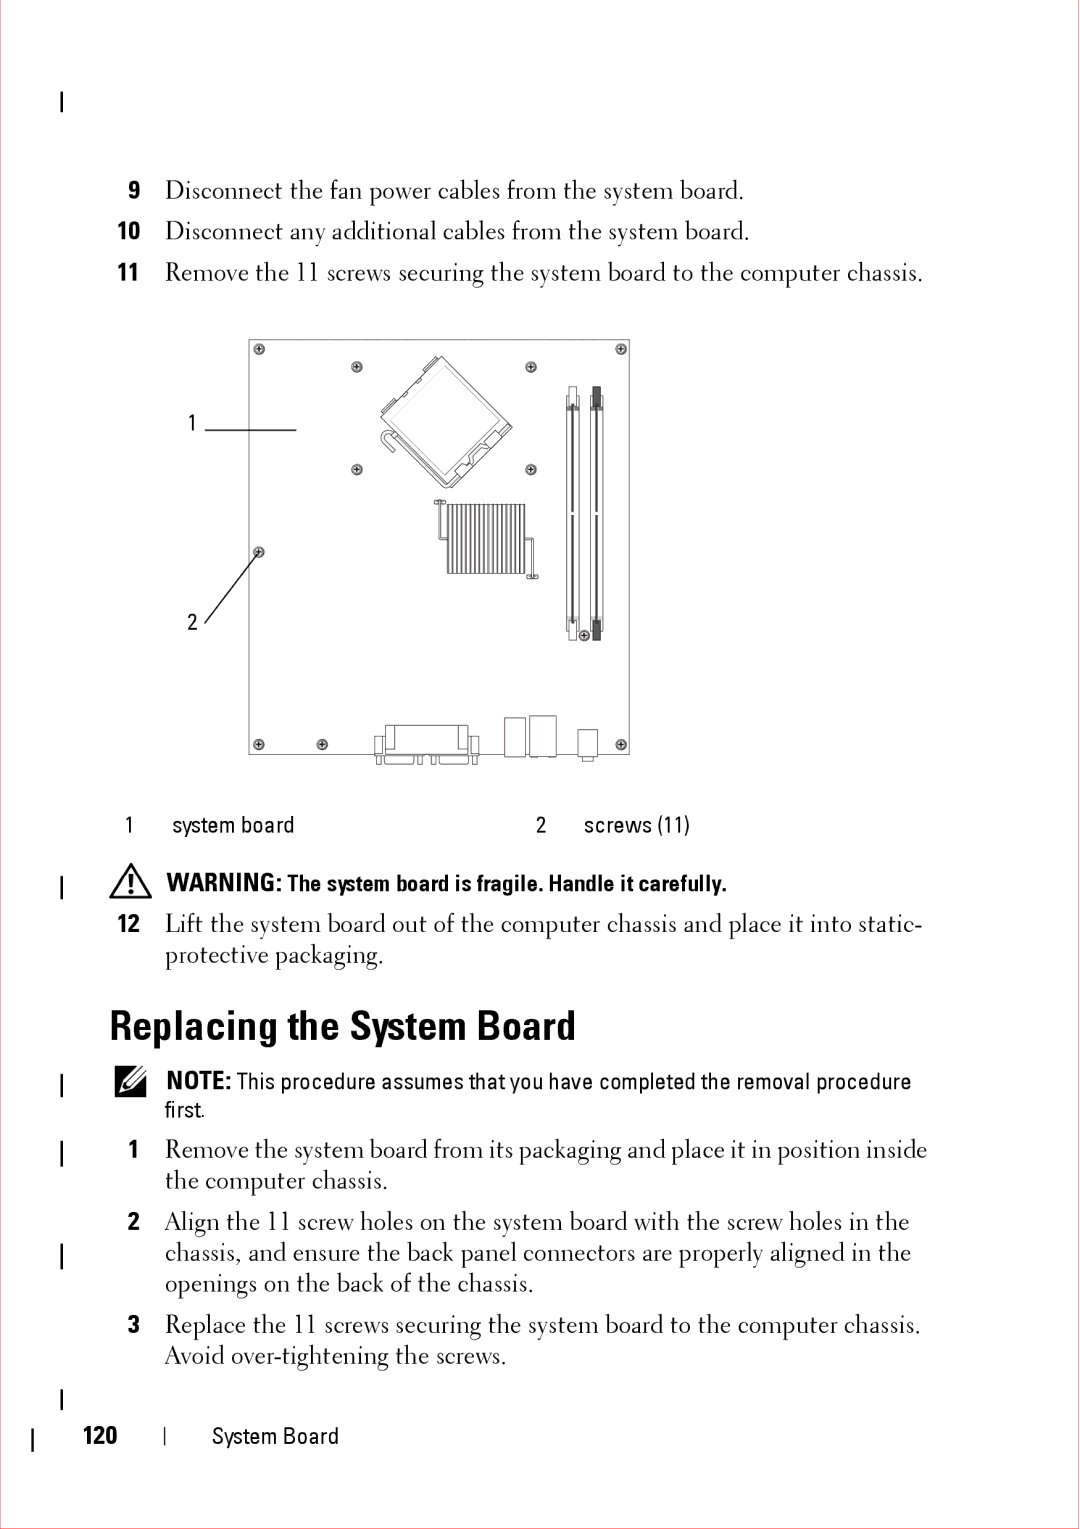
11Remove the 11 screws securing the system board to the computer chassis.
| 1 |
|
|
| 2 |
|
|
1 | system board | 2 | screws (11) |
WARNING: The system board is fragile. Handle it carefully.
12Lift the system board out of the computer chassis and place it into static- protective packaging.
Replacing the System Board
NOTE: This procedure assumes that you have completed the removal procedure first.
1Remove the system board from its packaging and place it in position inside the computer chassis.
2Align the 11 screw holes on the system board with the screw holes in the chassis, and ensure the back panel connectors are properly aligned in the openings on the back of the chassis.
3Replace the 11 screws securing the system board to the computer chassis. Avoid
120
System Board