3Remove the optical drive and set it aside (see "Removing the Optical Drive From the Desktop Computer" on page 59).
CAUTION: Do not pull the drive out of the computer by the drive cables. Doing so may cause damage to cables and the cable connectors.
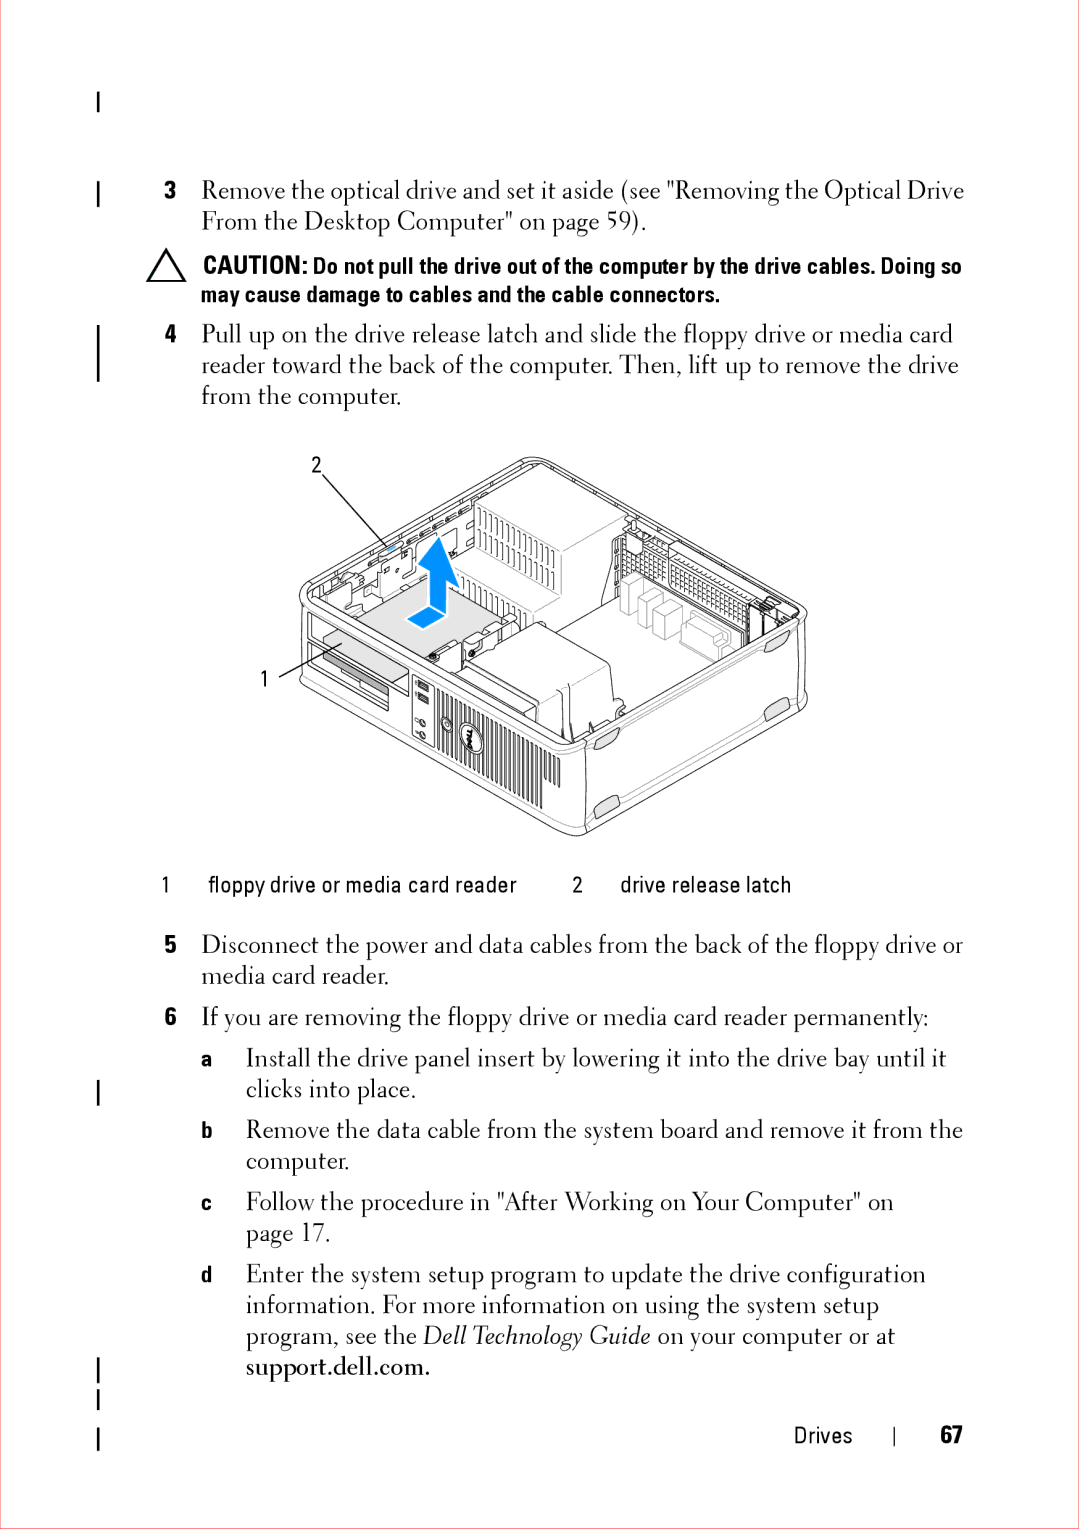
4Pull up on the drive release latch and slide the floppy drive or media card reader toward the back of the computer. Then, lift up to remove the drive from the computer.
2
1 ![]()
![]()
![]()
![]()
1 | floppy drive or media card reader | 2 | drive release latch |
5Disconnect the power and data cables from the back of the floppy drive or media card reader.
6If you are removing the floppy drive or media card reader permanently:
a Install the drive panel insert by lowering it into the drive bay until it clicks into place.
b Remove the data cable from the system board and remove it from the computer.
c Follow the procedure in "After Working on Your Computer" on page 17.
d Enter the system setup program to update the drive configuration information. For more information on using the system setup program, see the Dell Technology Guide on your computer or at support.dell.com.
Drives
67