Removing a Drive Bezel Insert
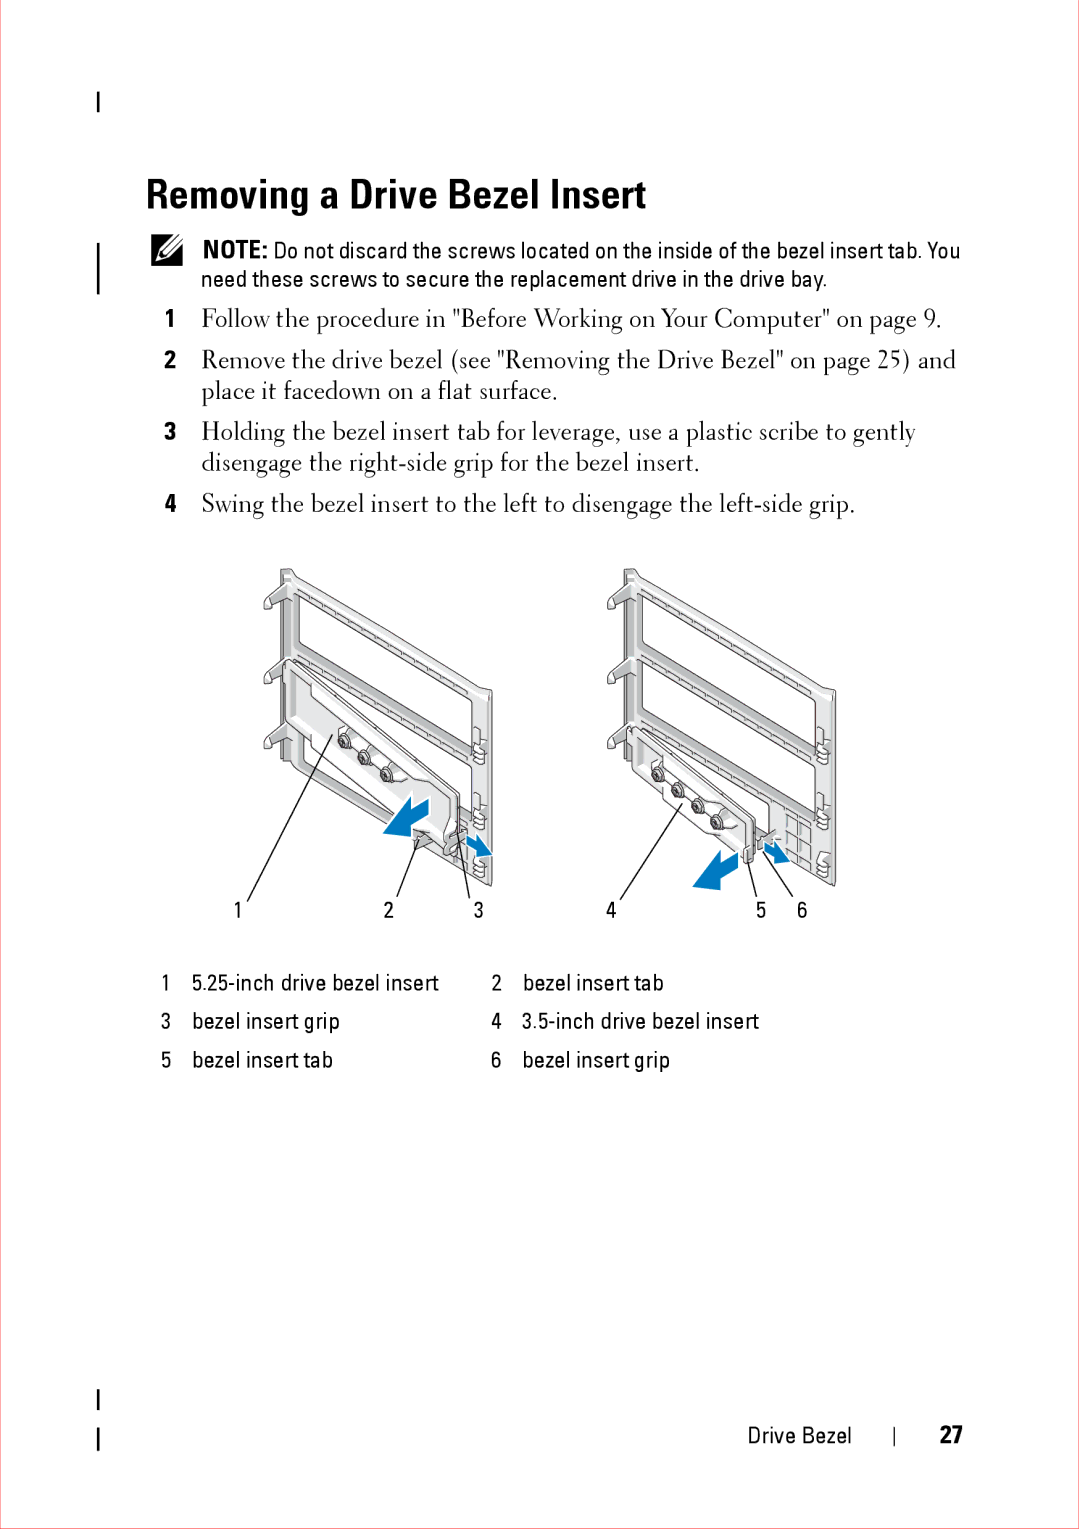
NOTE: Do not discard the screws located on the inside of the bezel insert tab. You need these screws to secure the replacement drive in the drive bay.
1Follow the procedure in "Before Working on Your Computer" on page 9.
2Remove the drive bezel (see "Removing the Drive Bezel" on page 25) and place it facedown on a flat surface.
3Holding the bezel insert tab for leverage, use a plastic scribe to gently disengage the
4Swing the bezel insert to the left to disengage the
| 1 | 2 | 3 |
| 4 | 5 | 6 |
1 |
| 2 | bezel insert tab |
|
| ||
3 | bezel insert grip |
|
| 4 |
| ||
5 | bezel insert tab |
|
| 6 | bezel insert grip |
|
|
Drive Bezel
27
