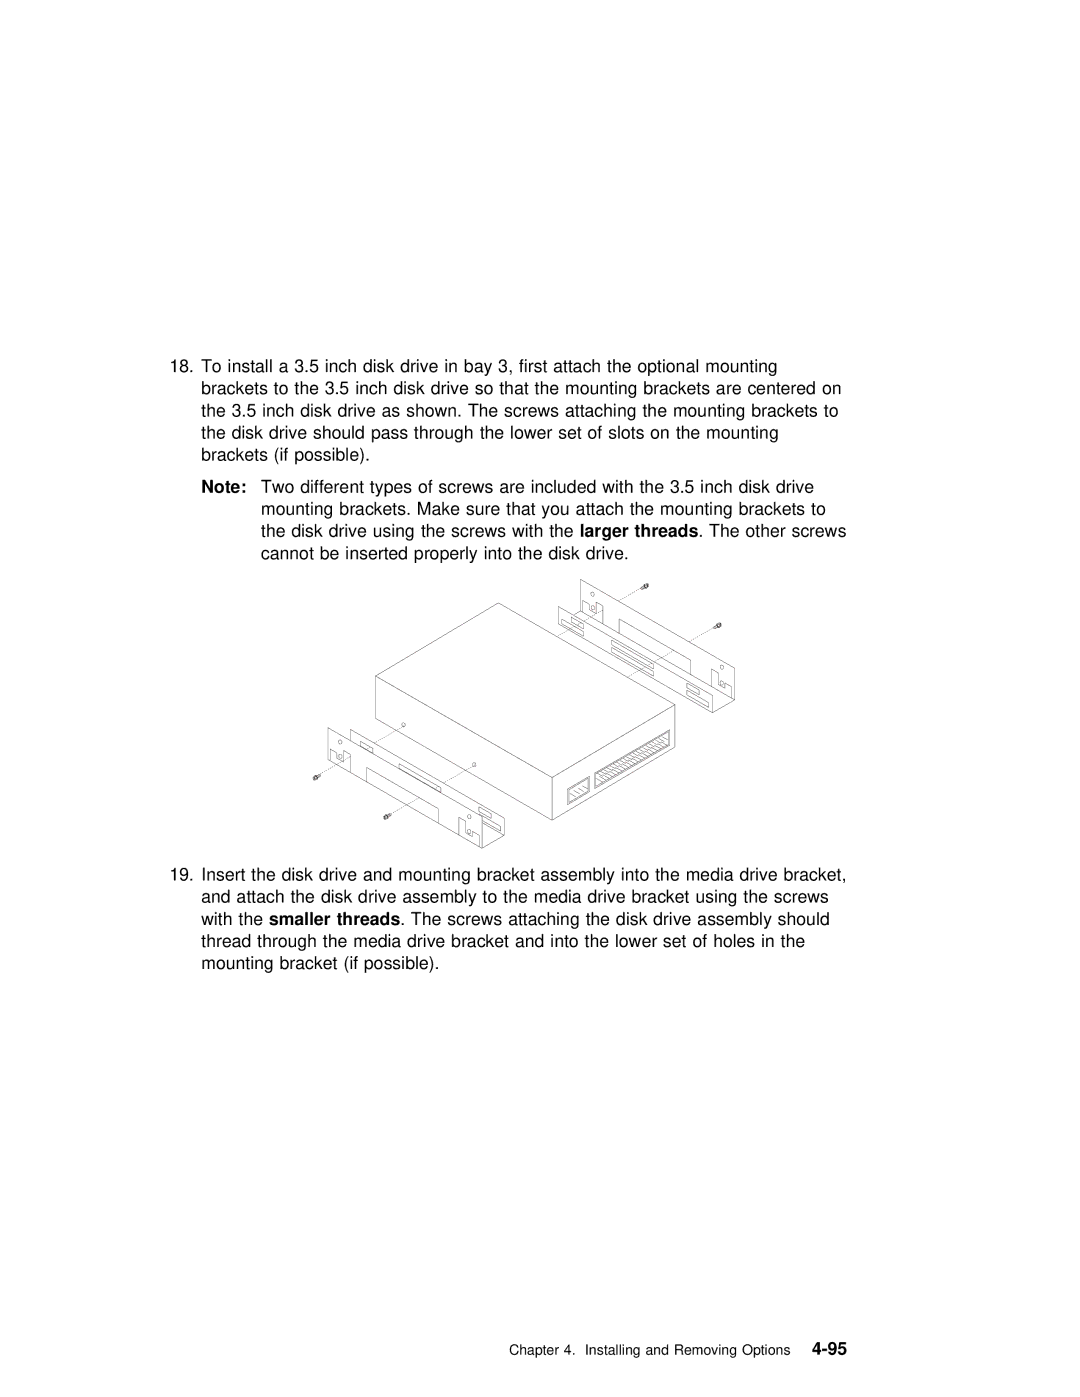
18. To | install | a | 3.5 | inch | disk | drive in bay 3, first | attach | the | o | ||||||||
brackets | to | the | 3.5 | inch | disk drive so that the | mounting | bracke | ||||||||||
the | 3.5 | inch disk drive as shown. The | screws | attaching | the | moun | |||||||||||
the | disk | drive | should | pass | through the lower | set | of | slots | on | t | |||||||
brackets | (if | possible). |
|
|
|
|
|
|
|
|
|
|
| ||||
Note: | Two | different types of screws are included | with |
| the | 3.5 | |||||||||||
| mounting | brackets. | Make | sure | that | you | attach | the | mounting | br | |||||||
| the | disk | drive | using | the | screwslarger threadswith | the.The | other |
| screws | |||||||
| cannot | be |
| inserted properly into | the | disk drive. |
|
|
|
|
| ||||||
19. Insert | the | disk drive and | mounting | bracket | assembly into | the me | ||
and attach | the | disk | drive | assembly | to the | media drive | bracket | |
with thesmaller threads . | The screws attaching the disk drive | assembly | ||||||
thread | through | the | media drive bracket and into the lower set | |||||
mounting | bracket | (if | possible). |
|
|
| ||
Chapter 4. Installing and
