Chapter 4: Management with WebPAM PRO
To create a new disk array:
1.Enter a name for the disk array in the field provided.
2.Check the box to enable initialization, if desired.
If you checked the initialization box, select the type of initialization from the dropdown menu.
•Quick – Erases the reserve sectors of the physical drives being added to the disk array.
•Full – Erases all sectors of the physical drives being added to the disk array.
3.Highlight physical drives you want in the disk array from the Available list and press the >> button to move them to the Selected list.
You can also
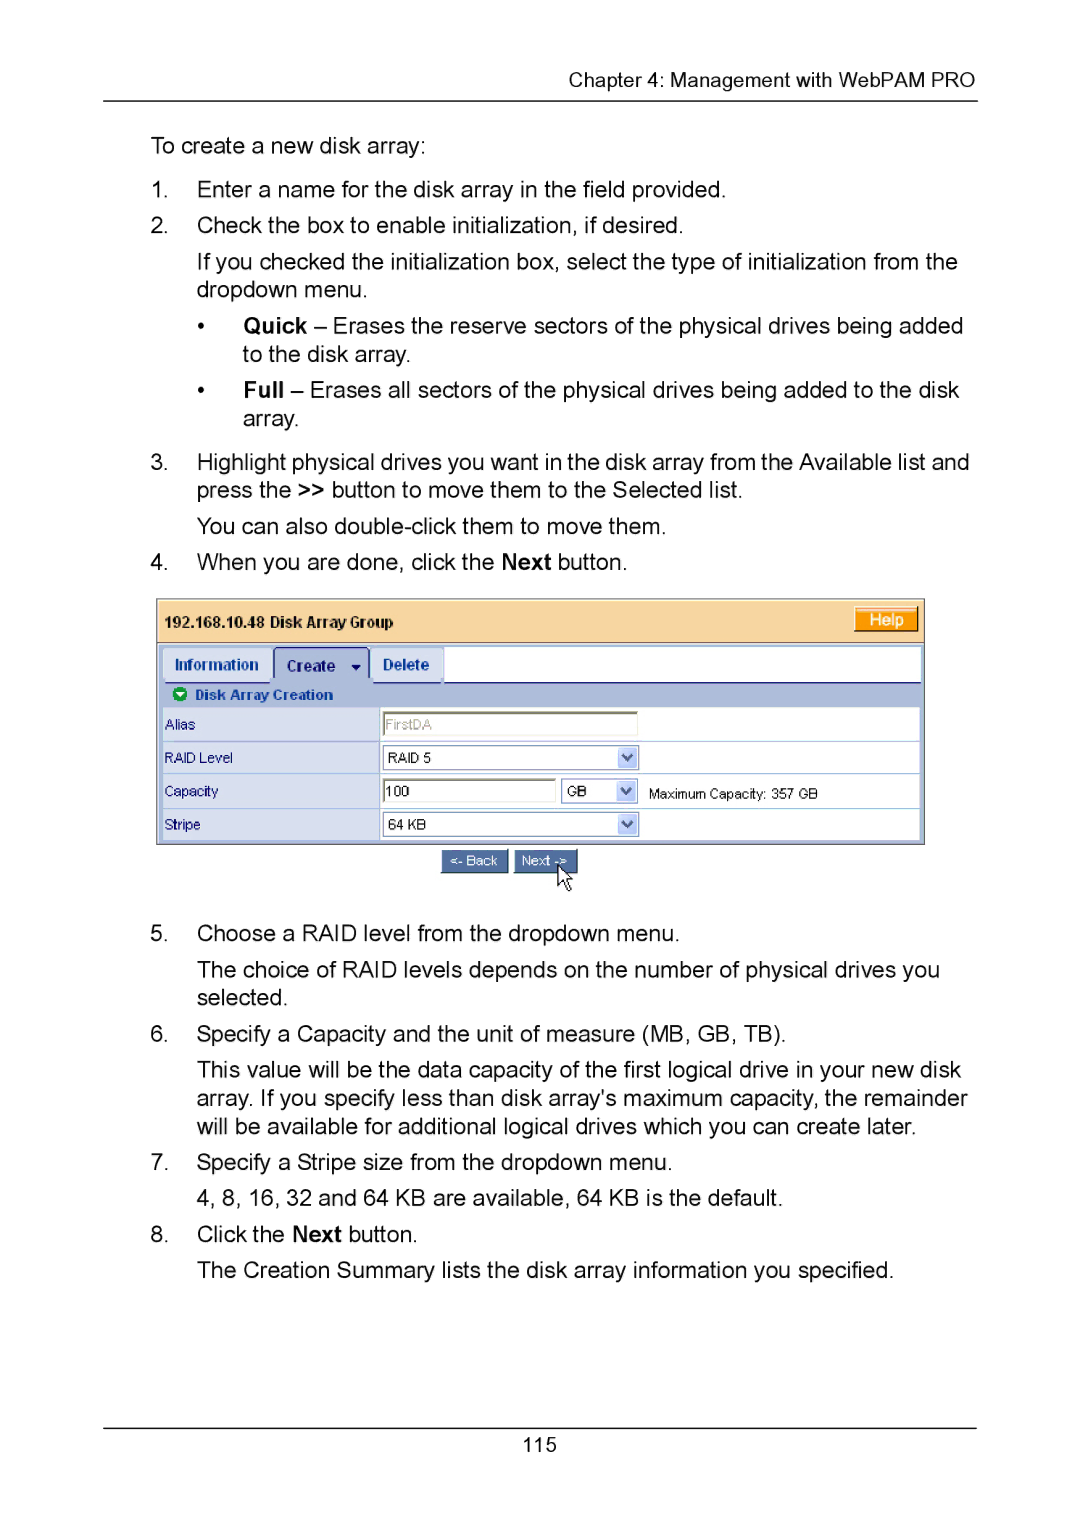
4.When you are done, click the Next button.
5.Choose a RAID level from the dropdown menu.
The choice of RAID levels depends on the number of physical drives you selected.
6.Specify a Capacity and the unit of measure (MB, GB, TB).
This value will be the data capacity of the first logical drive in your new disk array. If you specify less than disk array's maximum capacity, the remainder will be available for additional logical drives which you can create later.
7.Specify a Stripe size from the dropdown menu.
4, 8, 16, 32 and 64 KB are available, 64 KB is the default.
8.Click the Next button.
The Creation Summary lists the disk array information you specified.