VTrak 15110 User Manual
How to use the CLU
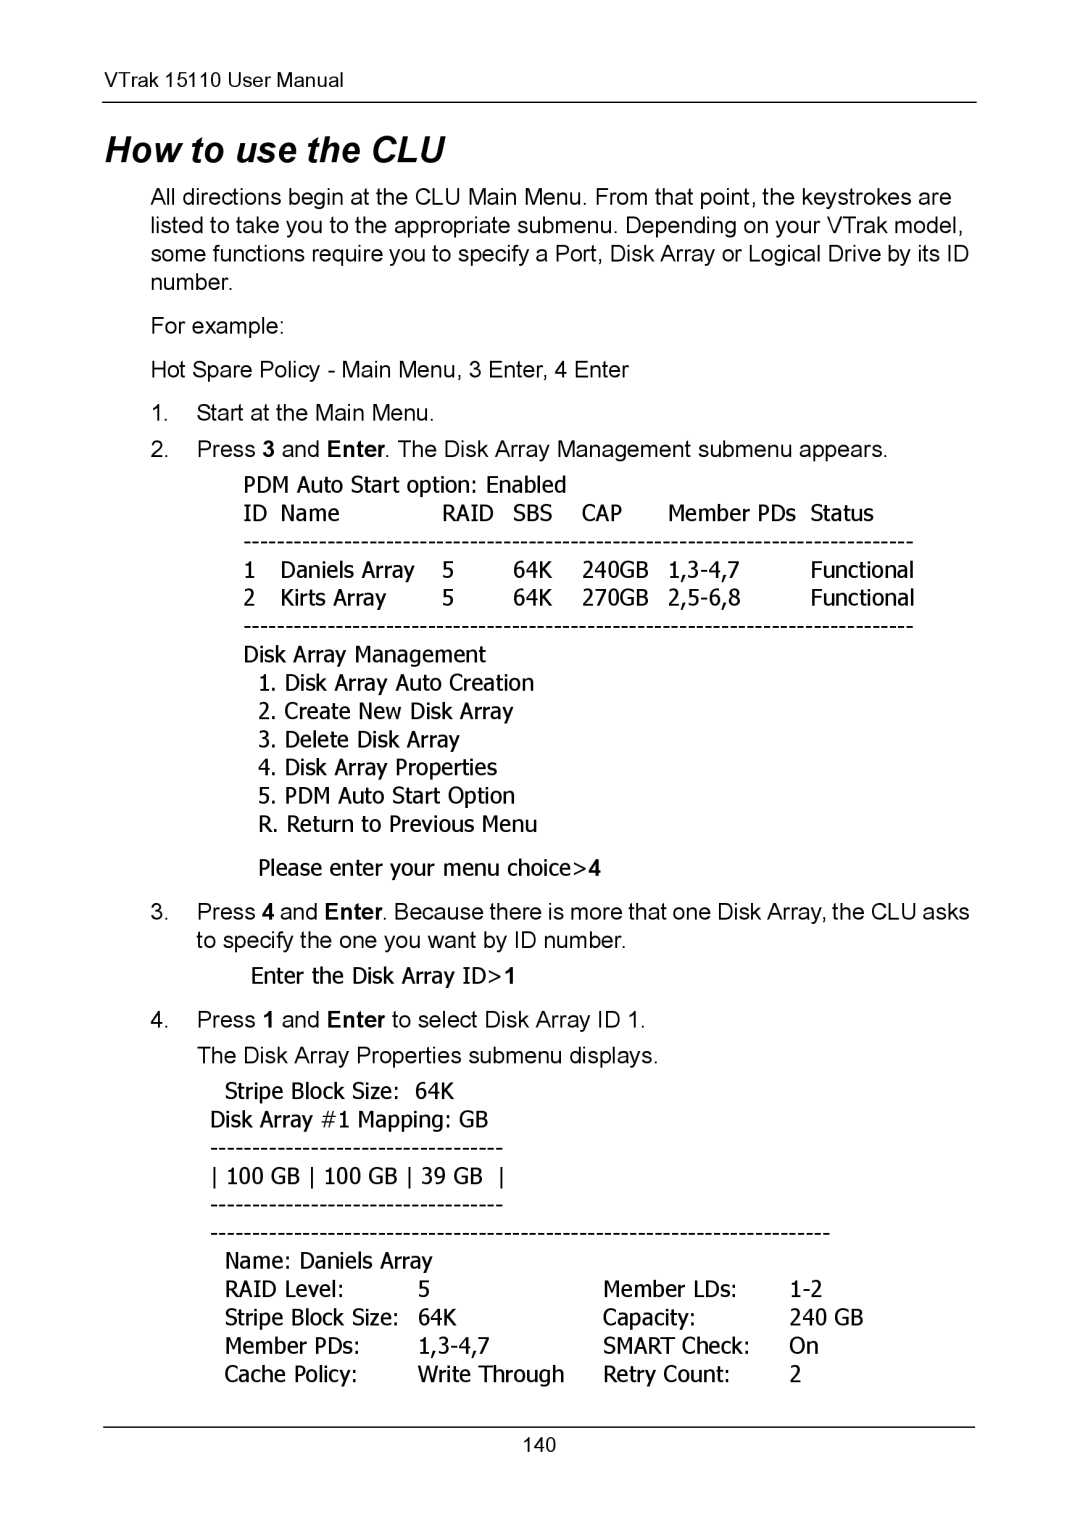
All directions begin at the CLU Main Menu. From that point, the keystrokes are listed to take you to the appropriate submenu. Depending on your VTrak model, some functions require you to specify a Port, Disk Array or Logical Drive by its ID number.
For example:
Hot Spare Policy - Main Menu, 3 Enter, 4 Enter
1.Start at the Main Menu.
2.Press 3 and Enter. The Disk Array Management submenu appears.
PDM Auto Start option: Enabled |
| |
ID Name | RAID SBS CAP | Member PDs Status |
1 | Daniels Array | 5 | 64K | 240GB | Functional | |
2 | Kirts Array | 5 | 64K | 270GB | Functional |
Disk Array Management
1.Disk Array Auto Creation
2.Create New Disk Array
3.Delete Disk Array
4.Disk Array Properties
5.PDM Auto Start Option R. Return to Previous Menu
Please enter your menu choice>4
3.Press 4 and Enter. Because there is more that one Disk Array, the CLU asks to specify the one you want by ID number.
Enter the Disk Array ID>1
4.Press 1 and Enter to select Disk Array ID 1.
The Disk Array Properties submenu displays.
Stripe Block Size: 64K
Disk Array #1 Mapping: GB
100 GB 100 GB 39 GB
Name: Daniels Array |
|
| |
RAID Level: | 5 | Member LDs: | |
Stripe Block Size: | 64K | Capacity: | 240 GB |
Member PDs: | SMART Check: | On | |
Cache Policy: | Write Through | Retry Count: | 2 |
140