Appendix A Migrating to Generation 3
Migration Procedures for the MDS 9513 Director
Se n d d o c u m e n t a t i o n c o m m e n t s t o m d s f e e d b a ck - d o c @ c i s c o . c o m .
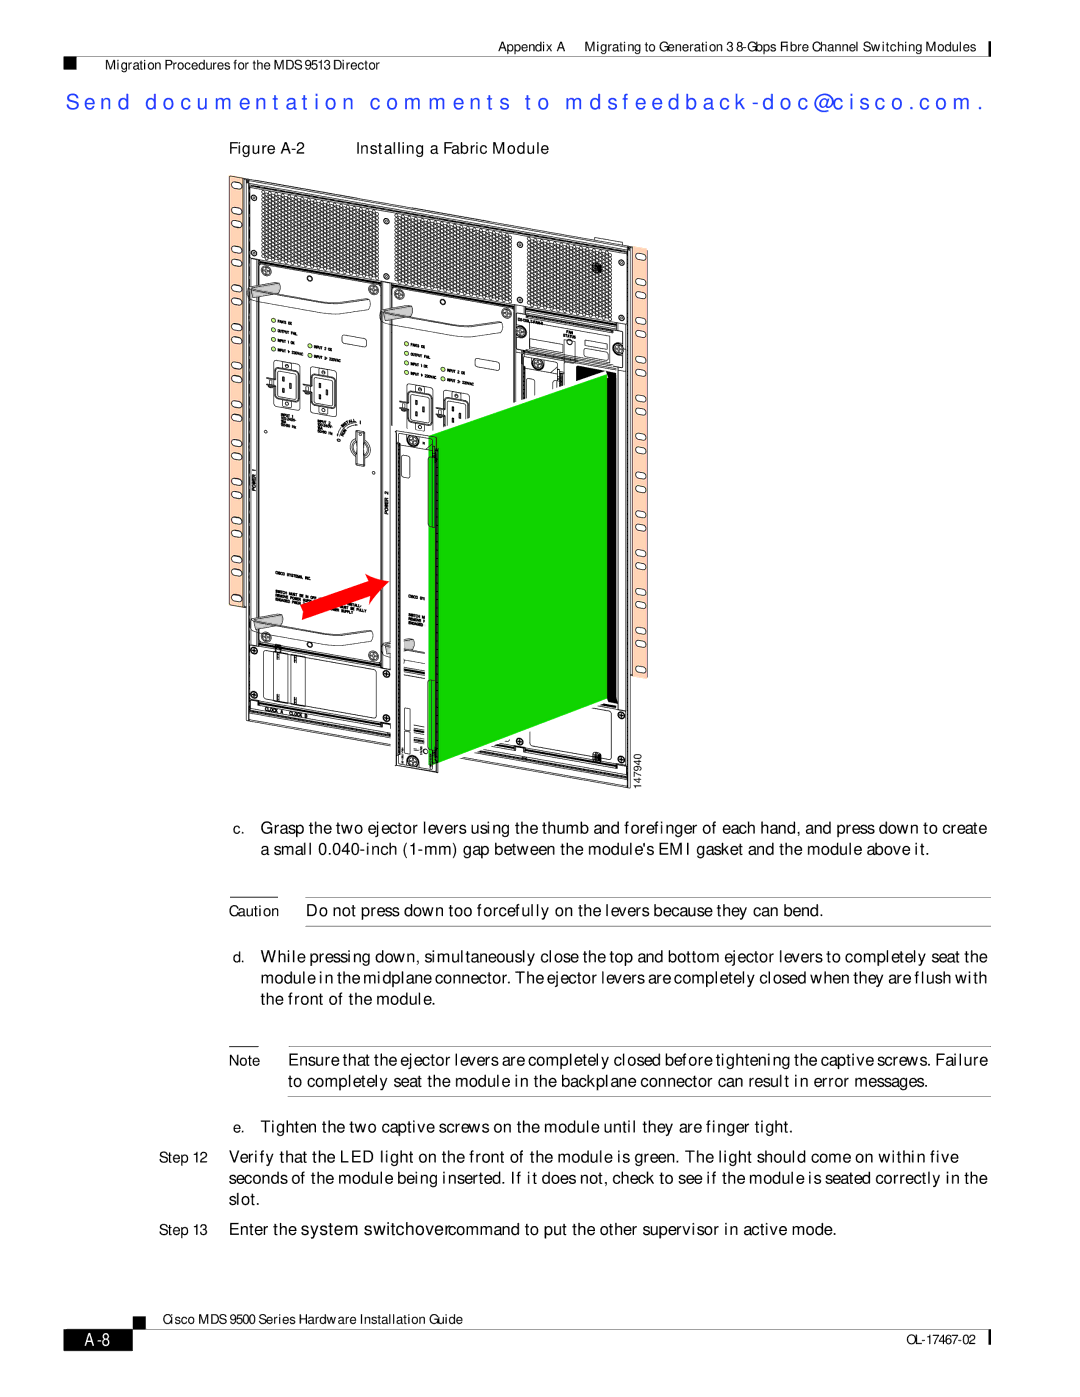
Figure A-2 Installing a Fabric Module
147940
c.Grasp the two ejector levers using the thumb and forefinger of each hand, and press down to create a small
Caution Do not press down too forcefully on the levers because they can bend.
d.While pressing down, simultaneously close the top and bottom ejector levers to completely seat the module in the midplane connector. The ejector levers are completely closed when they are flush with the front of the module.
|
|
|
| Note | Ensure that the ejector levers are completely closed before tightening the captive screws. Failure | |
|
|
|
|
| to completely seat the module in the backplane connector can result in error messages. | |
|
|
|
|
|
| |
|
|
|
| e. Tighten the two captive screws on the module until they are finger tight. | ||
|
|
| Step 12 | Verify that the LED light on the front of the module is green. The light should come on within five | ||
|
|
|
| seconds of the module being inserted. If it does not, check to see if the module is seated correctly in the | ||
|
|
|
| slot. |
|
|
|
|
| Step 13 | Enter the system switchover command to put the other supervisor in active mode. | ||
|
|
| Cisco MDS 9500 Series Hardware Installation Guide | |||
|
|
| ||||
|
|
|
|
|
|
|
|
|
|
|
| ||
|
|
|
|
| ||