Chapter 11
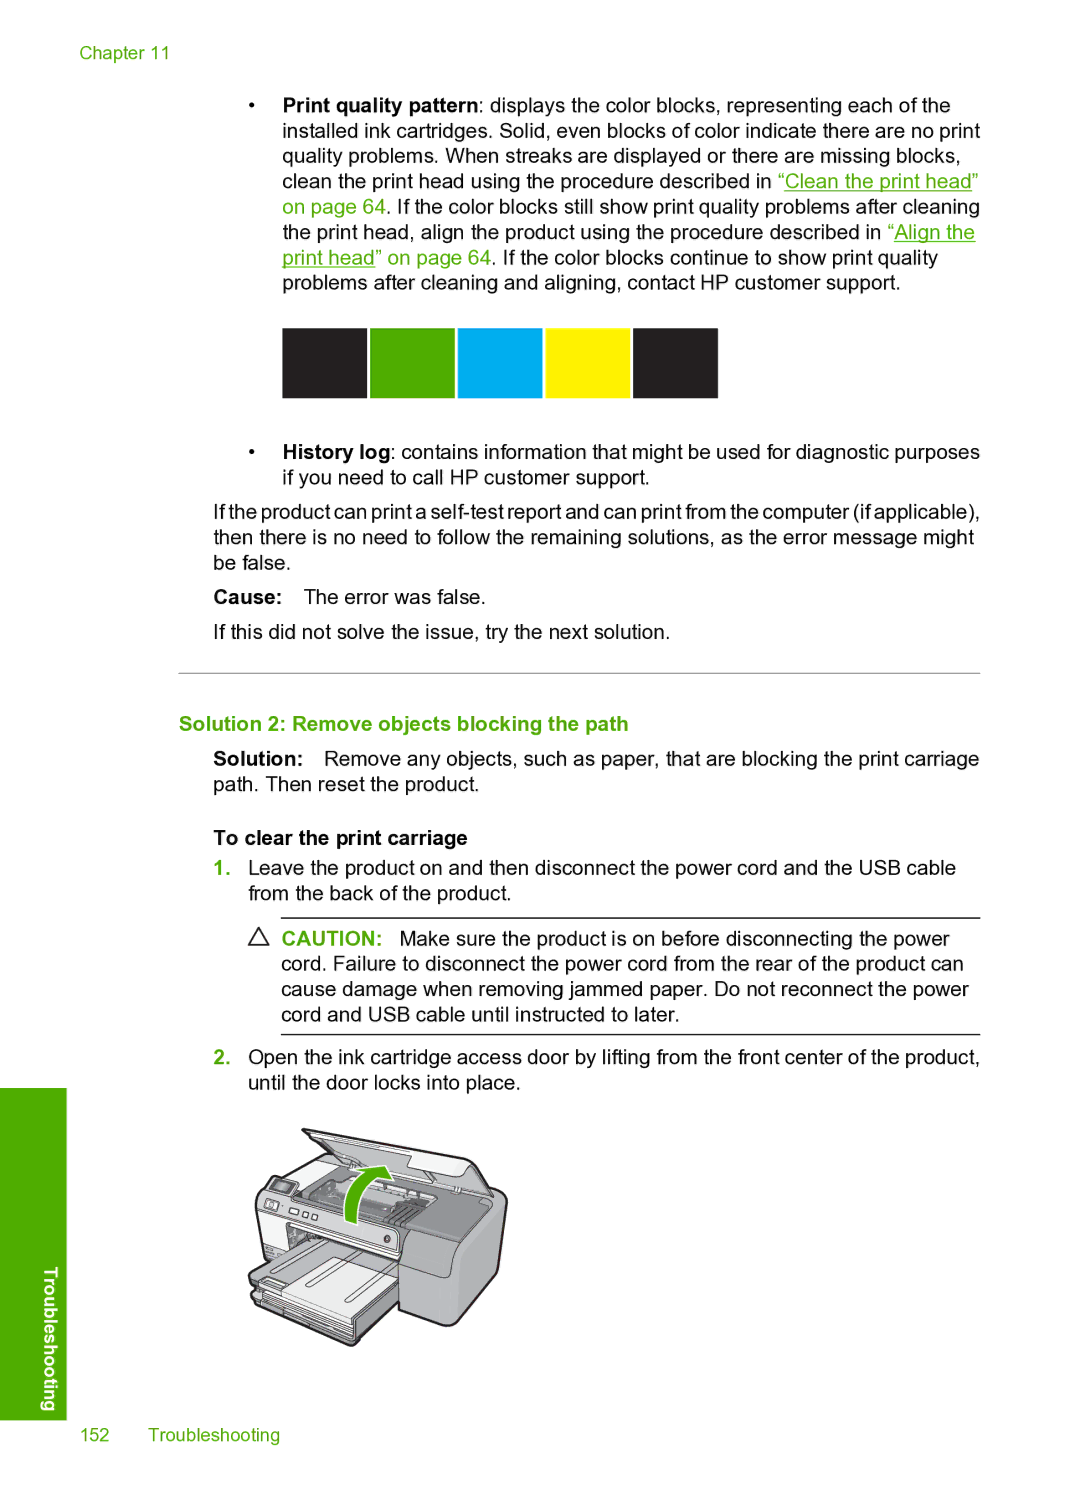
•Print quality pattern: displays the color blocks, representing each of the installed ink cartridges. Solid, even blocks of color indicate there are no print quality problems. When streaks are displayed or there are missing blocks, clean the print head using the procedure described in “Clean the print head” on page 64. If the color blocks still show print quality problems after cleaning the print head, align the product using the procedure described in “Align the print head” on page 64. If the color blocks continue to show print quality problems after cleaning and aligning, contact HP customer support.
•History log: contains information that might be used for diagnostic purposes if you need to call HP customer support.
If the product can print a
Cause: The error was false.
If this did not solve the issue, try the next solution.
Solution 2: Remove objects blocking the path
Solution: Remove any objects, such as paper, that are blocking the print carriage path. Then reset the product.
To clear the print carriage
1.Leave the product on and then disconnect the power cord and the USB cable from the back of the product.
![]() CAUTION: Make sure the product is on before disconnecting the power cord. Failure to disconnect the power cord from the rear of the product can cause damage when removing jammed paper. Do not reconnect the power cord and USB cable until instructed to later.
CAUTION: Make sure the product is on before disconnecting the power cord. Failure to disconnect the power cord from the rear of the product can cause damage when removing jammed paper. Do not reconnect the power cord and USB cable until instructed to later.
2.Open the ink cartridge access door by lifting from the front center of the product, until the door locks into place.
Troubleshooting
152 Troubleshooting