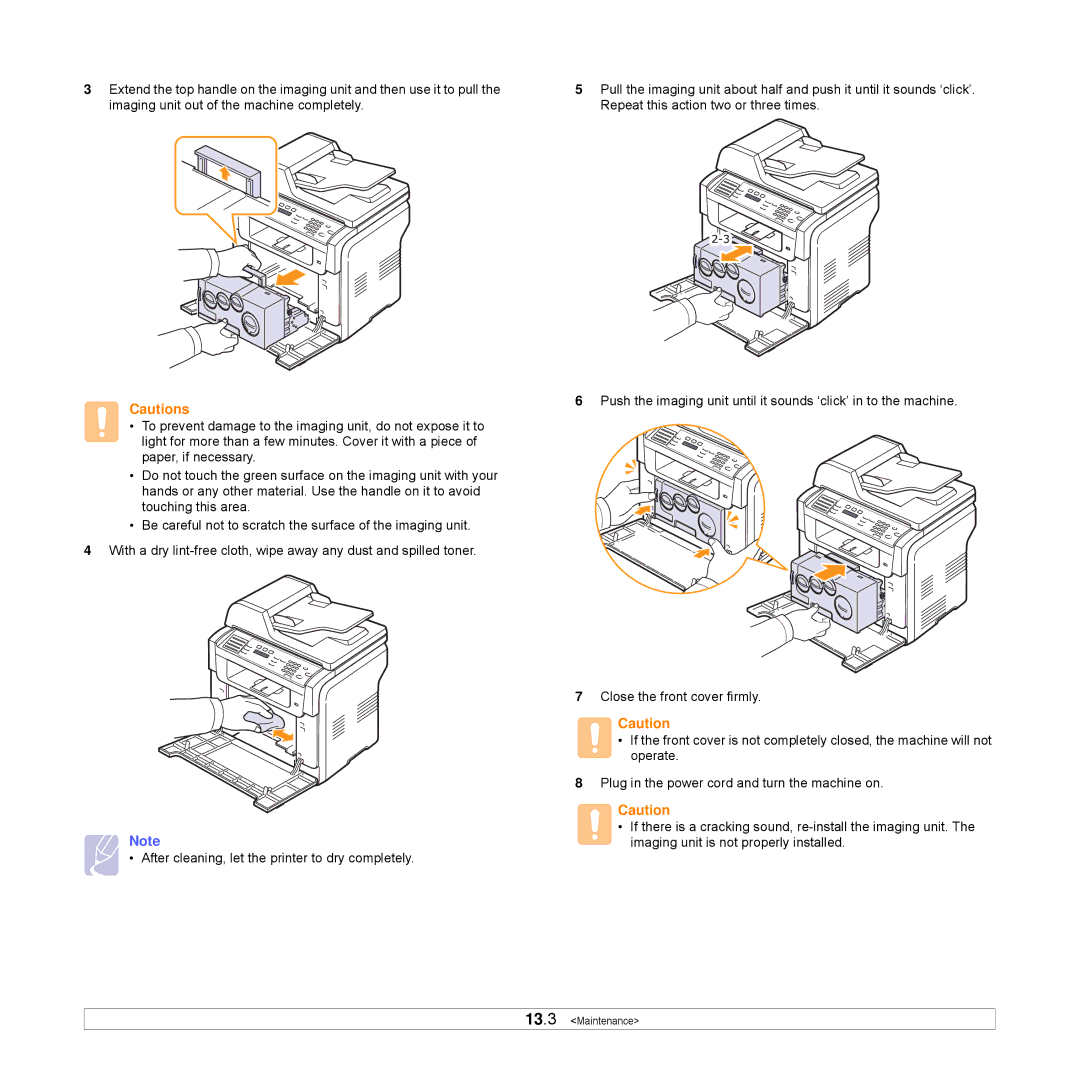
3Extend the top handle on the imaging unit and then use it to pull the imaging unit out of the machine completely.
Cautions
• To prevent damage to the imaging unit, do not expose it to light for more than a few minutes. Cover it with a piece of paper, if necessary.
•Do not touch the green surface on the imaging unit with your hands or any other material. Use the handle on it to avoid touching this area.
•Be careful not to scratch the surface of the imaging unit.
4With a dry
Note
• After cleaning, let the printer to dry completely.
5Pull the imaging unit about half and push it until it sounds ‘click’. Repeat this action two or three times.
6Push the imaging unit until it sounds ‘click’ in to the machine.
7Close the front cover firmly.
Caution
• If the front cover is not completely closed, the machine will not operate.
8Plug in the power cord and turn the machine on.
Caution
• If there is a cracking sound,