CHAPTER 4
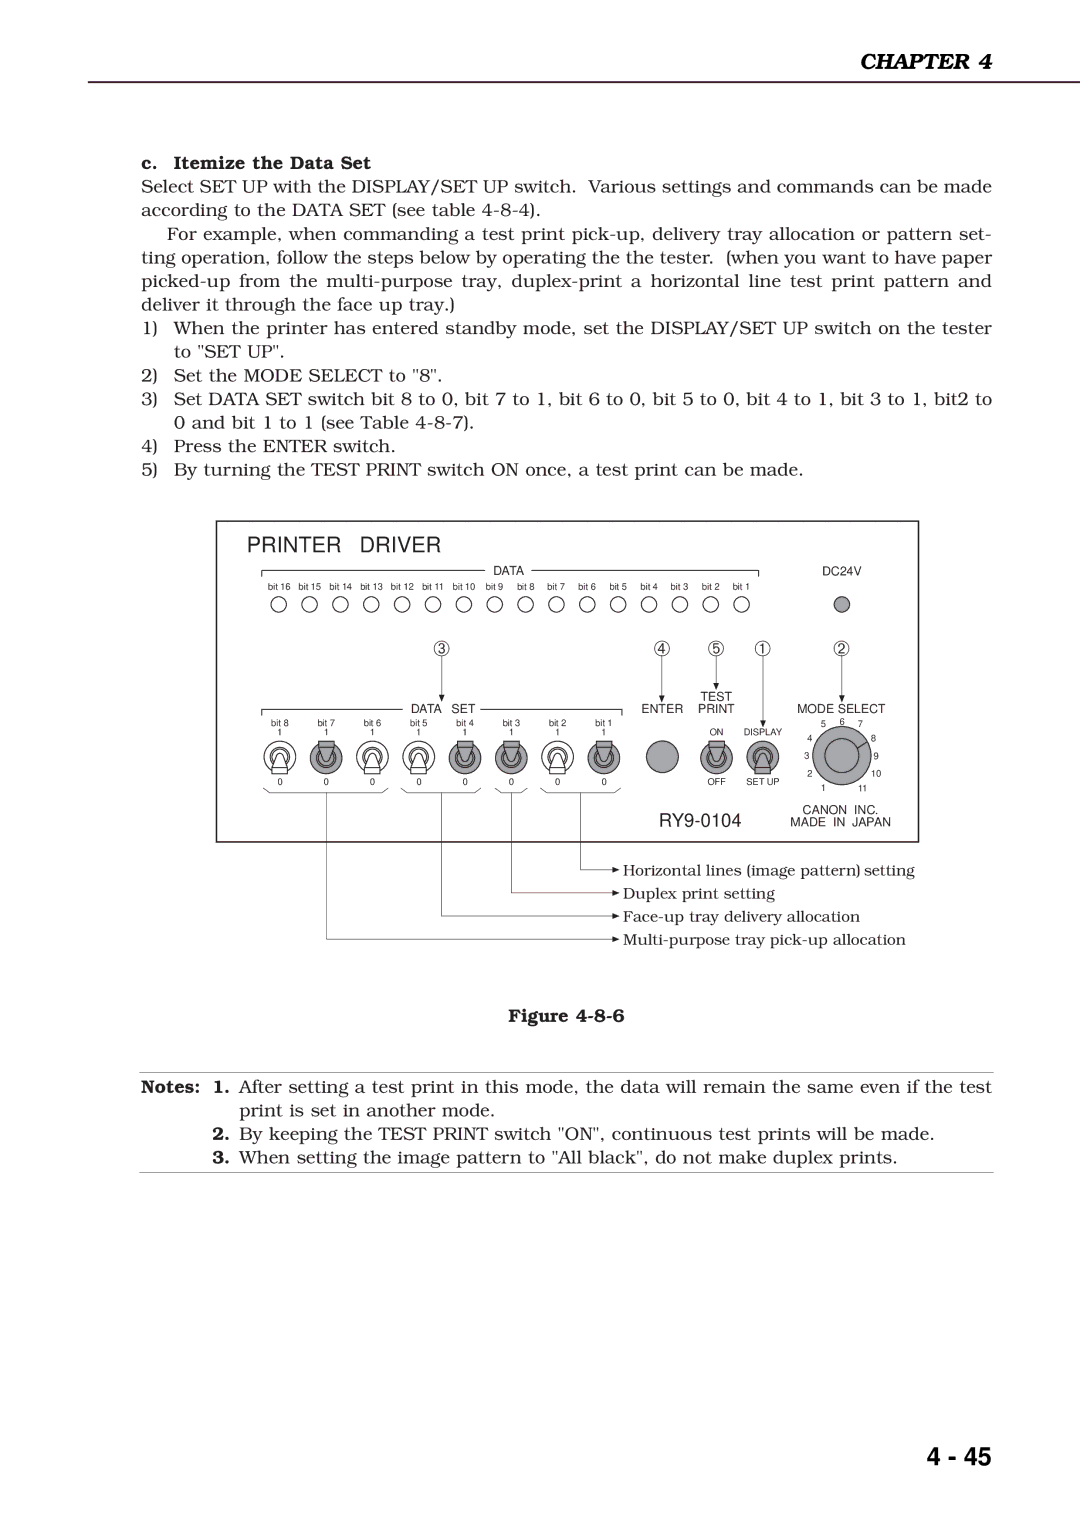
c. Itemize the Data Set
Select SET UP with the DISPLAY/SET UP switch. Various settings and commands can be made according to the DATA SET (see table
For example, when commanding a test print
1)When the printer has entered standby mode, set the DISPLAY/SET UP switch on the tester to "SET UP".
2)Set the MODE SELECT to "8".
3)Set DATA SET switch bit 8 to 0, bit 7 to 1, bit 6 to 0, bit 5 to 0, bit 4 to 1, bit 3 to 1, bit2 to 0 and bit 1 to 1 (see Table
4)Press the ENTER switch.
5)By turning the TEST PRINT switch ON once, a test print can be made.
PRINTER DRIVER
bit 16 bit 15 bit 14 bit 13 bit 12 bit 11 bit 10
|
|
| ➂ |
|
|
|
| DATA | SET |
bit 8 | bit 7 | bit 6 | bit 5 | bit 4 |
1 | 1 | 1 | 1 | 1 |
0 | 0 | 0 | 0 | 0 |
DATA |
|
|
| DC24V |
bit 9 bit 8 bit 7 bit 6 bit 5 bit 4 bit 3 | bit 2 bit 1 | |||
|
| ➃ | ➄ | ➀ |
| ➁ | |
|
|
| TEST |
|
|
| |
|
| ENTER |
| MODE SELECT | |||
bit 3 | bit 2 | bit 1 | ON | DISPLAY | 5 | 6 7 | |
1 | 1 | 1 | 4 | 8 | |||
|
|
|
|
| |||
|
|
|
|
| 3 | 9 | |
0 | 0 | 0 | OFF | SET UP | 2 | 10 | |
1 | 11 | ||||||
|
|
|
|
| |||
| CANON INC. |
MADE IN JAPAN |
![]() Horizontal lines (image pattern) setting
Horizontal lines (image pattern) setting
![]() Duplex print setting
Duplex print setting
![]()
![]()
Figure
Notes: 1. After setting a test print in this mode, the data will remain the same even if the test print is set in another mode.
2.By keeping the TEST PRINT switch "ON", continuous test prints will be made.
3.When setting the image pattern to "All black", do not make duplex prints.
4 - 45