A.4 Attach the external relay module
The external relay card provides 4 relays, each with one
1.Remove power and disconnect all cable connections to the module.
2.Place the external relay module on the DIN rail to the right of the base module and slide firmly against the base module (or other connected modules).
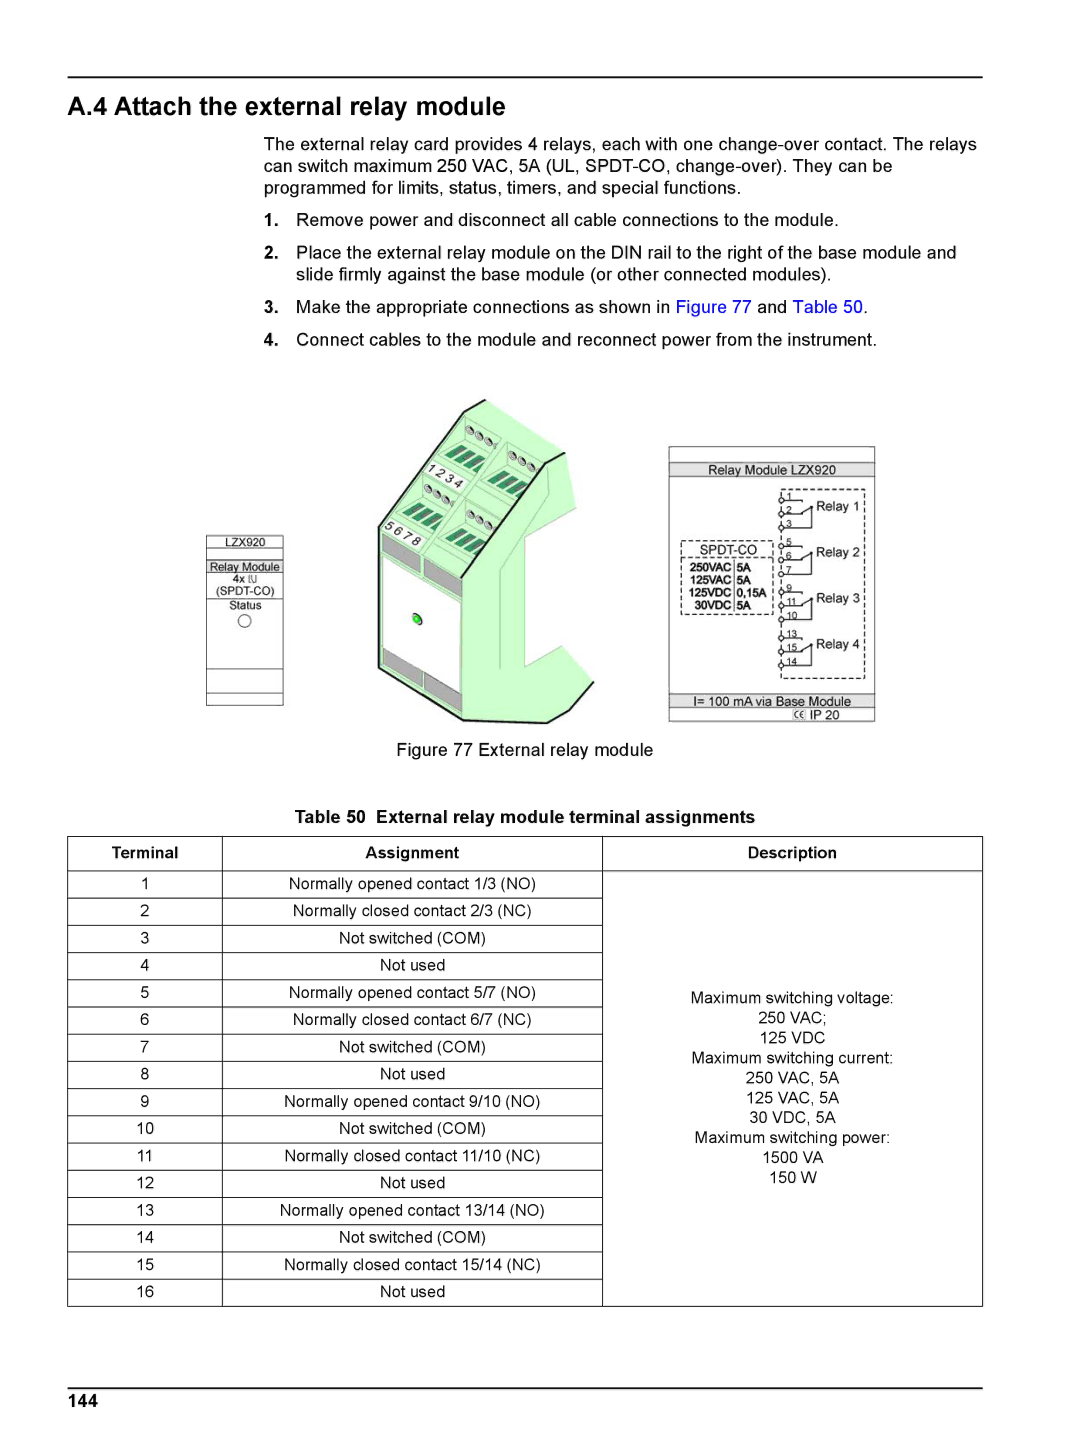
3.Make the appropriate connections as shown in Figure 77 and Table 50.
4.Connect cables to the module and reconnect power from the instrument.
Figure 77 External relay module
Table 50 External relay module terminal assignments
Terminal | Assignment | Description | |
|
|
| |
1 | Normally opened contact 1/3 (NO) |
| |
|
|
| |
2 | Normally closed contact 2/3 (NC) |
| |
|
|
| |
3 | Not switched (COM) |
| |
|
|
| |
4 | Not used |
| |
|
|
| |
5 | Normally opened contact 5/7 (NO) | Maximum switching voltage: | |
6 | Normally closed contact 6/7 (NC) | 250 VAC; | |
|
| 125 VDC | |
7 | Not switched (COM) | ||
Maximum switching current: | |||
|
| ||
8 | Not used | ||
250 VAC, 5A | |||
9 | Normally opened contact 9/10 (NO) | 125 VAC, 5A | |
|
| 30 VDC, 5A | |
10 | Not switched (COM) | ||
Maximum switching power: | |||
|
| ||
11 | Normally closed contact 11/10 (NC) | 1500 VA | |
|
| 150 W | |
12 | Not used | ||
| |||
|
|
| |
13 | Normally opened contact 13/14 (NO) |
| |
|
|
| |
14 | Not switched (COM) |
| |
|
|
| |
15 | Normally closed contact 15/14 (NC) |
| |
|
|
| |
16 | Not used |
| |
|
|
|
