![]() NOTE: Clean the area around the ink nozzles only if you continue to see streaks and smudges on your printed pages after you have already cleaned the print cartridges by using the software you installed with the HP
NOTE: Clean the area around the ink nozzles only if you continue to see streaks and smudges on your printed pages after you have already cleaned the print cartridges by using the software you installed with the HP
Make sure you have the following materials available:
•Dry foam rubber swabs,
![]() TIP: Coffee filters are
TIP: Coffee filters are
•Distilled, filtered, or bottled water (tap water might contain contaminants that can damage the print cartridges).
![]() CAUTION: Do not touch the
CAUTION: Do not touch the
To clean the area around the ink nozzles
1.Turn on the HP
The print carriage moves to the far right side of the HP
2.Wait until the print carriage is idle and silent, and then unplug the power cord from the back of the HP
3.Lightly press down on the print cartridge to release it, and then pull it toward you out of the slot.
![]() NOTE: Do not remove both print cartridges at the same time. Remove and clean each print cartridge one at a time. Do not leave a print cartridge outside the HP All-
NOTE: Do not remove both print cartridges at the same time. Remove and clean each print cartridge one at a time. Do not leave a print cartridge outside the HP All-
4.Place the print cartridge on a piece of paper with the ink nozzles facing up.
5.Lightly moisten a clean foam rubber swab with distilled water.
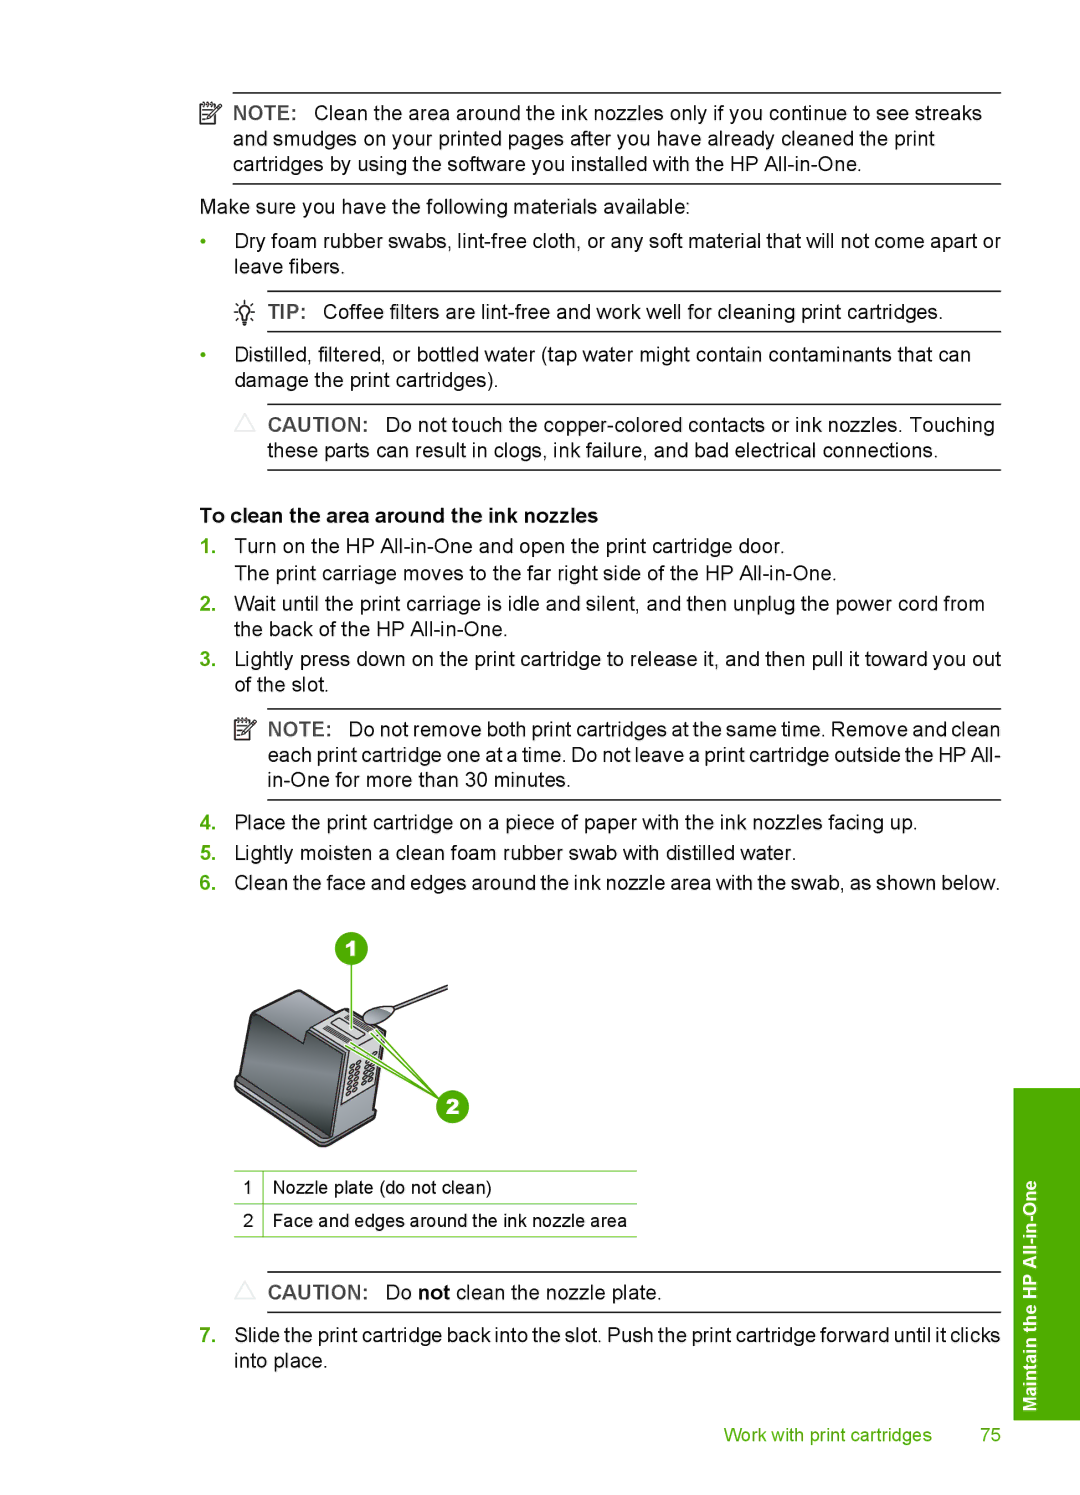
6.Clean the face and edges around the ink nozzle area with the swab, as shown below.
1Nozzle plate (do not clean)
2Face and edges around the ink nozzle area
![]() CAUTION: Do not clean the nozzle plate.
CAUTION: Do not clean the nozzle plate.
7.Slide the print cartridge back into the slot. Push the print cartridge forward until it clicks into place.
Work with print cartridges | 75 |