Juniper Networks manual Removing a Power Supply from an EX3200 or EX4200 Switch

Models: EX4200 EX3200

1 284
Download 284 pages 15.81 Kb
Page 199
Image 199

Chapter 13: Removing Switch Components

3.Disconnect power to the switch by performing one of the following:

AC power supply—If the AC power source outlet has a power switch, set it to the OFF (0) position. If the AC power source outlet does not have a power switch, gently pull out the male end of the power cord connected to the power source outlet.

DC power supply—Switch the circuit breaker on the panel board that services the DC circuit to the OFF position.

4.Remove the power source cable from the power supply faceplate:

AC power supply—Gently pull out the female end of the power cord connected to the power supply faceplate.

DC power supply—Remove the screws securing the ring lugs attached to the power source cables to the power supply using the

Phillips (+) screwdriver, number 2, and remove the power source cables from the power supply. Replace the screws on the terminals and tighten them.

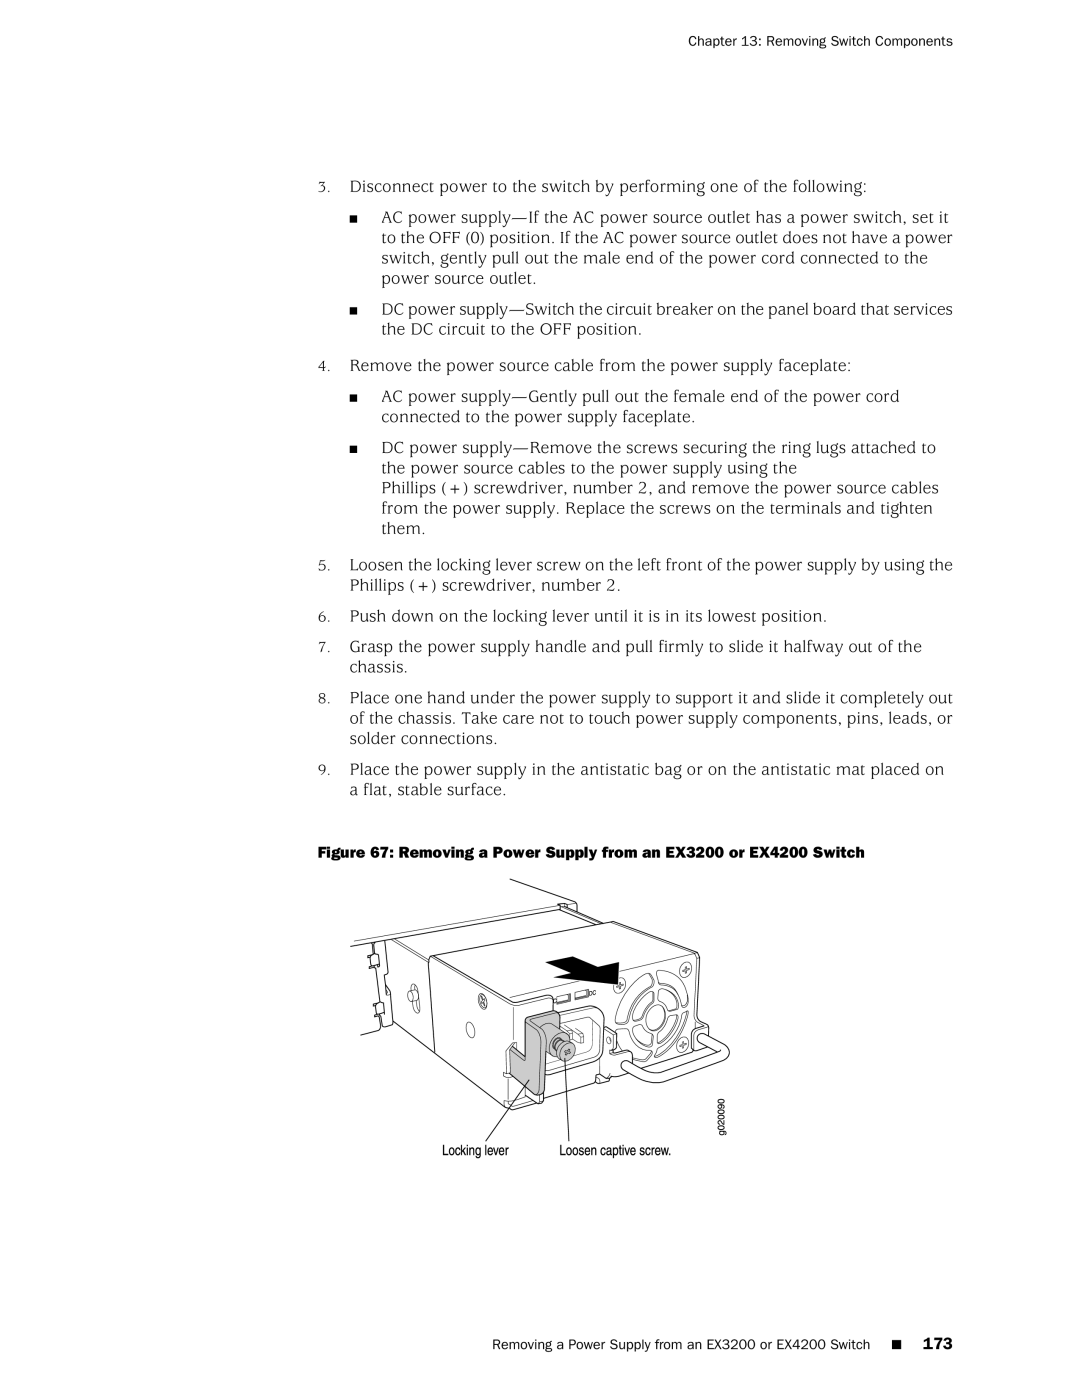
5.Loosen the locking lever screw on the left front of the power supply by using the Phillips (+) screwdriver, number 2.

6.Push down on the locking lever until it is in its lowest position.

7.Grasp the power supply handle and pull firmly to slide it halfway out of the chassis.

8.Place one hand under the power supply to support it and slide it completely out of the chassis. Take care not to touch power supply components, pins, leads, or solder connections.

9.Place the power supply in the antistatic bag or on the antistatic mat placed on a flat, stable surface.

Figure 67: Removing a Power Supply from an EX3200 or EX4200 Switch

Removing a Power Supply from an EX3200 or EX4200 Switch 173

Page 199
Image 199
Juniper Networks manual Removing a Power Supply from an EX3200 or EX4200 Switch