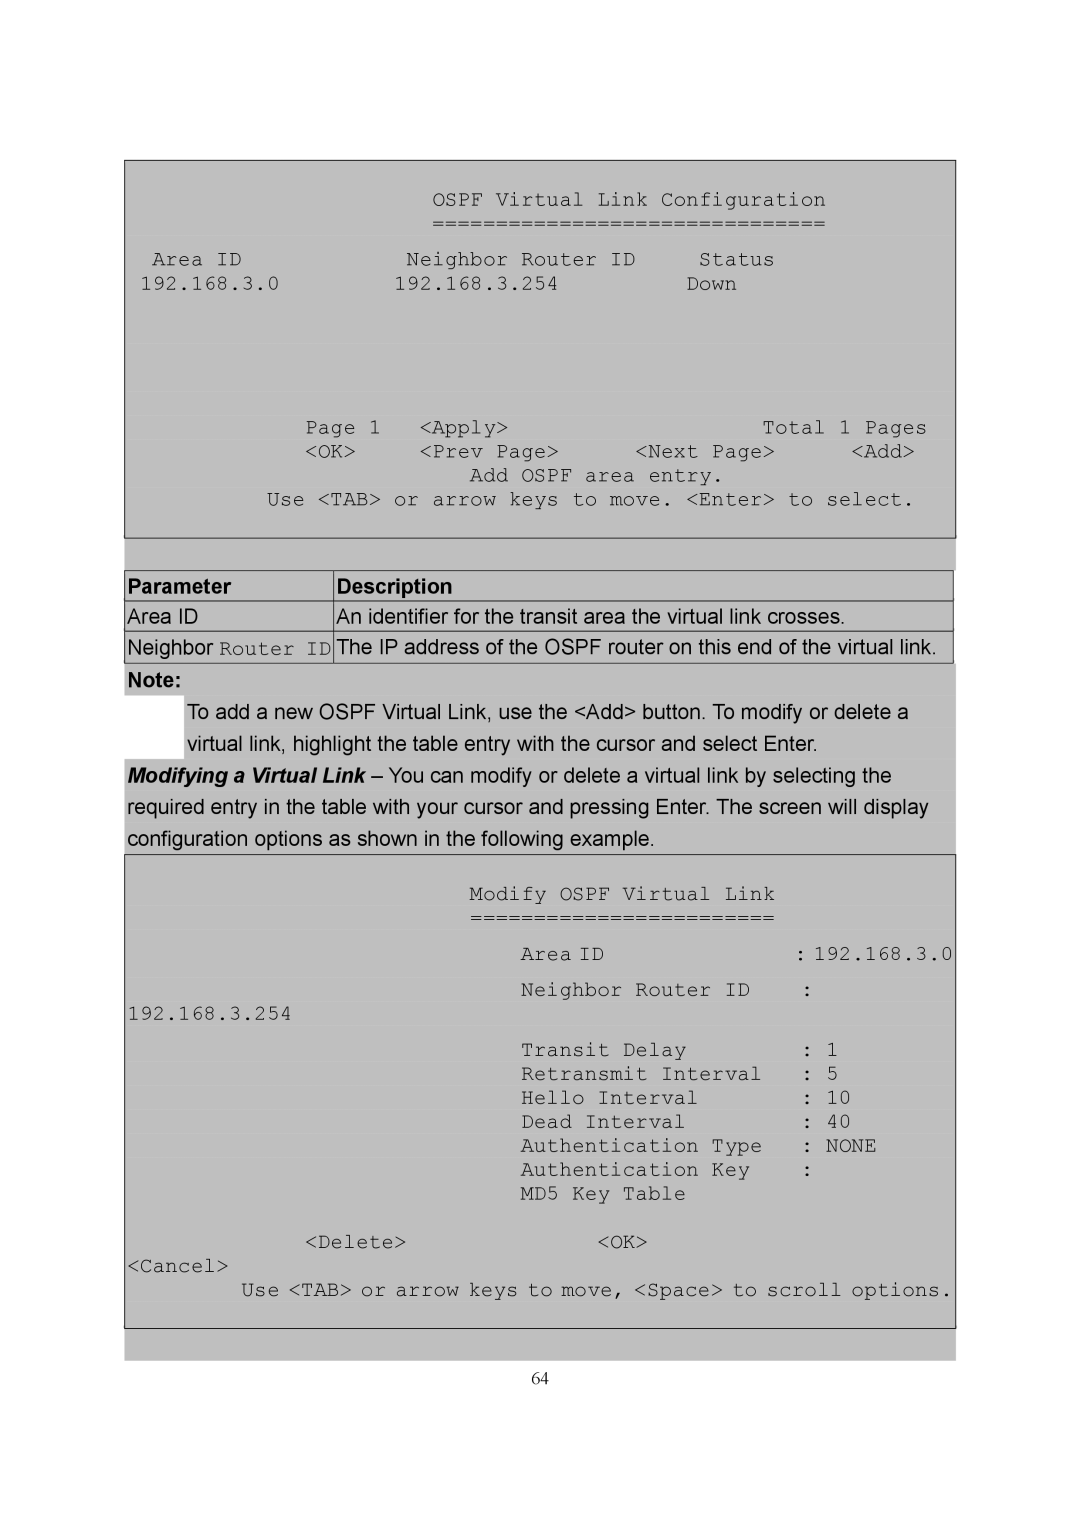
OSPF Virtual Link Configuration
===============================
Area ID | Neighbor Router ID | Status |
192.168.3.0 | 192.168.3.254 | Down |
| Page 1 | <Apply> | Total 1 Pages | |||
| <OK> | <Prev Page> | <Next Page> | <Add> | ||
|
|
| Add OSPF area entry. |
|
| |
| Use <TAB> or arrow keys to move. <Enter> to select. | |||||
|
|
|
|
|
| |
|
|
|
|
|
| |
Parameter |
| Description |
|
|
| |
Area ID |
| An identifier for the transit area the virtual link crosses. |
|
| ||
Neighbor Router ID | The IP address of the OSPF router on this end of the virtual link. |
| ||||
Note: |
|
|
|
|
|
|
To add a new OSPF Virtual Link, use the <Add> button. To modify or delete a virtual link, highlight the table entry with the cursor and select Enter.
Modifying a Virtual Link – You can modify or delete a virtual link by selecting the required entry in the table with your cursor and pressing Enter. The screen will display configuration options as shown in the following example.
Modify OSPF Virtual Link
========================
| Area ID | : 192.168.3.0 |
192.168.3.254 | Neighbor Router ID | : |
|
| |
| Transit Delay | : 1 |
| Retransmit Interval | : 5 |
| Hello Interval | : 10 |
| Dead Interval | : 40 |
| Authentication Type | : NONE |
| Authentication Key | : |
| MD5 Key Table |
|
<Delete> | <OK> |
|
<Cancel> |
|
|
Use <TAB> or arrow keys to move, <Space> to scroll options.
64