Setup Guide
Connecting the REO Appliance to the Network
Use the following instructions to connect your REO Appliance to your backup servers, SAN, or FC switch.
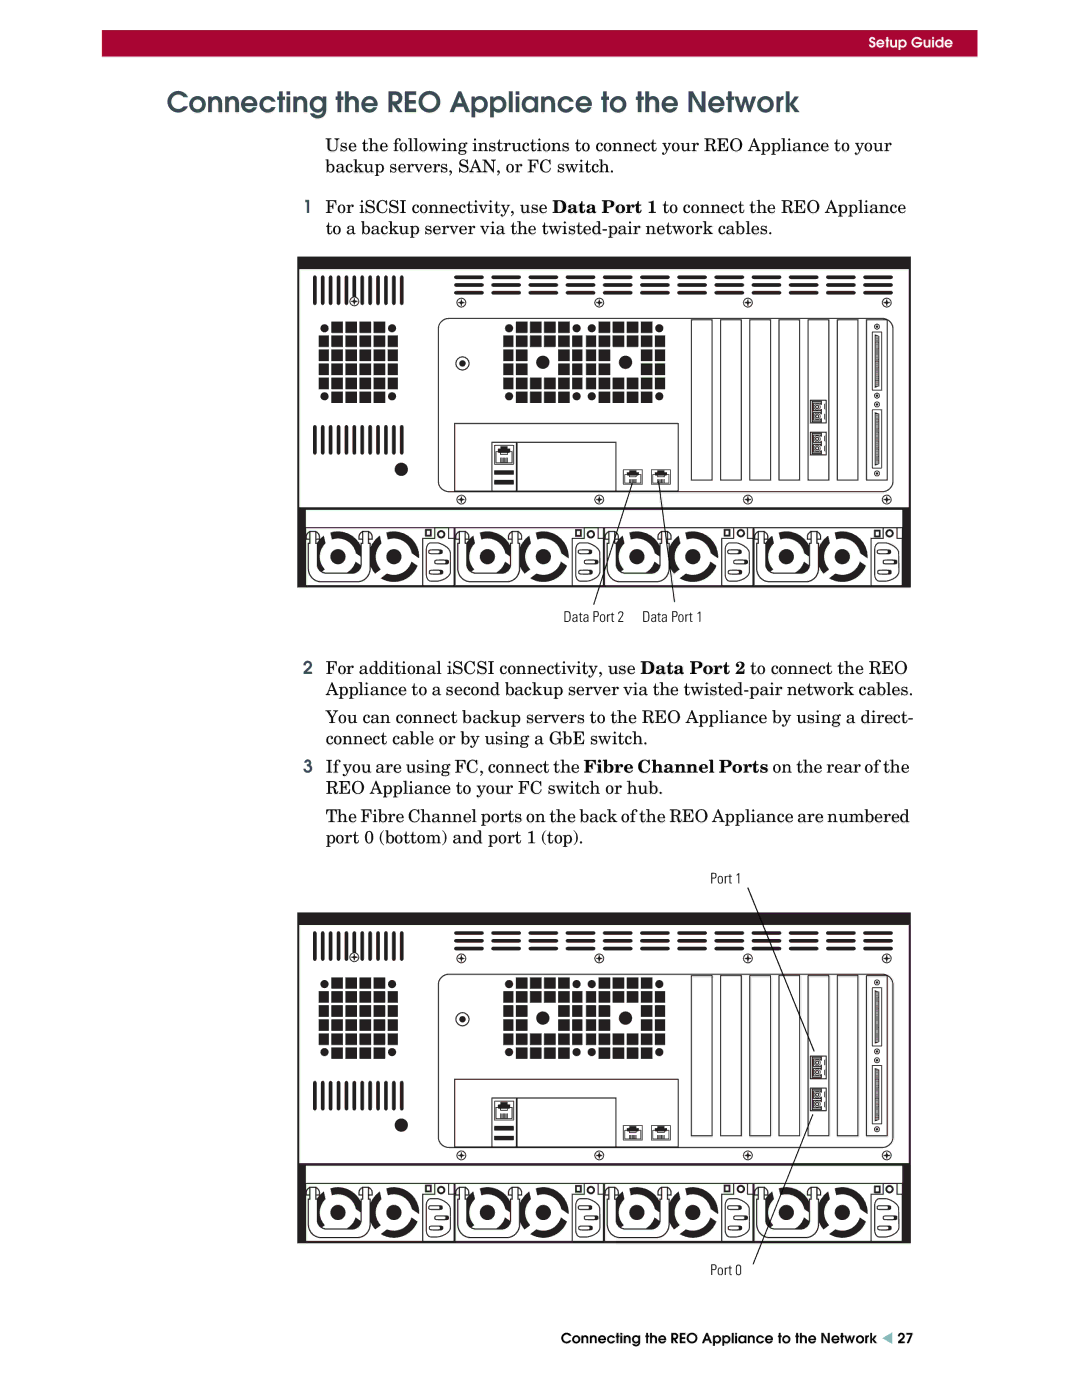
1For iSCSI connectivity, use Data Port 1 to connect the REO Appliance to a backup server via the
Data Port 2 Data Port 1
2For additional iSCSI connectivity, use Data Port 2 to connect the REO Appliance to a second backup server via the
You can connect backup servers to the REO Appliance by using a direct- connect cable or by using a GbE switch.
3If you are using FC, connect the Fibre Channel Ports on the rear of the REO Appliance to your FC switch or hub.
The Fibre Channel ports on the back of the REO Appliance are numbered port 0 (bottom) and port 1 (top).
Port 1
Port 0
Connecting the REO Appliance to the Network W 27
