Section 7: Replacement Procedures
DAUGHTER BOARD REPLACEMENT
1Switch off the printer and disconnect the power supply cord.
2Open/remove thetop, right, and left housing covers.
NOTE: Figure
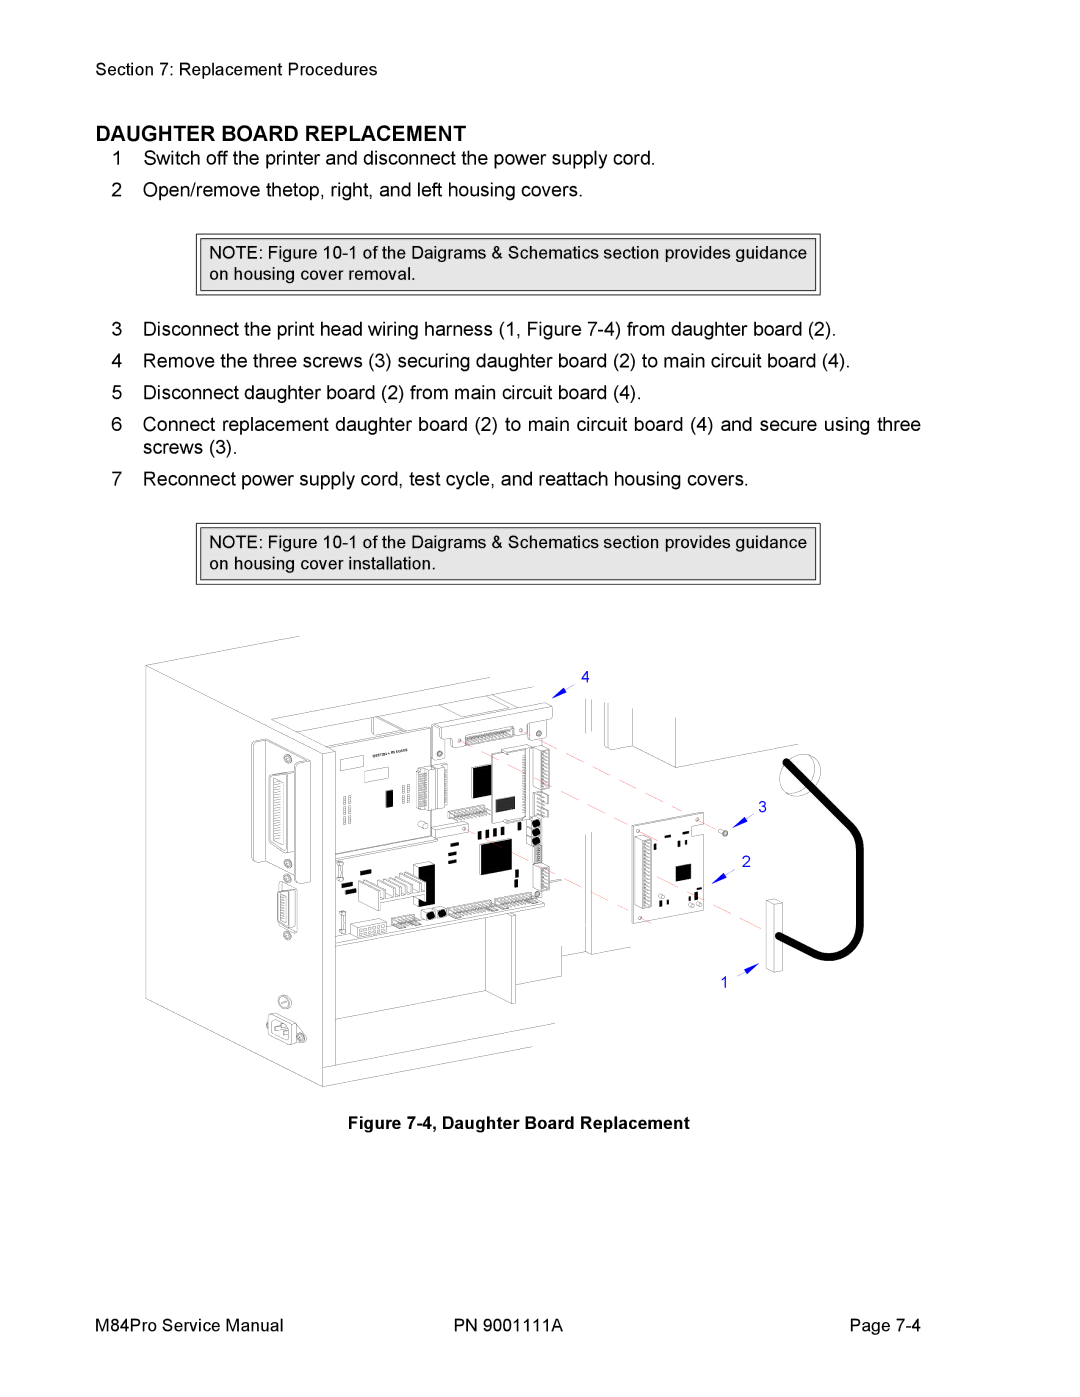
3Disconnect the print head wiring harness (1, Figure
4Remove the three screws (3) securing daughter board (2) to main circuit board (4).
5Disconnect daughter board (2) from main circuit board (4).
6Connect replacement daughter board (2) to main circuit board (4) and secure using three screws (3).
7Reconnect power supply cord, test cycle, and reattach housing covers.
NOTE: Figure
4
84 +RS | BOARD |
IEEE12 |
|
3
2
1
Figure 7-4, Daughter Board Replacement
M84Pro Service Manual | PN 9001111A | Page |