Section 7: Replacement Procedures
20
22
|
|
|
|
| ER |
|
|
|
| GHT | |
| E |
|
| DAU | D |
|
|
| BOAR | ||
RFAC |
|
|
|
| |
INTE | D |
|
|
|
|
BOAR |
|
|
|
| |
|
|
|
| ARD |
|
|
|
| TBO |
| |
|
| RCUI |
|
| |
| N CI |
|
|
| |
| MAI |
|
|
|
|
|
| D |
|
|
|
| ER BOAR |
|
|
| |
| POW |
|
|
|
|
15 | 21 | 19 |
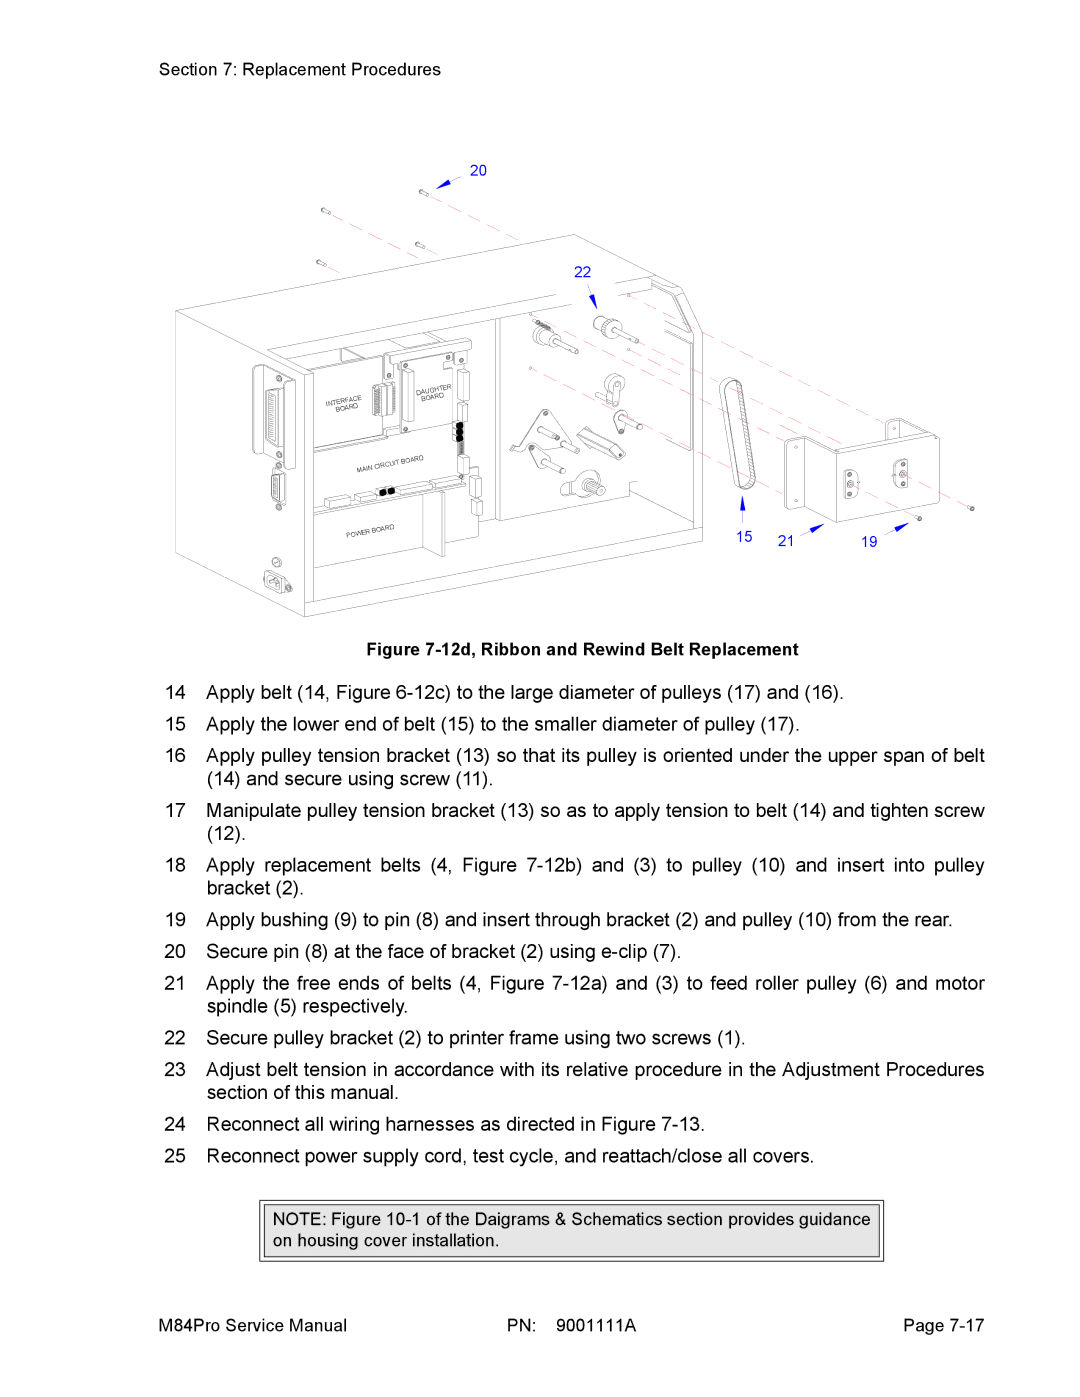
Figure 7-12d, Ribbon and Rewind Belt Replacement
14Apply belt (14, Figure
15Apply the lower end of belt (15) to the smaller diameter of pulley (17).
16Apply pulley tension bracket (13) so that its pulley is oriented under the upper span of belt
(14)and secure using screw (11).
17Manipulate pulley tension bracket (13) so as to apply tension to belt (14) and tighten screw
18Apply replacement belts (4, Figure
19Apply bushing (9) to pin (8) and insert through bracket (2) and pulley (10) from the rear.
20Secure pin (8) at the face of bracket (2) using
21Apply the free ends of belts (4, Figure
22Secure pulley bracket (2) to printer frame using two screws (1).
23Adjust belt tension in accordance with its relative procedure in the Adjustment Procedures section of this manual.
24Reconnect all wiring harnesses as directed in Figure
25Reconnect power supply cord, test cycle, and reattach/close all covers.
NOTE: Figure
M84Pro Service Manual | PN: 9001111A | Page |
