Section 7: Replacement Procedures
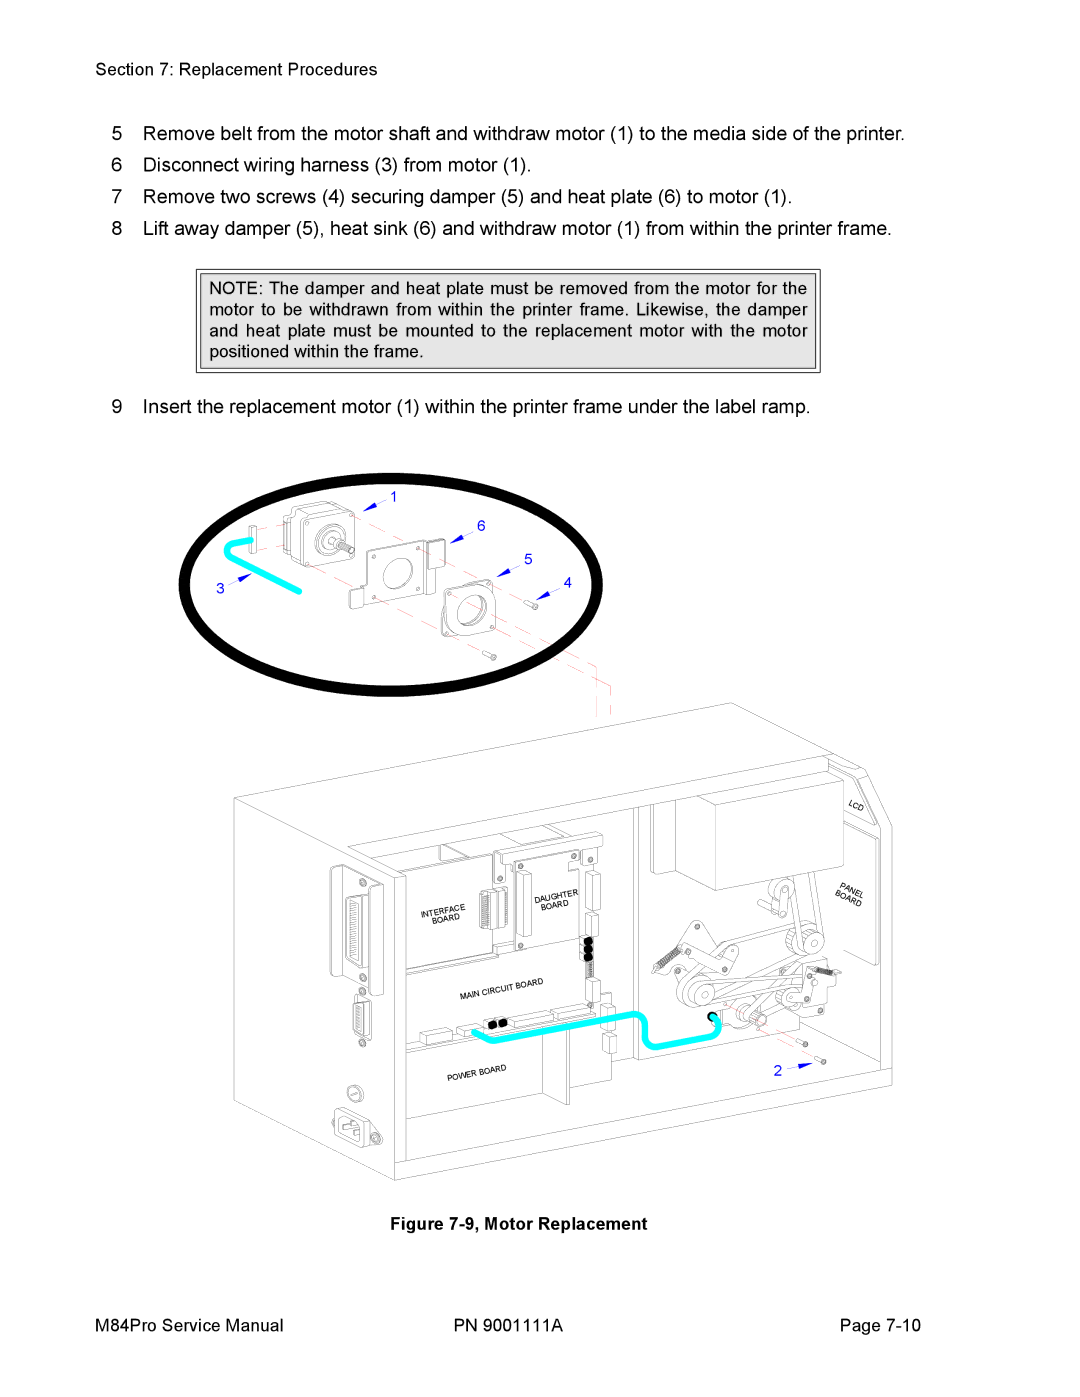
5Remove belt from the motor shaft and withdraw motor (1) to the media side of the printer.
6Disconnect wiring harness (3) from motor (1).
7Remove two screws (4) securing damper (5) and heat plate (6) to motor (1).
8Lift away damper (5), heat sink (6) and withdraw motor (1) from within the printer frame.
NOTE: The damper and heat plate must be removed from the motor for the motor to be withdrawn from within the printer frame. Likewise, the damper and heat plate must be mounted to the replacement motor with the motor positioned within the frame.
9 Insert the replacement motor (1) within the printer frame under the label ramp.
| 1 |
| 6 |
| 5 |
3 | 4 |
|
|
|
|
|
|
| R |
|
|
|
|
| HTE | |
|
|
| UG |
| ||
|
|
| DA |
| D |
|
|
| CE |
| AR |
| |
|
| BO |
|
| ||
RFA |
|
|
|
| ||
INTE |
| D |
|
|
|
|
| AR |
|
|
|
| |
BO |
|
|
|
|
| |
|
| L |
|
|
| C | |
|
|
| D |
| P |
|
|
B | AN | E | |
O |
| ||
|
| L | |
|
| AR | |
|
|
| D |
|
|
|
| D |
|
|
| AR | |
|
| ITBO |
| |
| CU |
|
| |
IN CIR |
|
|
| |
MA |
|
|
|
|
|
|
| RD |
|
| OA | |
| R B |
| |
WE |
|
| |
PO |
|
|
|
2
Figure 7-9, Motor Replacement
M84Pro Service Manual | PN 9001111A | Page |
