Section 2: Installation and Setup
Figure 2.15. Connecting RS422
Ethernet Communications
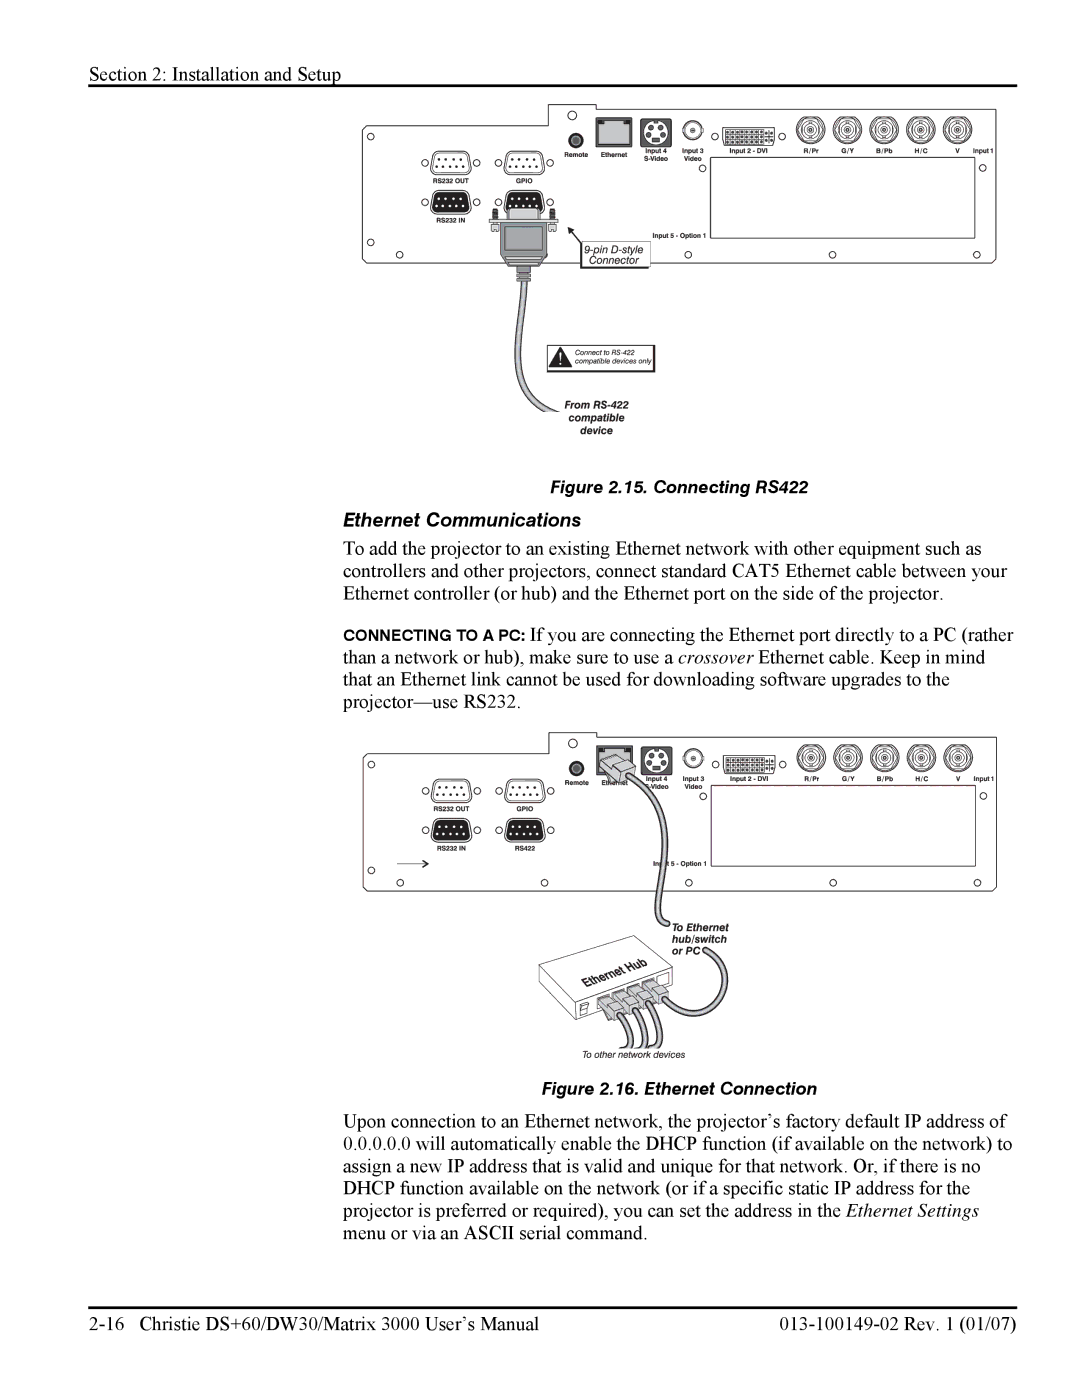
To add the projector to an existing Ethernet network with other equipment such as controllers and other projectors, connect standard CAT5 Ethernet cable between your Ethernet controller (or hub) and the Ethernet port on the side of the projector.
CONNECTING TO A PC: If you are connecting the Ethernet port directly to a PC (rather than a network or hub), make sure to use a crossover Ethernet cable. Keep in mind that an Ethernet link cannot be used for downloading software upgrades to the
Figure 2.16. Ethernet Connection
Upon connection to an Ethernet network, the projector’s factory default IP address of
0.0.0.0.0will automatically enable the DHCP function (if available on the network) to assign a new IP address that is valid and unique for that network. Or, if there is no DHCP function available on the network (or if a specific static IP address for the projector is preferred or required), you can set the address in the Ethernet Settings menu or via an ASCII serial command.