Section 4: Maintenance
4.5Replacing the Projection Lens
Use the following instructions when replacing a projection lens:
NOTE FOR FIRST TIME USE: The projection lens is shipped separately from the projector. Before you install a lens it is important to remove the lens plug from the lens opening in the projector and the protective end cap from the lens.
1.Power down the projector and wait five minutes to allow the lamps to cool before continuing with Step 2.
2.Place the lens cap on the projection lens to protect it from being damaged during the installation or removal process.
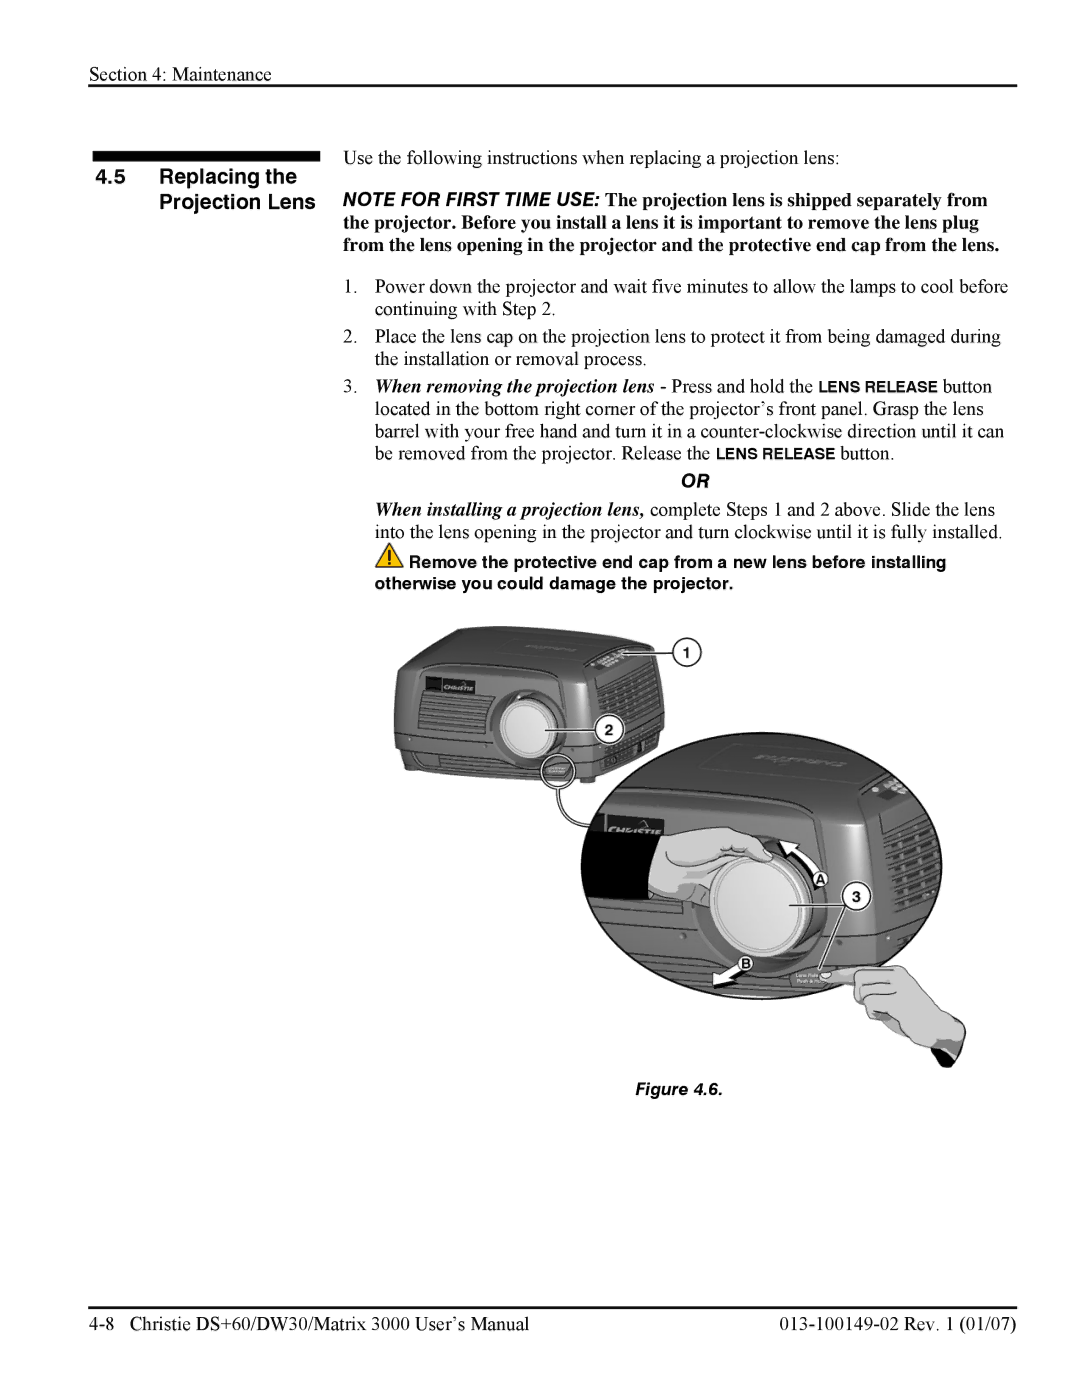
3.When removing the projection lens - Press and hold the LENS RELEASE button located in the bottom right corner of the projector’s front panel. Grasp the lens barrel with your free hand and turn it in a
OR
When installing a projection lens, complete Steps 1 and 2 above. Slide the lens into the lens opening in the projector and turn clockwise until it is fully installed.
![]() Remove the protective end cap from a new lens before installing otherwise you could damage the projector.
Remove the protective end cap from a new lens before installing otherwise you could damage the projector.
Figure 4.6.