Section 3: Operation
Menu Preferences — SUBMENU
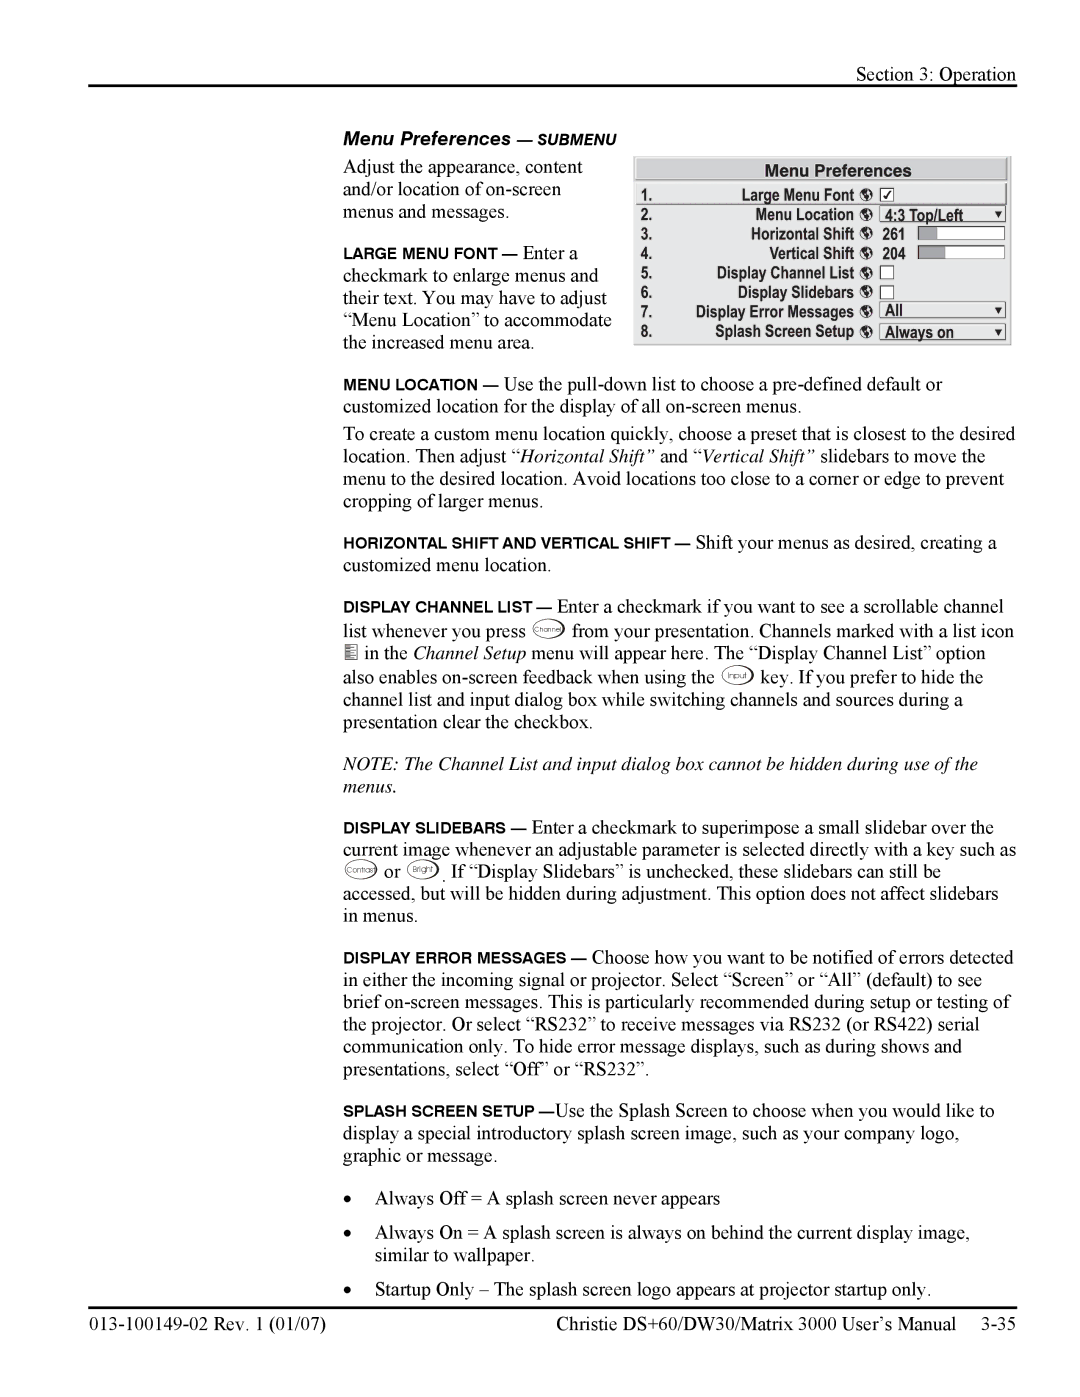
Adjust the appearance, content and/or location of
LARGE MENU FONT — Enter a checkmark to enlarge menus and their text. You may have to adjust “Menu Location” to accommodate the increased menu area.
MENU LOCATION — Use the
To create a custom menu location quickly, choose a preset that is closest to the desired location. Then adjust “Horizontal Shift” and “Vertical Shift” slidebars to move the menu to the desired location. Avoid locations too close to a corner or edge to prevent cropping of larger menus.
HORIZONTAL SHIFT AND VERTICAL SHIFT — Shift your menus as desired, creating a customized menu location.
DISPLAY CHANNEL LIST — Enter a checkmark if you want to see a scrollable channel list whenever you press Channel from your presentation. Channels marked with a list icon ![]()
![]()
![]() in the Channel Setup menu will appear here. The “Display Channel List” option also enables
in the Channel Setup menu will appear here. The “Display Channel List” option also enables
NOTE: The Channel List and input dialog box cannot be hidden during use of the menus.
DISPLAY SLIDEBARS — Enter a checkmark to superimpose a small slidebar over the current image whenever an adjustable parameter is selected directly with a key such as Contrast or Bright . If “Display Slidebars” is unchecked, these slidebars can still be accessed, but will be hidden during adjustment. This option does not affect slidebars in menus.
DISPLAY ERROR MESSAGES — Choose how you want to be notified of errors detected in either the incoming signal or projector. Select “Screen” or “All” (default) to see brief
SPLASH SCREEN SETUP
•Always Off = A splash screen never appears
•Always On = A splash screen is always on behind the current display image, similar to wallpaper.
•Startup Only – The splash screen logo appears at projector startup only.
Christie DS+60/DW30/Matrix 3000 User’s Manual |
