Section 3: Operation
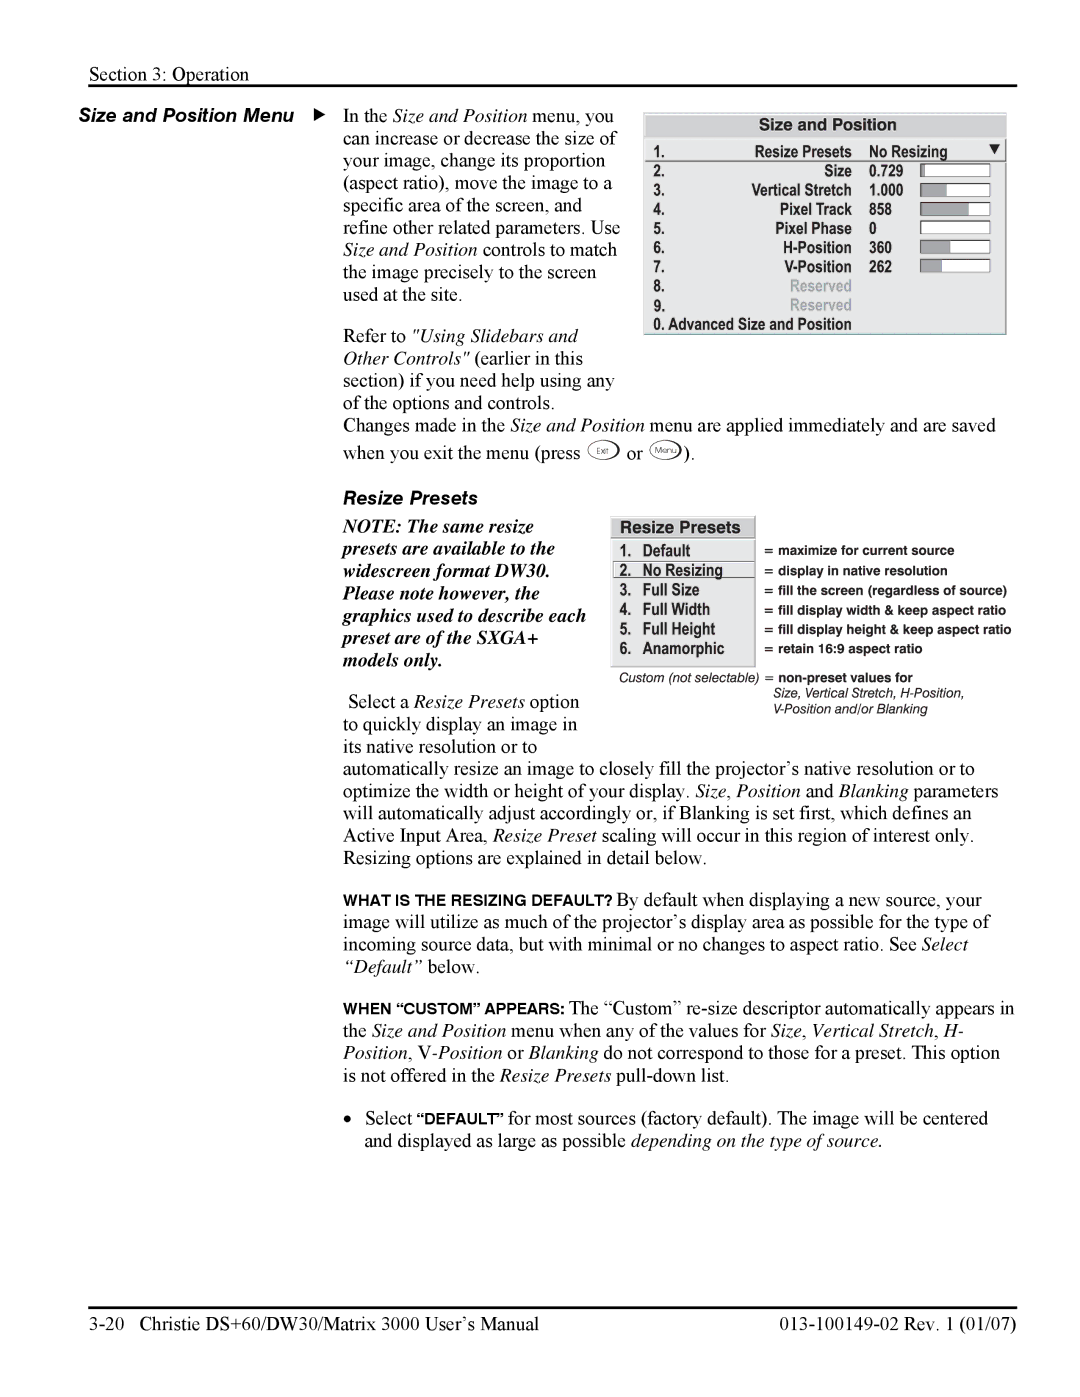
Size and Position Menu f In the Size and Position menu, you can increase or decrease the size of your image, change its proportion (aspect ratio), move the image to a specific area of the screen, and refine other related parameters. Use Size and Position controls to match the image precisely to the screen used at the site.
Refer to "Using Slidebars and
Other Controls" (earlier in this
section) if you need help using any of the options and controls.
Changes made in the Size and Position menu are applied immediately and are saved when you exit the menu (press Exit or Menu ).
Resize Presets
NOTE: The same resize presets are available to the widescreen format DW30. Please note however, the graphics used to describe each preset are of the SXGA+ models only.
Select a Resize Presets option to quickly display an image in
its native resolution or to
automatically resize an image to closely fill the projector’s native resolution or to optimize the width or height of your display. Size, Position and Blanking parameters will automatically adjust accordingly or, if Blanking is set first, which defines an Active Input Area, Resize Preset scaling will occur in this region of interest only. Resizing options are explained in detail below.
WHAT IS THE RESIZING DEFAULT? By default when displaying a new source, your image will utilize as much of the projector’s display area as possible for the type of incoming source data, but with minimal or no changes to aspect ratio. See Select “Default” below.
WHEN “CUSTOM” APPEARS: The “Custom”
•Select “DEFAULT” for most sources (factory default). The image will be centered and displayed as large as possible depending on the type of source.