Section 4: Maintenance
To replace a lamp:
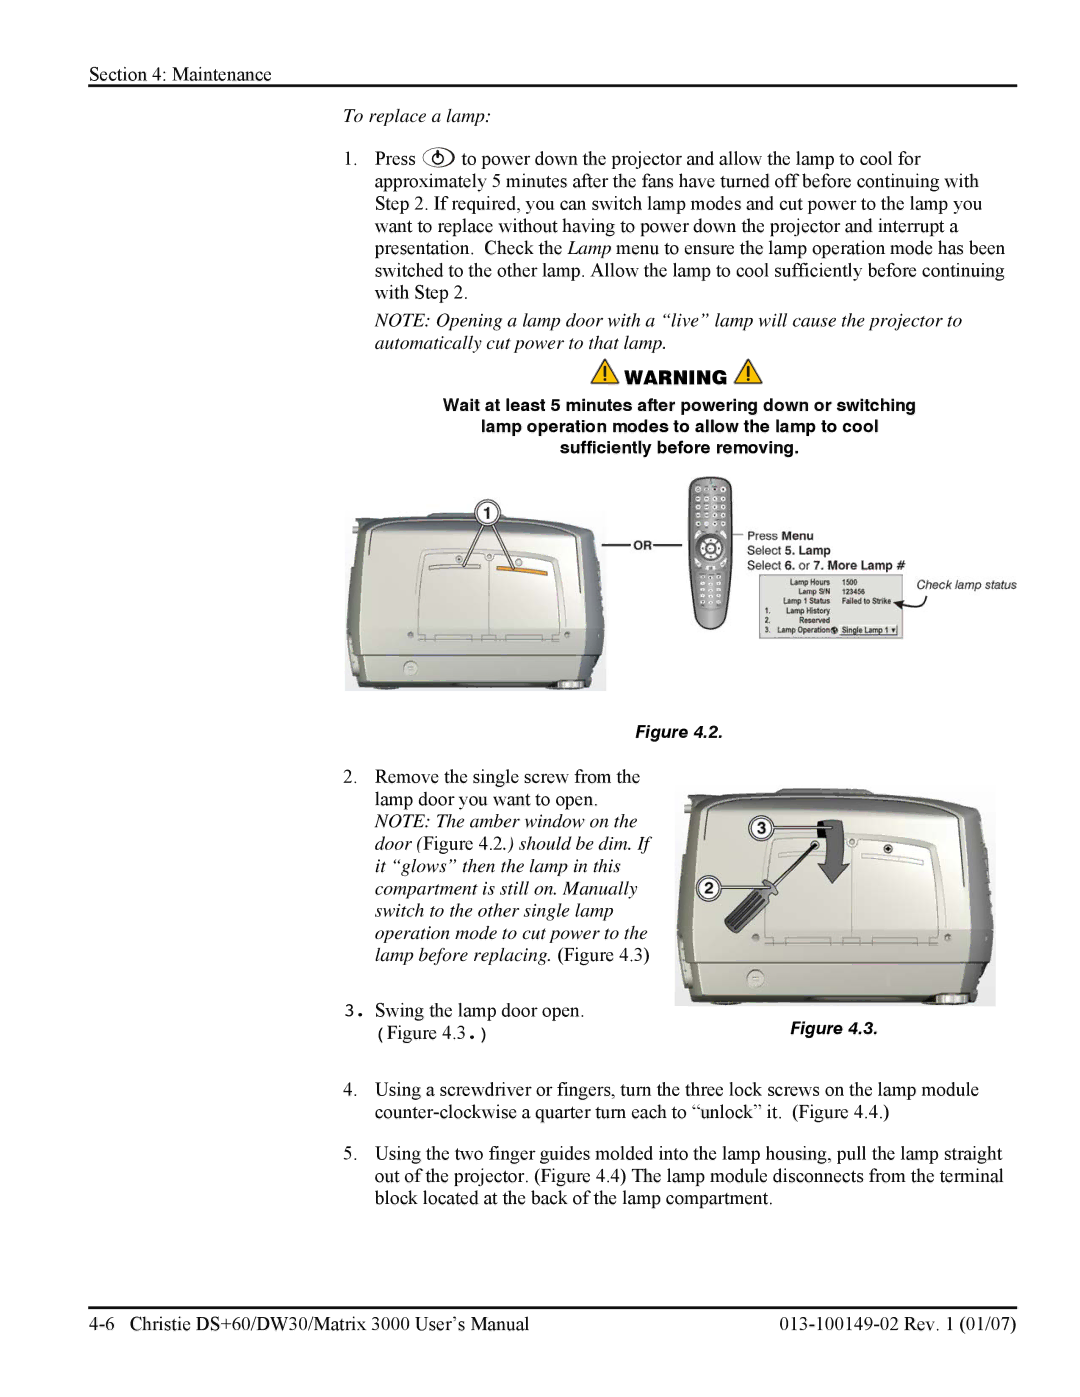
1.Press ![]() to power down the projector and allow the lamp to cool for approximately 5 minutes after the fans have turned off before continuing with Step 2. If required, you can switch lamp modes and cut power to the lamp you want to replace without having to power down the projector and interrupt a presentation. Check the Lamp menu to ensure the lamp operation mode has been switched to the other lamp. Allow the lamp to cool sufficiently before continuing with Step 2.
to power down the projector and allow the lamp to cool for approximately 5 minutes after the fans have turned off before continuing with Step 2. If required, you can switch lamp modes and cut power to the lamp you want to replace without having to power down the projector and interrupt a presentation. Check the Lamp menu to ensure the lamp operation mode has been switched to the other lamp. Allow the lamp to cool sufficiently before continuing with Step 2.
NOTE: Opening a lamp door with a “live” lamp will cause the projector to automatically cut power to that lamp.
![]() WARNING
WARNING ![]()
Wait at least 5 minutes after powering down or switching
lamp operation modes to allow the lamp to cool
sufficiently before removing.
Figure 4.2.
2.Remove the single screw from the lamp door you want to open. NOTE: The amber window on the door (Figure 4.2.) should be dim. If it “glows” then the lamp in this compartment is still on. Manually switch to the other single lamp operation mode to cut power to the lamp before replacing. (Figure 4.3)
3.Swing the lamp door open.
(Figure 4.3.) | Figure 4.3. |
4.Using a screwdriver or fingers, turn the three lock screws on the lamp module
5.Using the two finger guides molded into the lamp housing, pull the lamp straight out of the projector. (Figure 4.4) The lamp module disconnects from the terminal block located at the back of the lamp compartment.