Section 3: Operation
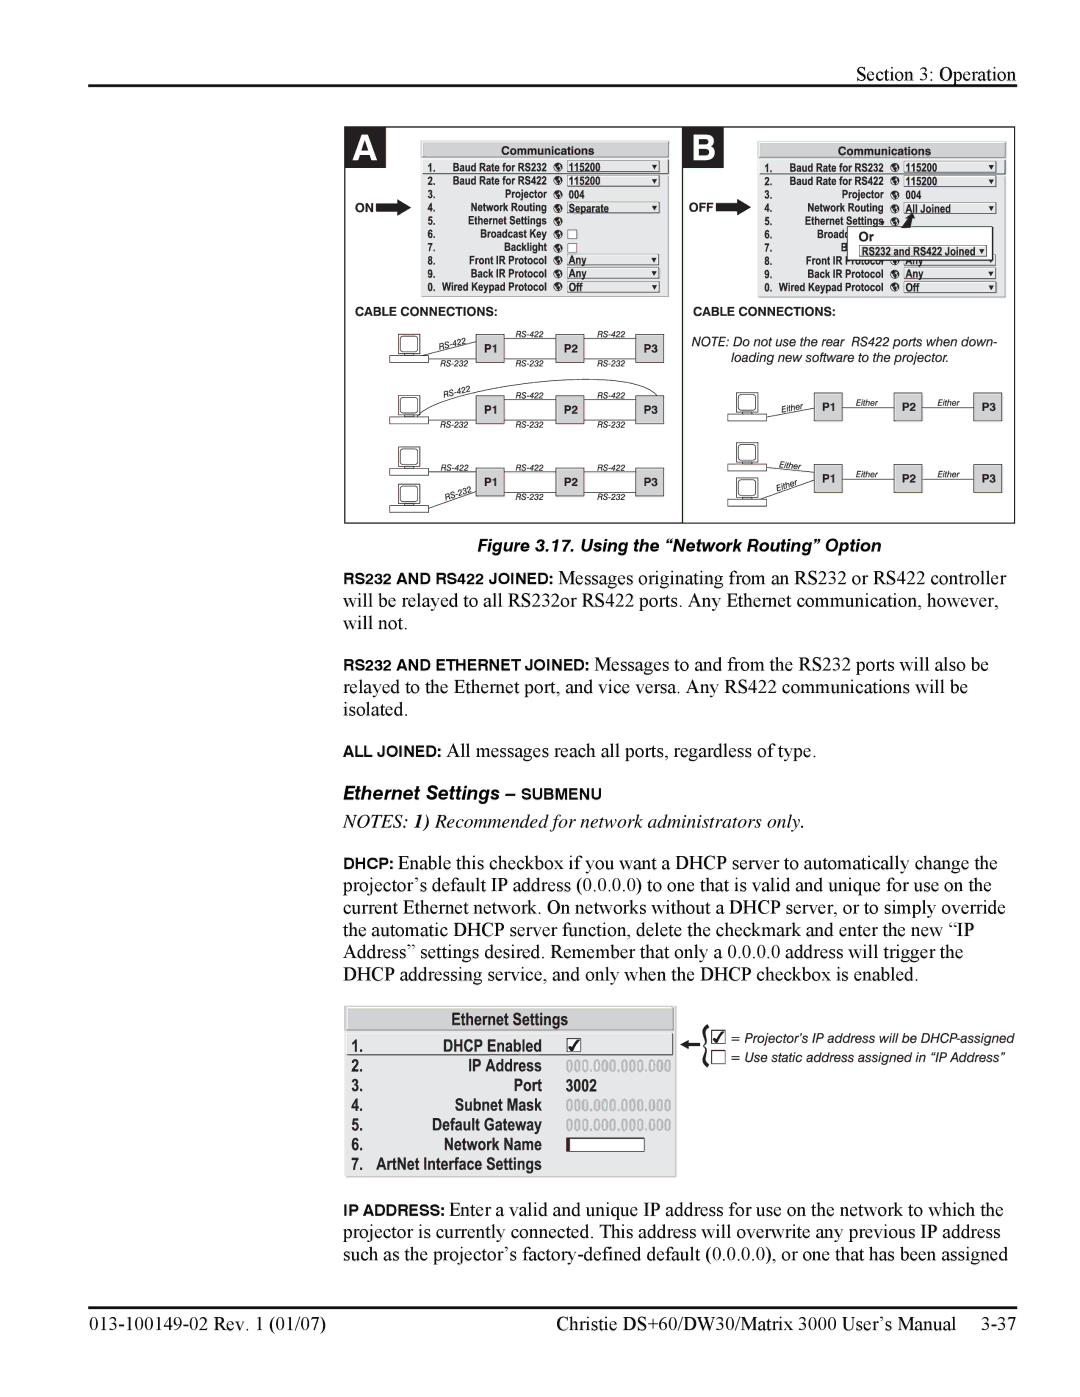
Figure 3.17. Using the “Network Routing” Option
RS232 AND RS422 JOINED: Messages originating from an RS232 or RS422 controller will be relayed to all RS232or RS422 ports. Any Ethernet communication, however, will not.
RS232 AND ETHERNET JOINED: Messages to and from the RS232 ports will also be relayed to the Ethernet port, and vice versa. Any RS422 communications will be isolated.
ALL JOINED: All messages reach all ports, regardless of type.
Ethernet Settings – SUBMENU
NOTES: 1) Recommended for network administrators only.
DHCP: Enable this checkbox if you want a DHCP server to automatically change the projector’s default IP address (0.0.0.0) to one that is valid and unique for use on the current Ethernet network. On networks without a DHCP server, or to simply override the automatic DHCP server function, delete the checkmark and enter the new “IP Address” settings desired. Remember that only a 0.0.0.0 address will trigger the DHCP addressing service, and only when the DHCP checkbox is enabled.
IP ADDRESS: Enter a valid and unique IP address for use on the network to which the projector is currently connected. This address will overwrite any previous IP address such as the projector’s
Christie DS+60/DW30/Matrix 3000 User’s Manual |