Section 3: Operation
3.11Remote Control of the Projector
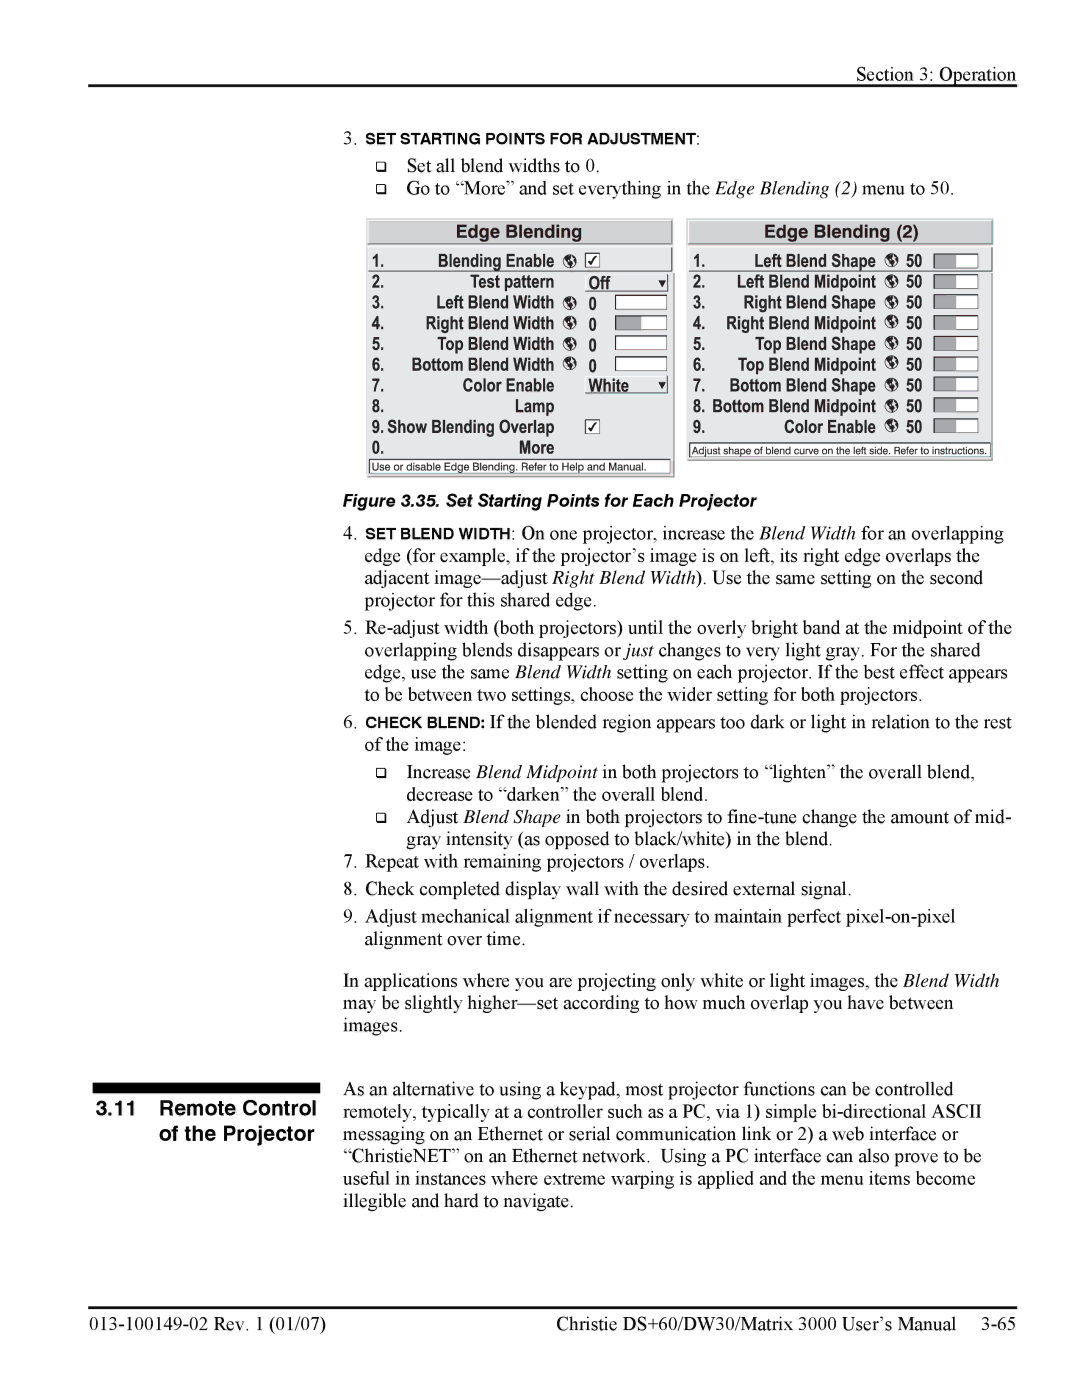
3.SET STARTING POINTS FOR ADJUSTMENT:
Set all blend widths to 0.
Go to “More” and set everything in the Edge Blending (2) menu to 50.
Figure 3.35. Set Starting Points for Each Projector
4.SET BLEND WIDTH: On one projector, increase the Blend Width for an overlapping edge (for example, if the projector’s image is on left, its right edge overlaps the adjacent
5.
6.CHECK BLEND: If the blended region appears too dark or light in relation to the rest of the image:
Increase Blend Midpoint in both projectors to “lighten” the overall blend, decrease to “darken” the overall blend.
Adjust Blend Shape in both projectors to
7.Repeat with remaining projectors / overlaps.
8.Check completed display wall with the desired external signal.
9.Adjust mechanical alignment if necessary to maintain perfect
In applications where you are projecting only white or light images, the Blend Width may be slightly
As an alternative to using a keypad, most projector functions can be controlled remotely, typically at a controller such as a PC, via 1) simple
Christie DS+60/DW30/Matrix 3000 User’s Manual |
